
This guide outlines the process for configuring your own business email domain within Aqilla. By default, Aqilla sends emails from a generic address (e.g.noreply.InstanceName@outbound.aqilla.net).
By following these steps, you can mask outgoing emails so they appear to come directly from your company (e.g. accounts@yourbusiness.com).
Important Information
-
Cost: Your initial domain email setup is free of charge. Subsequent changes to the email address will incur a service charge of 1 hour.
-
Security: Once the process is complete, the email field is locked to prevent unauthorised changes.
-
Verification: To prevent spoofing, Amazon Web Services (AWS), our infrastructure provider, must verify that you own the email address before Aqilla can send on your behalf.
Step-by-Step Procedure
Step 1: Update your Reply Email in Aqilla
First, you must specify which email address you intend to use.
-
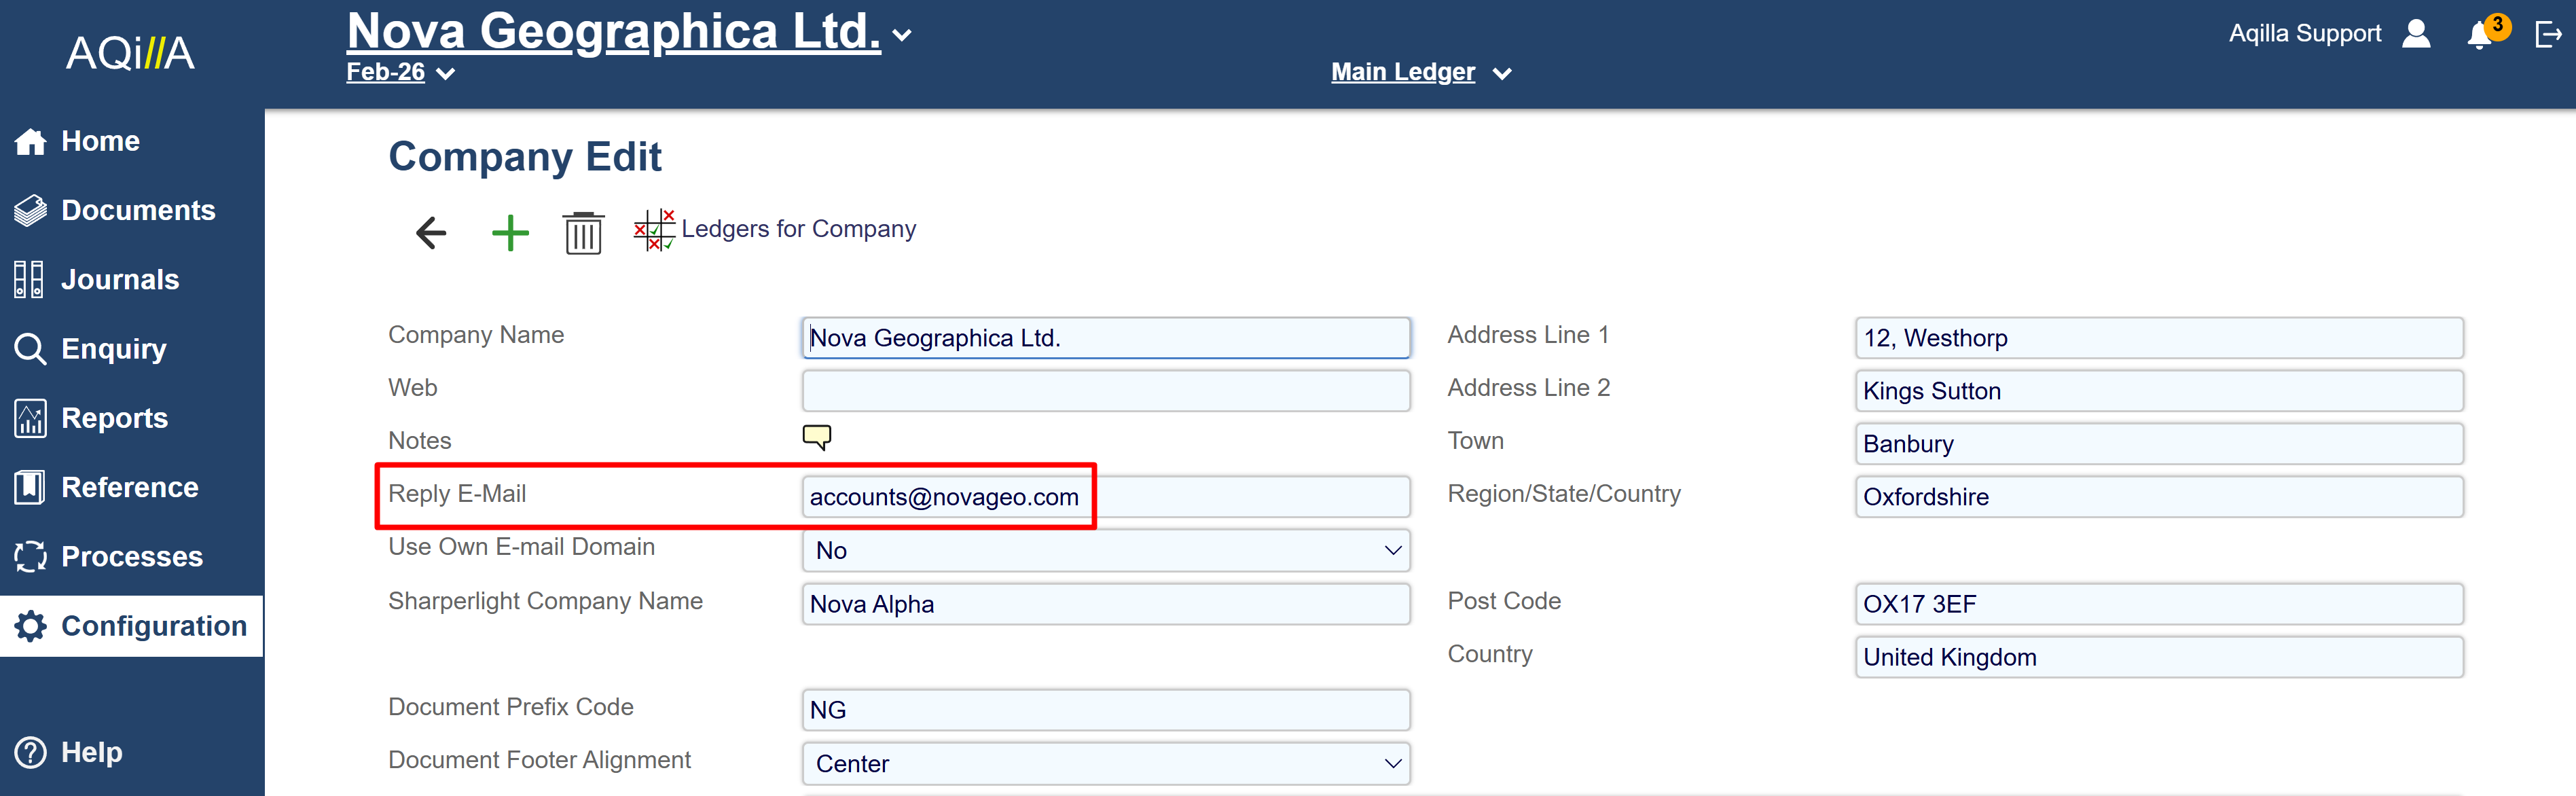
Log in to Aqilla and navigate to Configuration > Companies > Company Edit.
-
Locate the Reply E-Mail field.
-
Replace the default Aqilla address with your preferred business email (e.g.
finance@yourcompany.com). -
Save your changes.
Step 2: Request AWS Verification
Aqilla Support must trigger a verification request through our AWS servers.
-
Send an email to support@aqilla.com.
-
Include your Instance Name and the New Reply Email address.
-
Request that this address be verified for use with your domain.
Step 3: Verify the Email (Action Required by Customer)
Support will register your email and AWS will send an automated verification email to the address you provided in Step 1.
-
Monitor the inbox of the new reply email address.
-
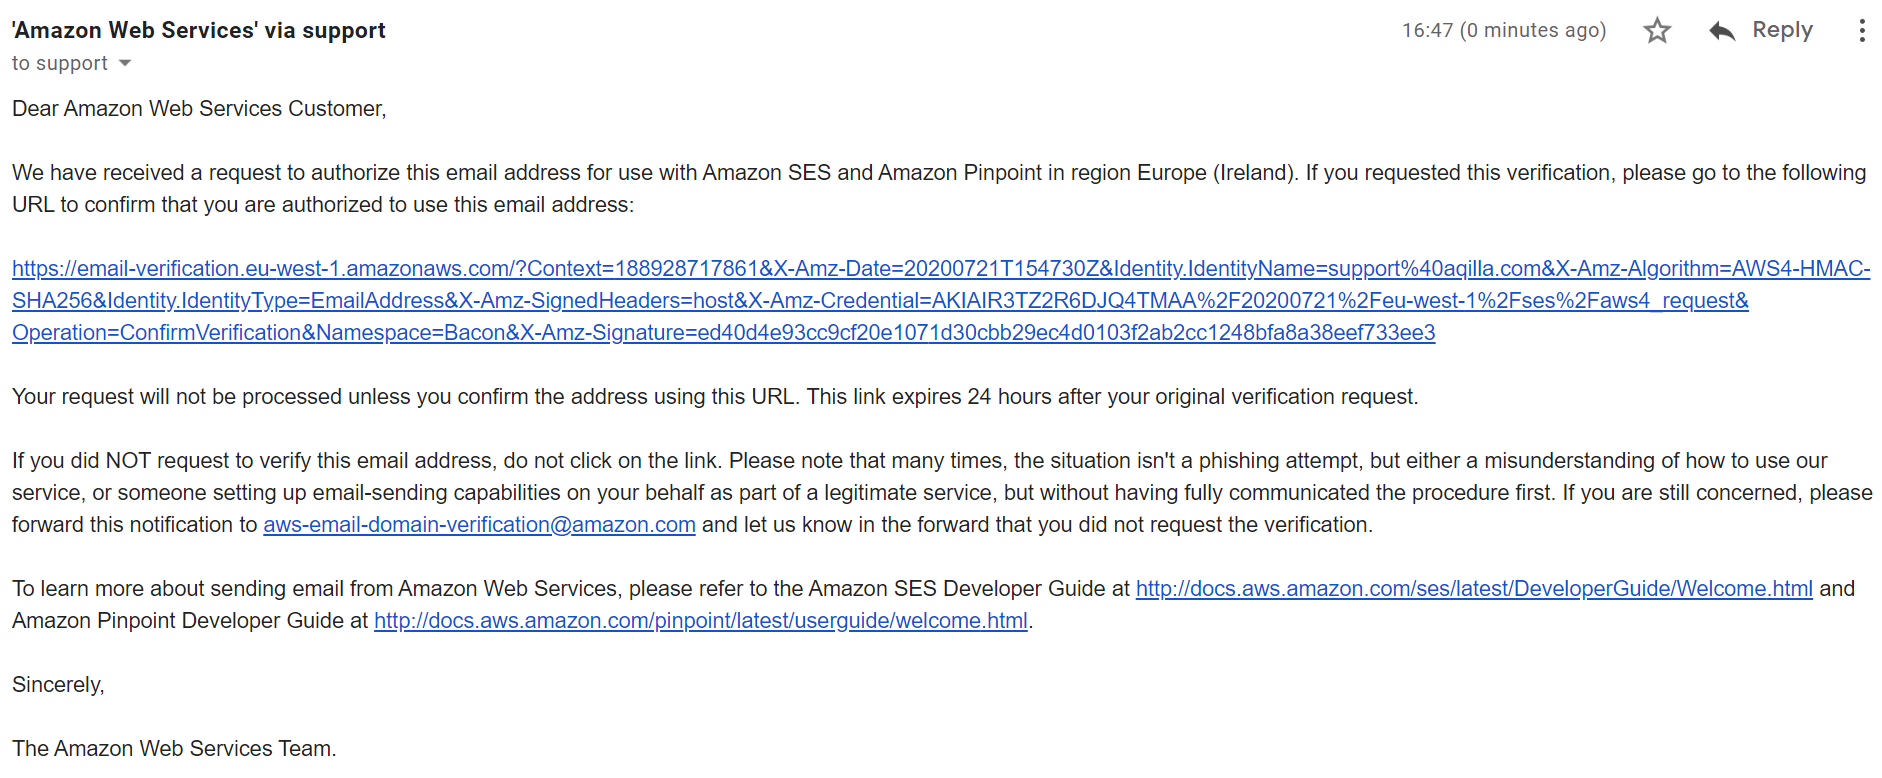
Look for an email from Amazon Web Services, it will look similar to the example below:
-
Click the verification link inside that email.
-
Note: The status will remain "Pending" in our system until this link is clicked.
-
Step 4: Finalise the Activation
Once you have clicked the link, you must notify us to "flip the switch."
-
Inform your Aqilla Consultant or Support that the link has been clicked.
-
Aqilla Support will then access your instance and set Use Own E-mail Domain to Yes.
-
This action locks the field (making it Read Only) and activates the masking.
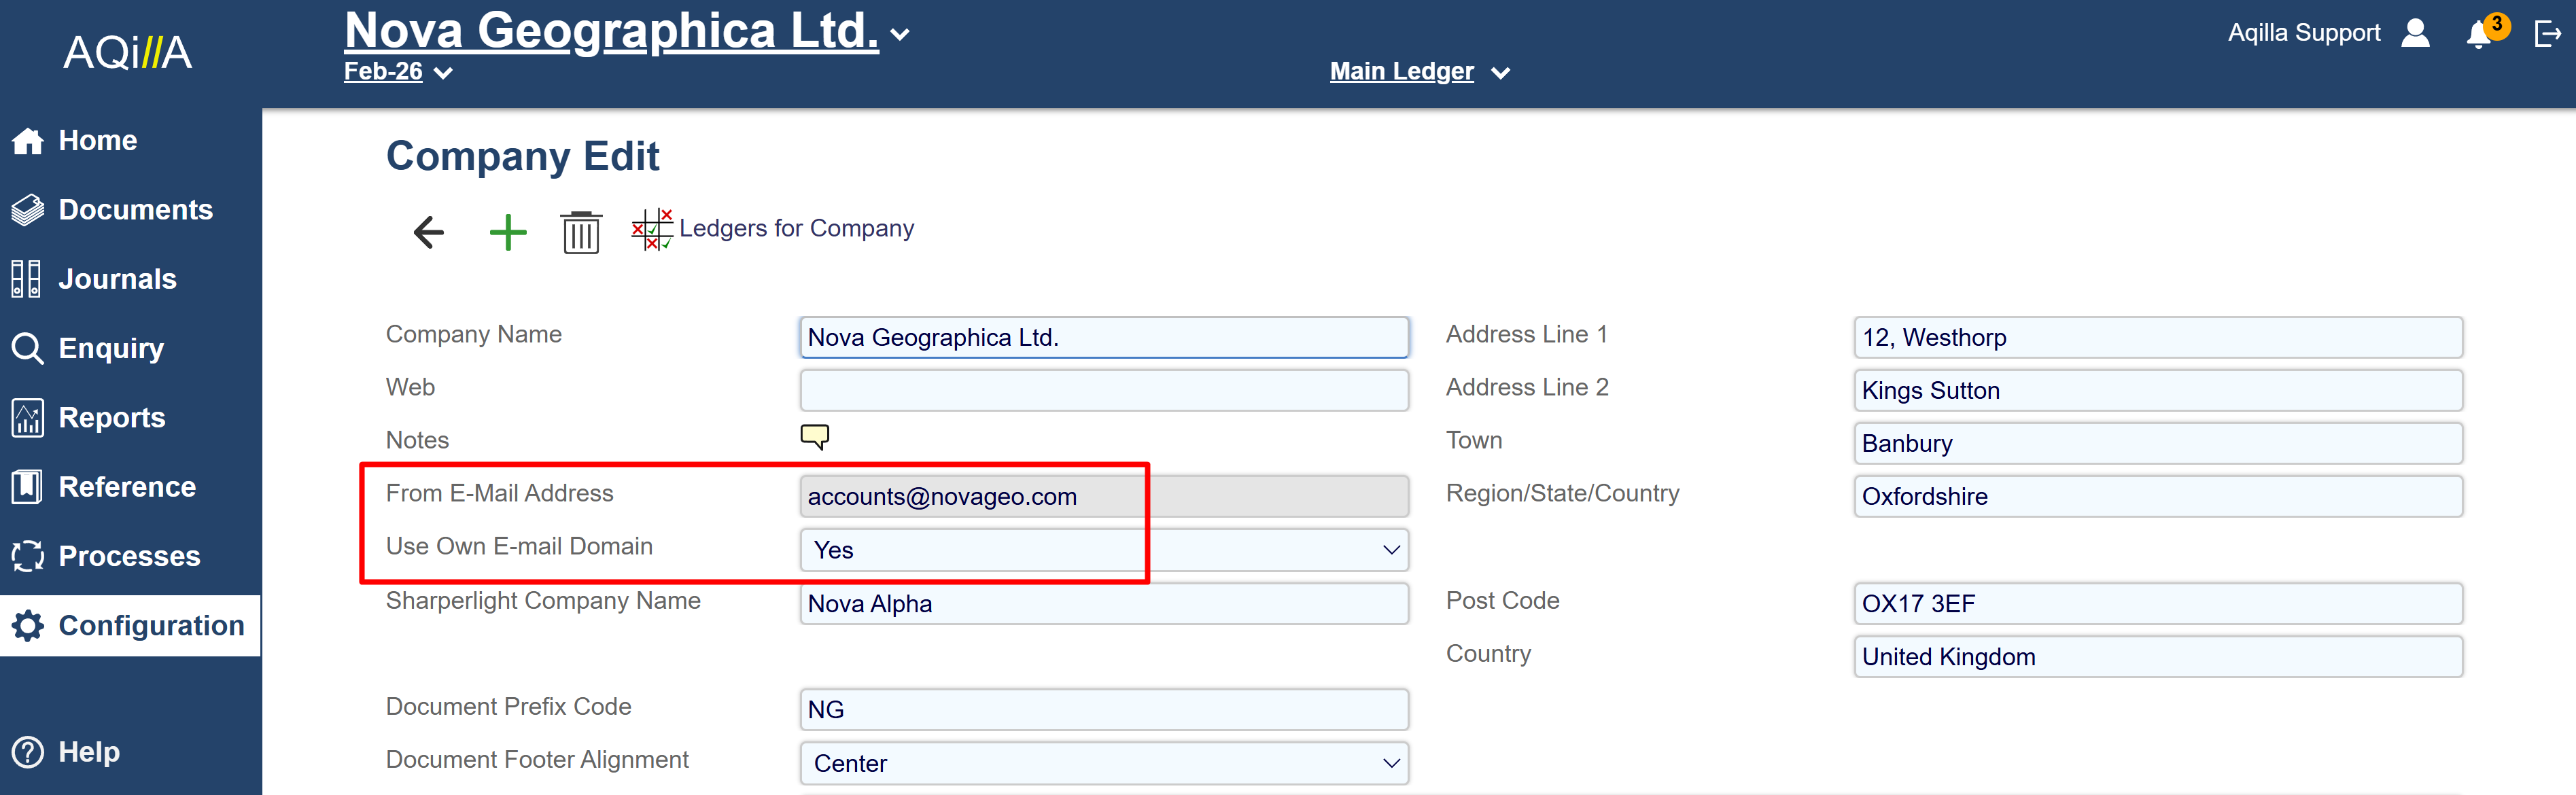
Note: The “Use Own Email Domain” toggle is only accessible via a Support Token login to ensure the integrity of the AWS verification.