Make Account & Ledger Enquiries
Account & Ledger Enquiry
The Add-in provides functions that perform account and ledger enquiries similar to the enquiry functions provided by the Aqilla web browser interface.
The examples described below will be based on Enquiries > Account in Aqilla; however ledger enquiry functions behave in the same way.
You will need to select a ledger to work with after you have configured your connection.
Get account and ledger enquiry

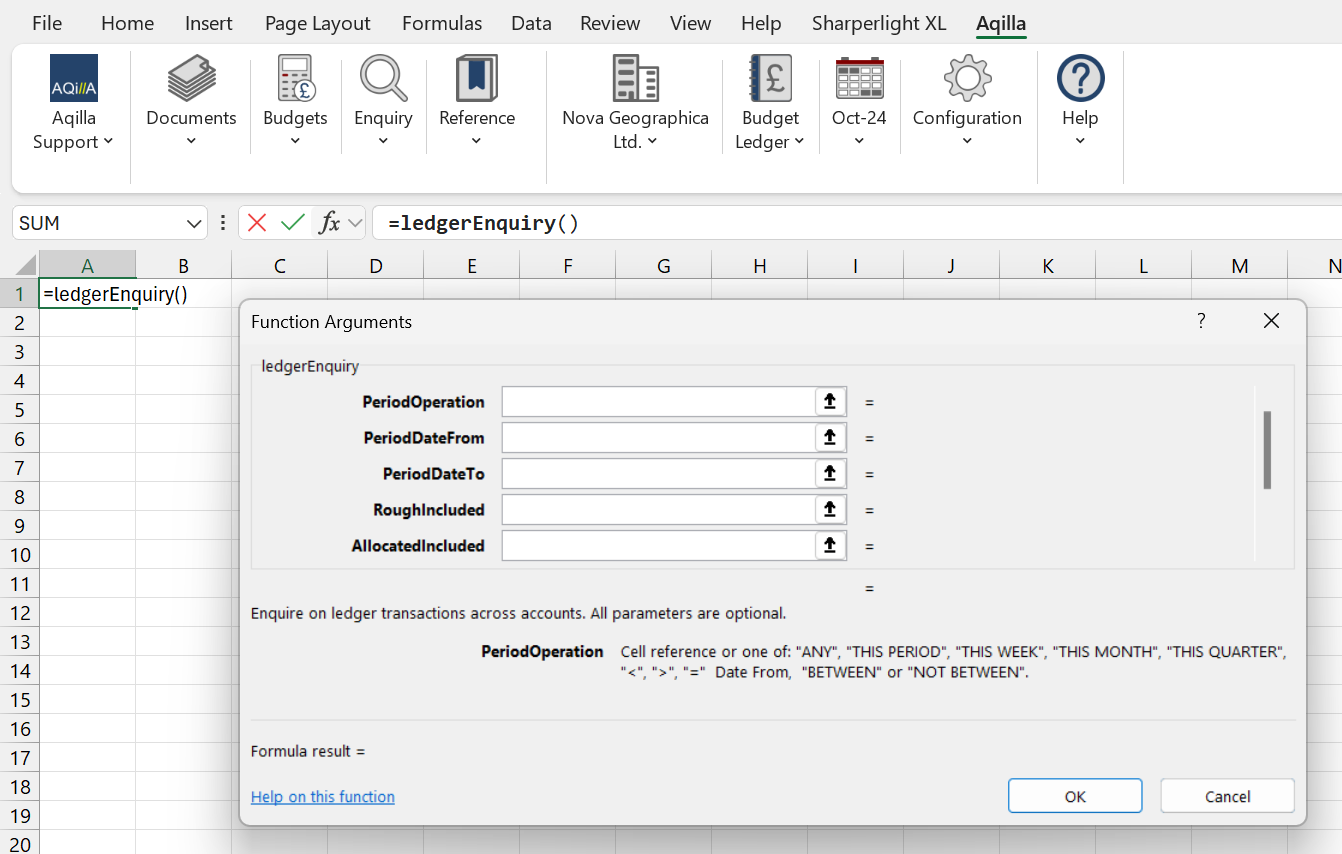
This will open a Function Argument pop up, in which you can filter the parameters to get the desired enquiry.
Click Get Supported Ledger Definitions and then Ledger Definitions to select a ledger.
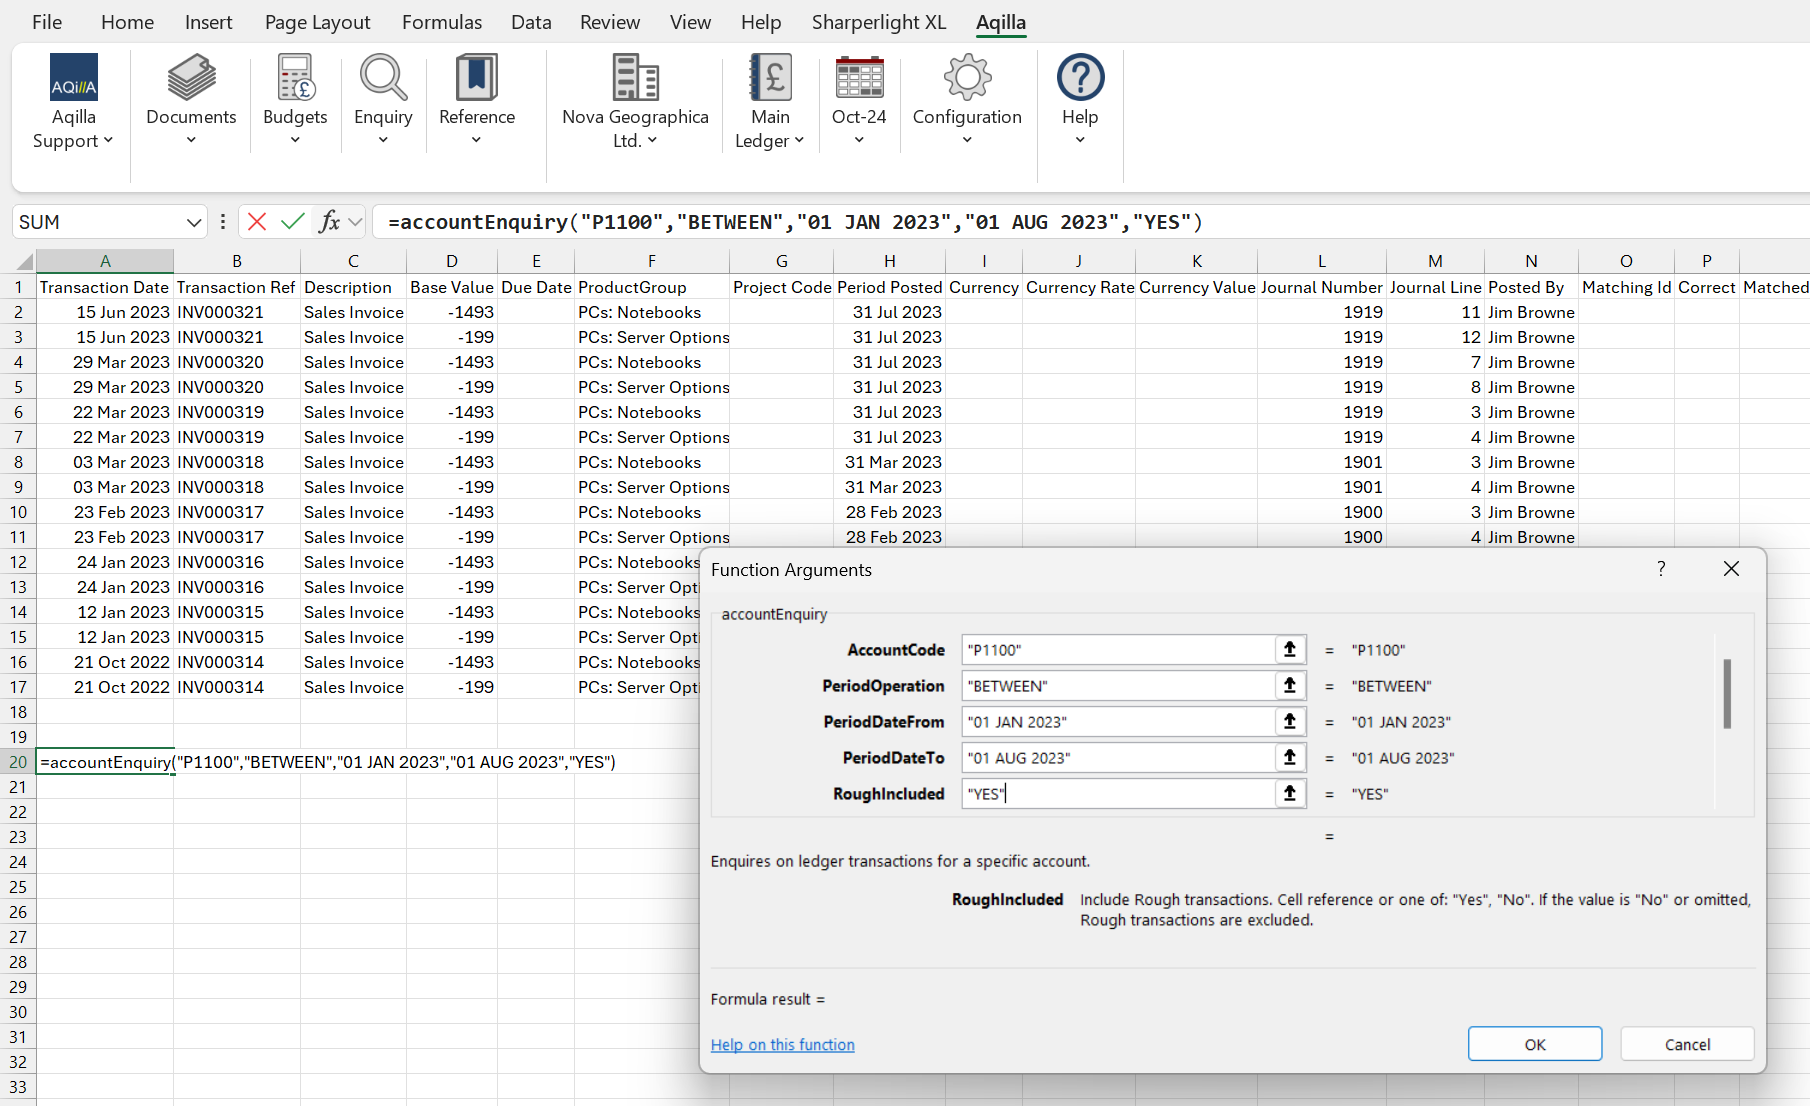
Select the cell in the worksheet where you wish to start displaying the enquiry (usually A:1) and select Insert Function and then select accountEnquiry. The Function Arguments dialogue will then list a number of parameters applicable to the enquiry. Most parameters are optional except for Account Code and Period Operation. For a simple account enquiry just enter an Account Code and ANY for Period Operation. As you move between parameters, help text is displayed at the bottom of the dialogue as shown below:
Tip - you may need to place "quotation marks" around the account code as Excel might confuse the code with a cell reference.
Running the function will display all transactions filtered by Function Arguments.
If you want to change the selections re-select the selected cell and select Insert Function again and repeat the above process.
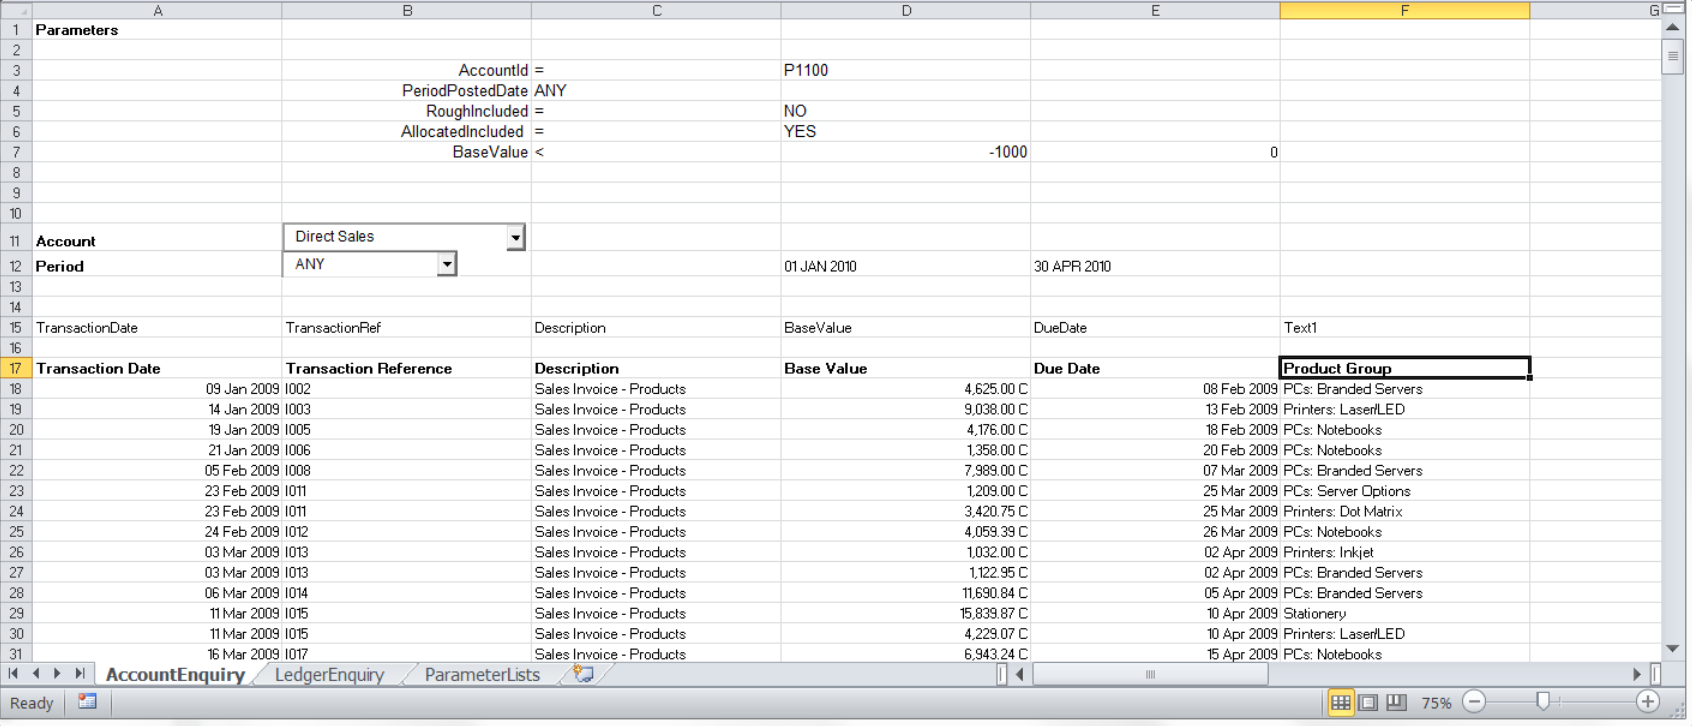
More complex enquires can be performed by specifying Dynamic Parameters and Selected Columns. Rather than displaying all the available columns in the enquiry, you can specify which columns to display and in which order. You can also apply some additional selection criteria using the Dynamic Parameters.
Create some blank lines at the top of the worksheet (4 will do for this example).
To define the columns to report, select the top-left cell in the worksheet and use the function accountEnquiryTags to display a list of columns in the top row. From this list, select the columns that you wish to use by placing them in a row in the sequence you want. Return to the top-left column of the first line of the enquiry and select the Insert Function button to amend the parameters. In the Function Arguments dialogue go to the Selected Columns parameter (last parameter) and highlight the columns selected above.
Tip - On older versions of Excel it is important to select the columns in this way and not type in the column range manually otherwise Excel does not recognise that this is a parameter array.
When the function is run, you will see only the columns selected and without headings. You can create your own meaningful headings on the line above the enquiry values.
To specify additional selection criteria define (on a spare row on the worksheet) the name of the field to select by in the first column, the selection criteria in the second column and one or two values in the next two columns depending on the selection criteria. In Dynamic Parameters in Function Arguments highlight the selection criteria columns.
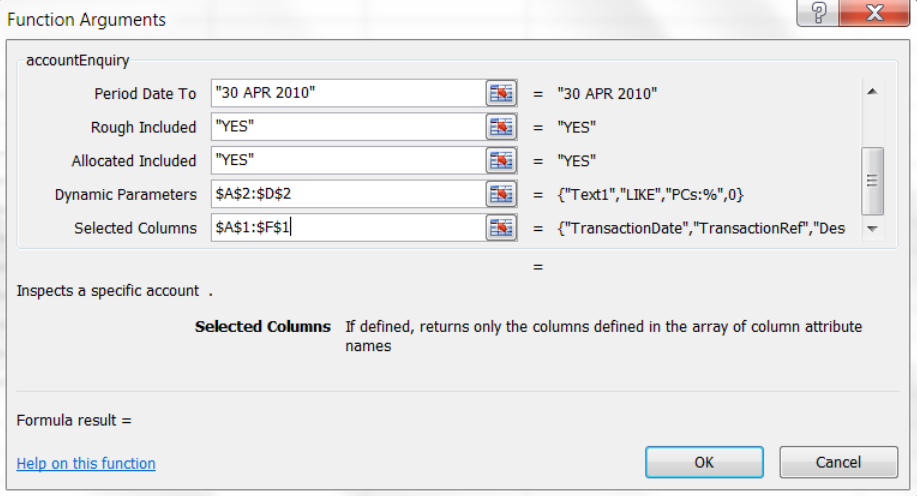
In the example shown below, the Text1 field is selecting values starting with PCs: using the LIKE selection criteria:
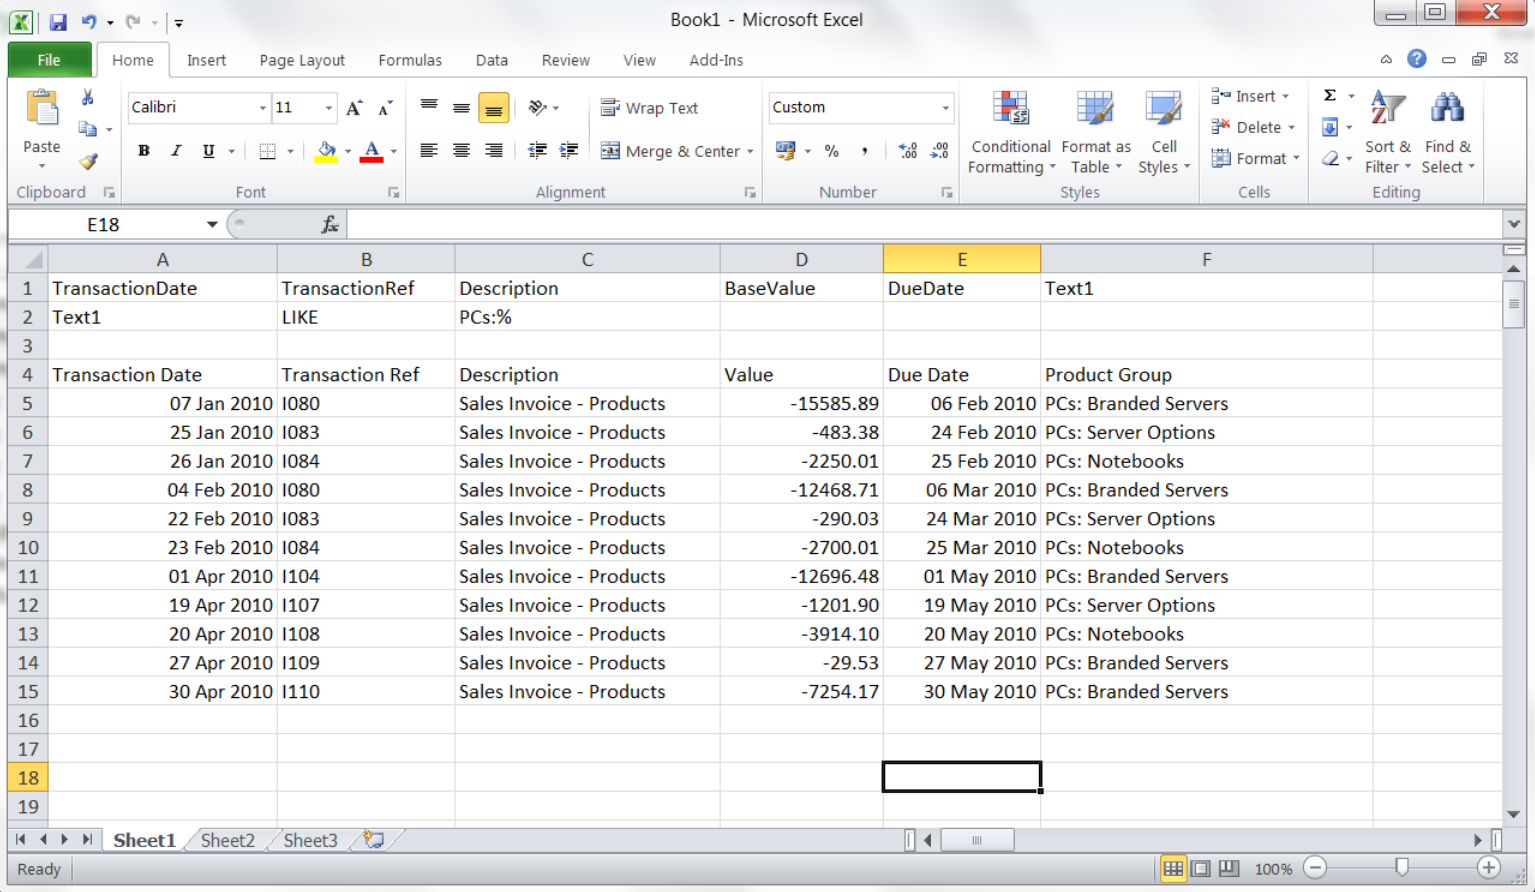
Note that more than one selection criteria can be used if the Dynamic Parameters specify more than one row in the worksheet.
AccountDynamicParameterNames is an additional helper function that will display a list of the names with a short description that may be used for selections. It is recommended that this function is run in a separate worksheet.
The parameters defined in the Function Arguments dialogue can refer to cells in the spreadsheet rather than entering them directly into the dialogue.
This, and hiding rows that contain parameters, can provide a simpler interface for regular use. The example below makes use of some of Excel’s embedded controls.