Dashboard Gadget (Smart Events)
Introduction to Smart Events
When the Smart Event Gadget has been added to your Home Page, it allows you to define calendar reminders for yourself and other Aqilla users.
From the Home Page it can display current and past events and send out notifications to Aqilla users. This is either displayed inside Aqilla via the Bell icon and Smart Events Gadget, or via email (those without email addresses are highlighted and flagged).
First of all you will need to have a Smart Events gadget on your Home Page. If it is missing you can add the smart event gadgets by pressing the + Add Gadgets.
On the Gadget Menu, select Smart Event and click on Add

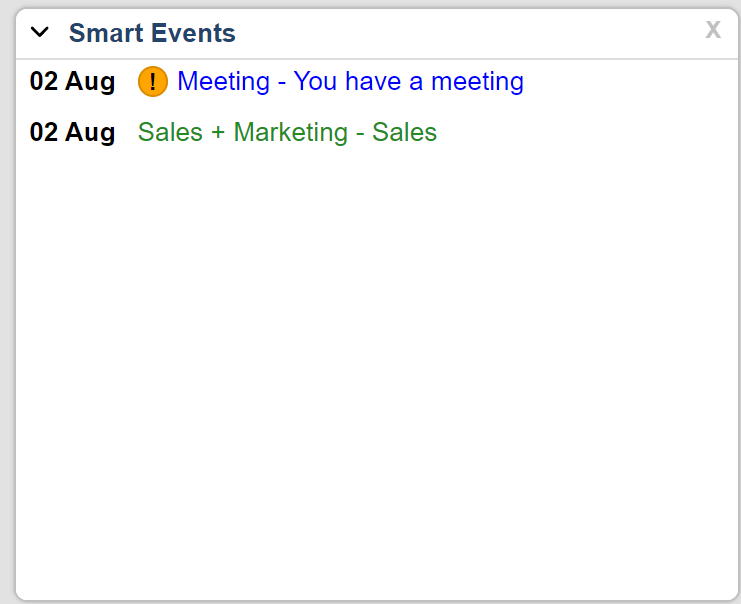
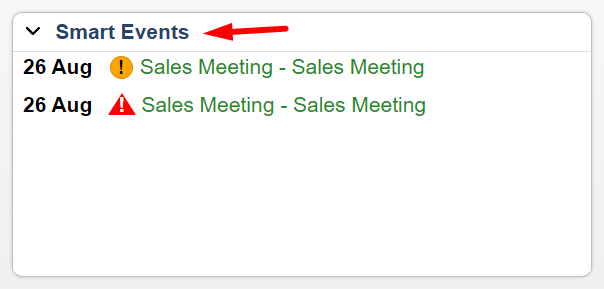
The Smart Events gadget will now be shown. If you have any events, they will be shown on the smart event list.
Aqilla User Notifications
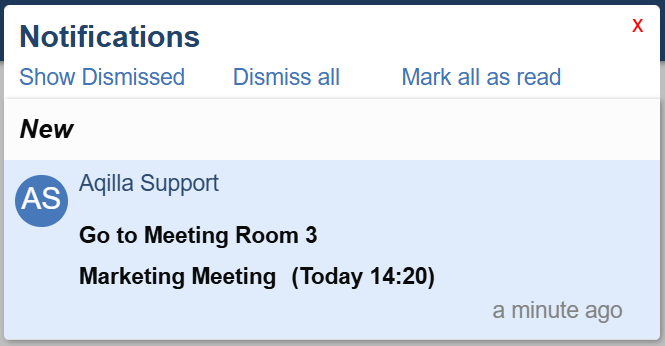
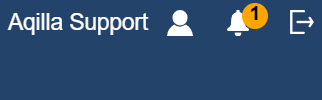
A new event User Notification feature has been added which extends the capability of Aqilla Smart Events. Users will now note the presence of a ‘Notification Bell’ icon at the top right hand side of the browser window. The icon shows a count of the number of unread messages.

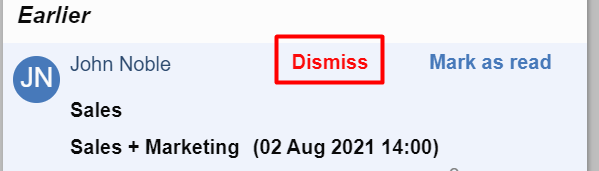
Clicking on the notification icon opens up the list of Smart Event notifications with the most recent at the top.
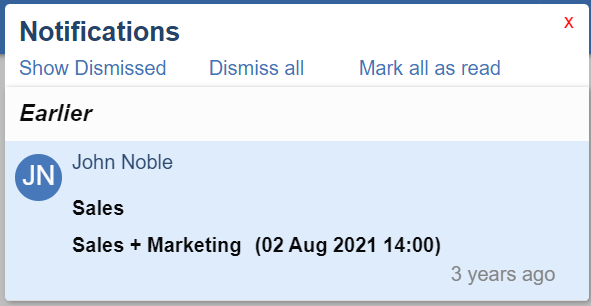
All the visible notifications will after a timed interval be automatically marked as read. However moving the cursor over an individual notification provides options to toggle the message as being ‘marked’ as unread or read. Alternatively the notification can be Dismissed to remove it immediately from the list.
Options at the top of the notifications list provide a toggle for the display of dismissed items (in effect the history), dismiss all notifications, and mark all notifications as read.
Initially, notifications are generated from the new form of Smart Events (see below), but later releases will include other types such as service notifications.
Smart Event Collaboration Support
Whilst Smart Events have been a feature of Aqilla for many years, the functionality has been enhanced in two significant ways; allowing users to specify multiple recipients of notifications displayed in the the Smart Events home screen gadget (and therefore now also therefore the new Notification Bell feature) plus , AND also multiple notification recipients delivered via email.

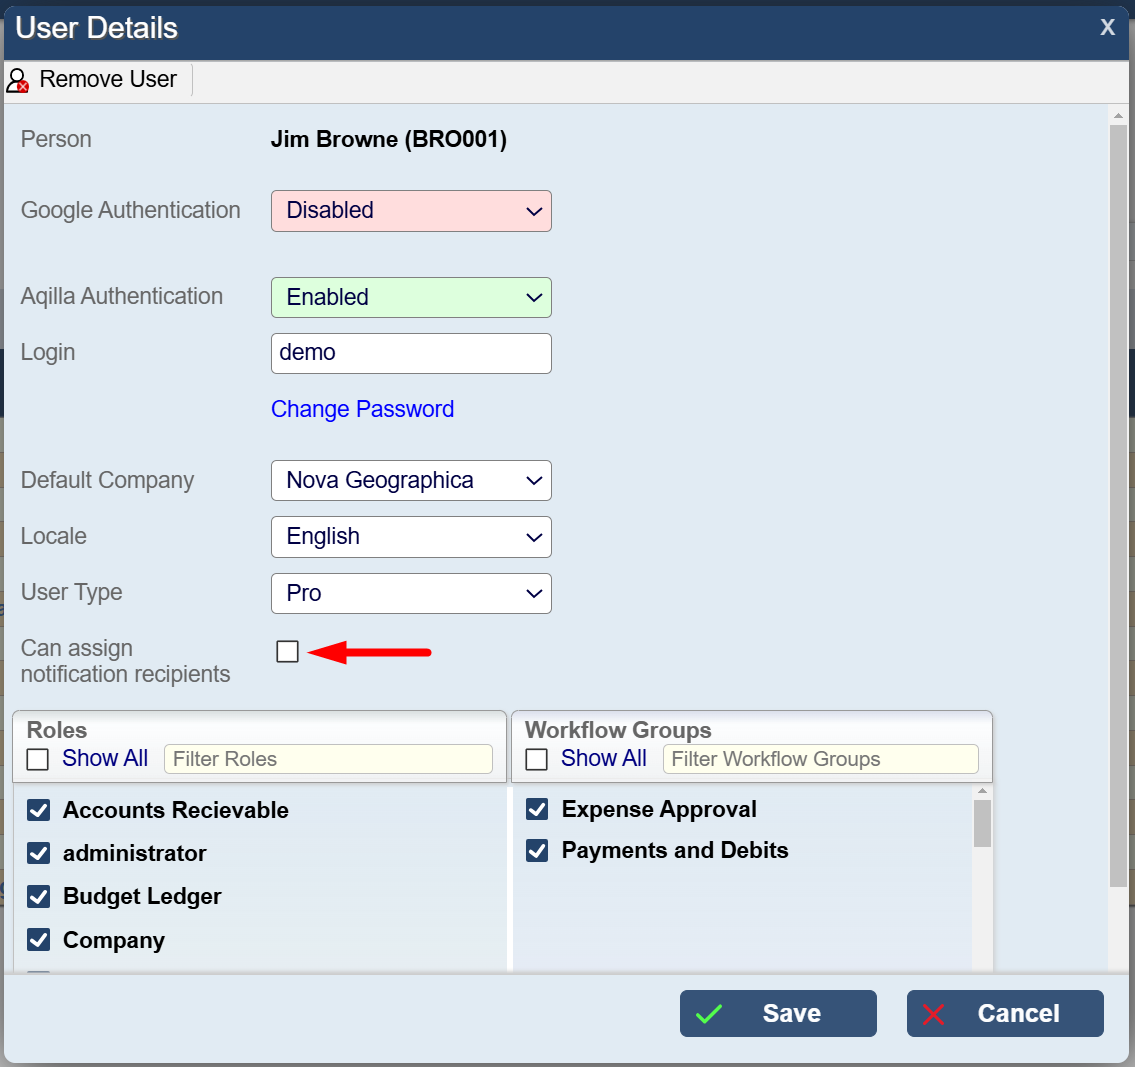
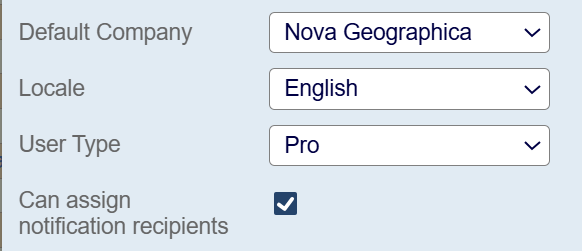
Permission to allow someone to send notifications to other users in Aqilla is enabled by way of a new flag called “Can assign notification recipients” defined in the User Details view. This is to allow administrators to control the volume of notifications generated by members of staff, in order to for example limit such capability to those needing to inform or request action of others.
Users without this flag set can still generate their own Aqilla Smart Event which will appear in both the Home Screen gadget and Notification Bell as well as optionally send personal email reminders (a common requirement). When the flag has been enabled, a user can select from a list of other Aqilla users (as defined in Reference-Personnel) who are to receive the notification. Normal multiple select options such as row select, ctrl-A or ‘Select All’ are all supported. Note that the creator of the event always receives a notification.
Furthermore, for additional security, whilst the Smart Event notification is readable by all specified users, it is only editable / deletable by the user who initially created it. Users can no longer browse from the notification in the Home Screen gadget to the notification definition unless it is created by that particular user.
If no valid email address is available for a user (in most cases highly unlikely) such a condition is highlighted (in red):
Creating a new Event.
To create a new Smart Event, open the calendar by clicking on the Smart Event label.
The calendar will show you all your smart events. The Smart Event header is similar to other calendar related notification configurations. You can give the notification a name and select options if you want the meeting to be a reoccurrence or receive an advance notice.
The various events can be colour coded by the event category found in the Event Edit page.
Blue = None
Green = First Category
Yellow = 2nd Category
Red = 3rd Category
The various event categories will be shown on the right.
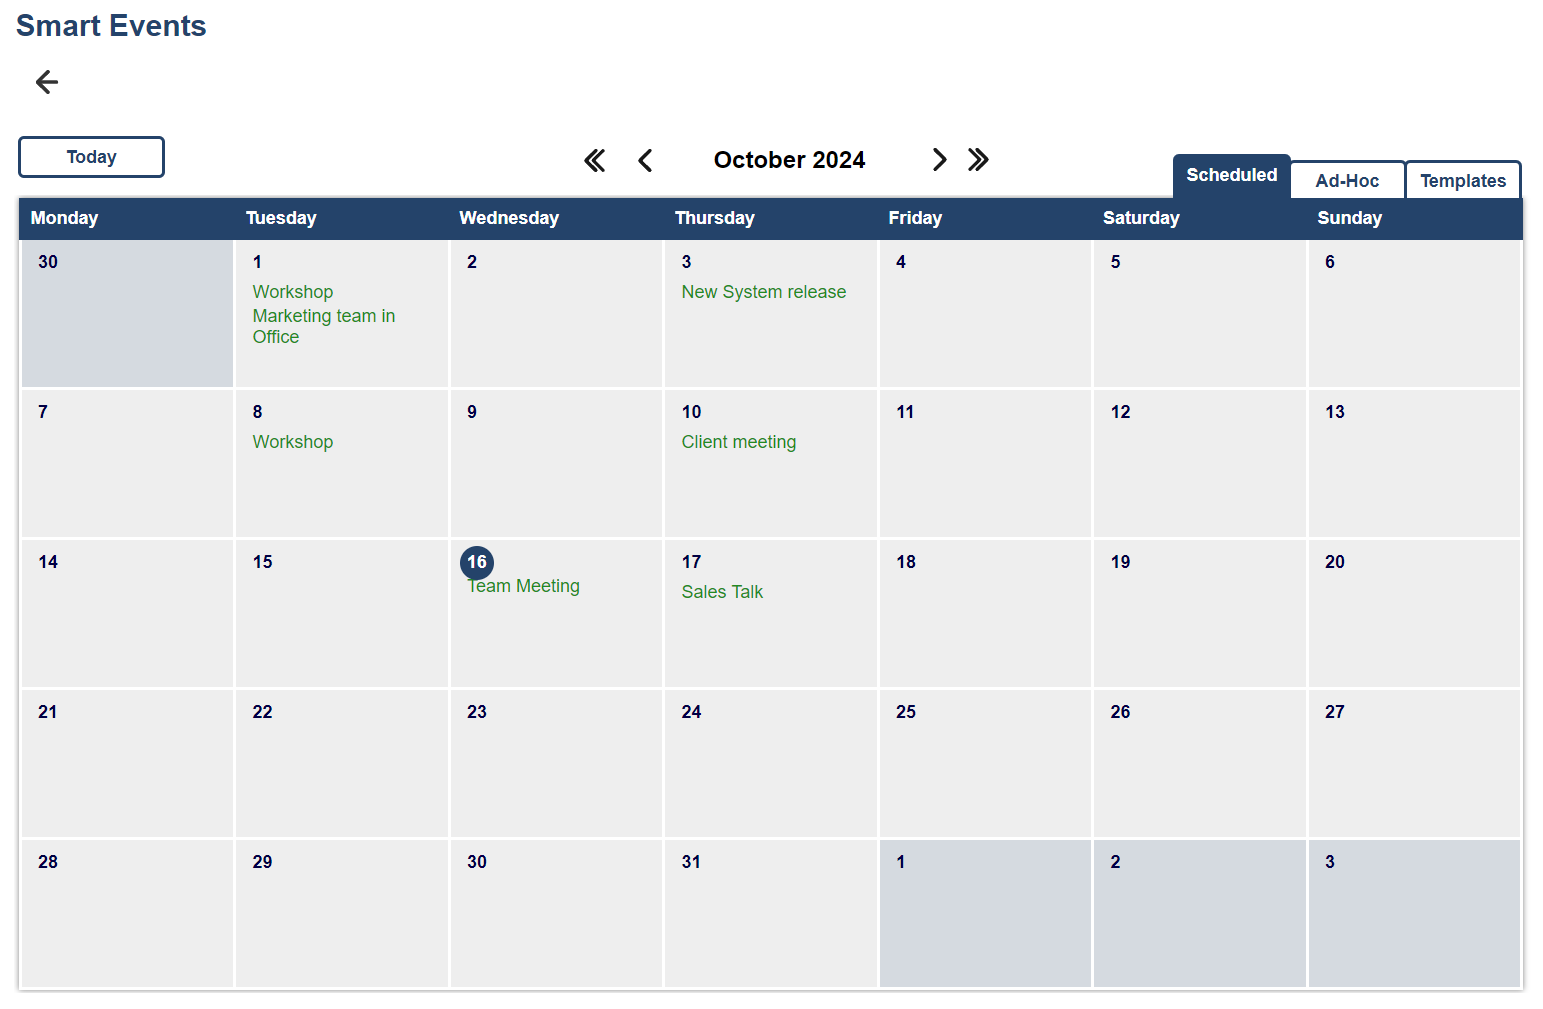
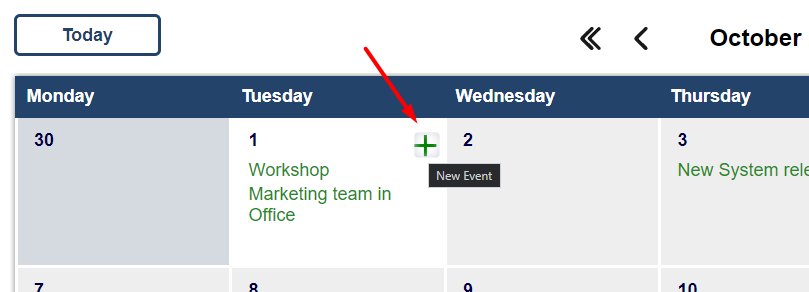
You can create a new event by hovering your mouse over the relevant day and clicking on the + sign.
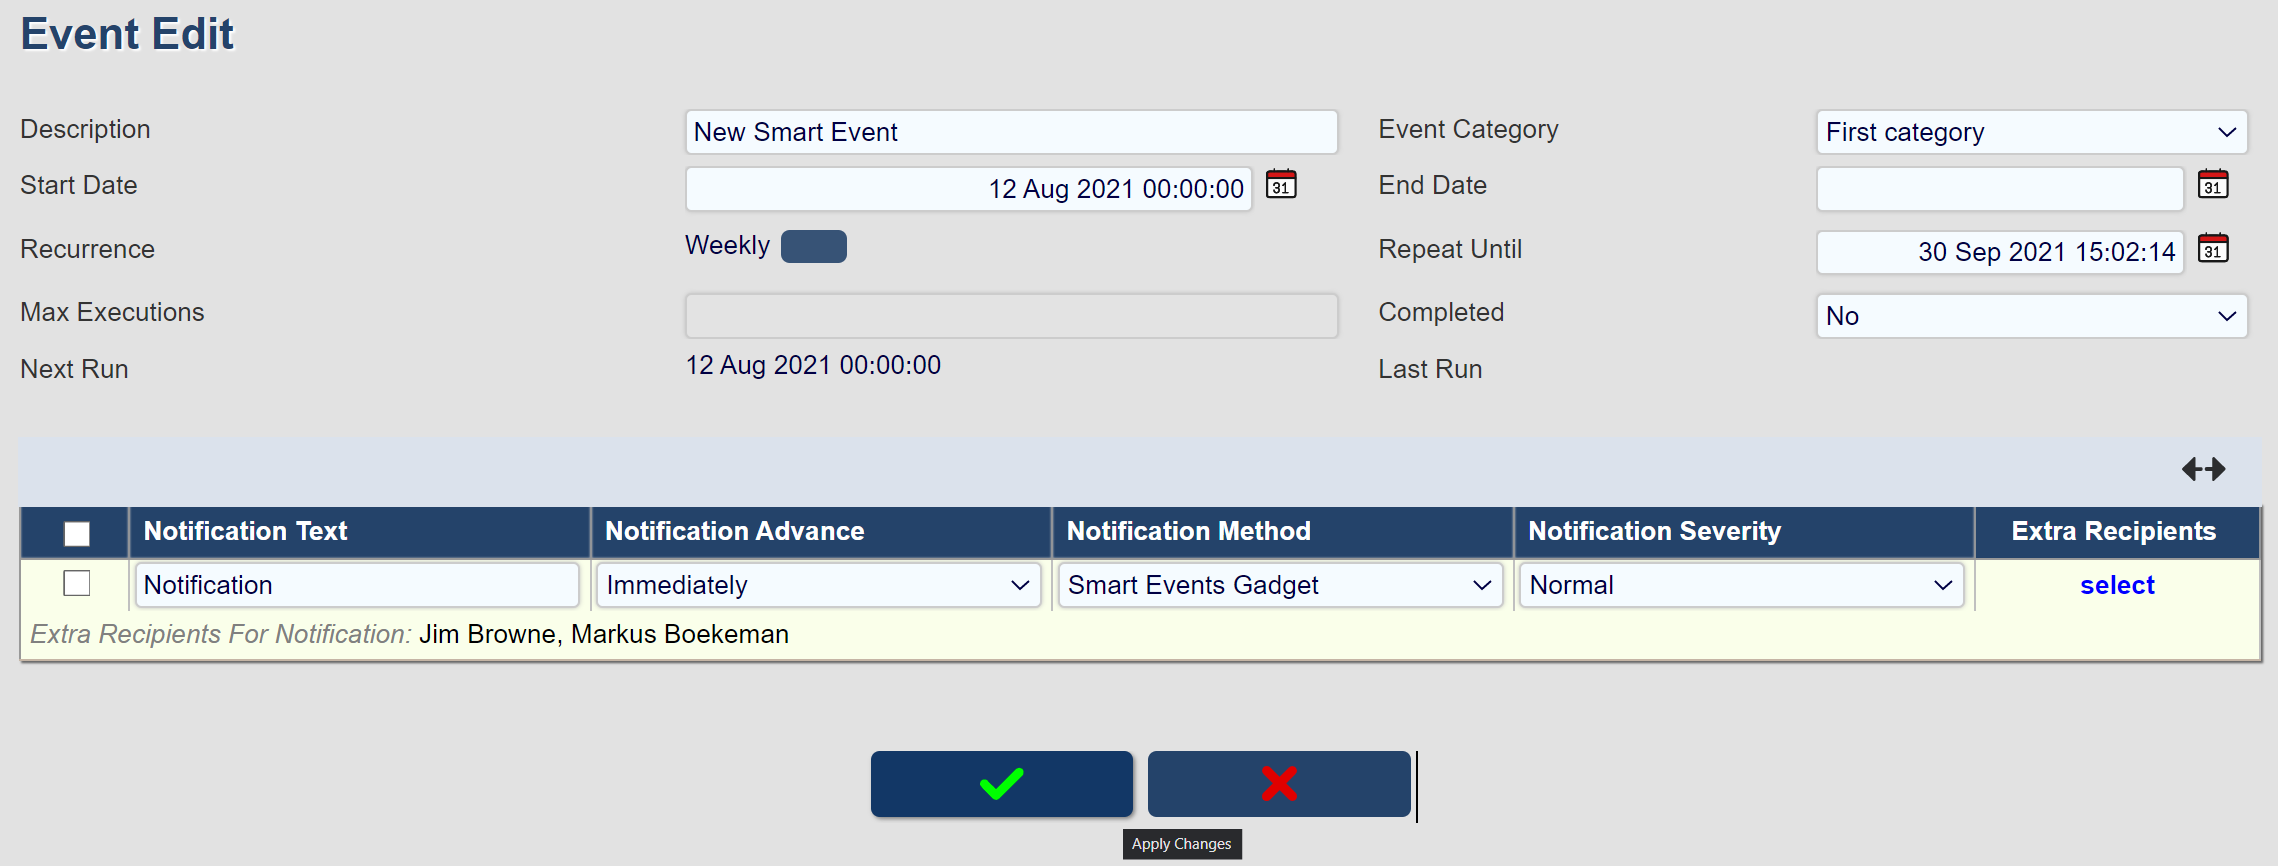
When creating a new Event, you will be presented with an empty Event Edit Page.
The following has been filled out to show the various options. You need to give the Smart Event a name, and you must select the Start Date and optionally the End Date of the event. You can also select options for the event to reoccur and how many times you wish it to be repeated.
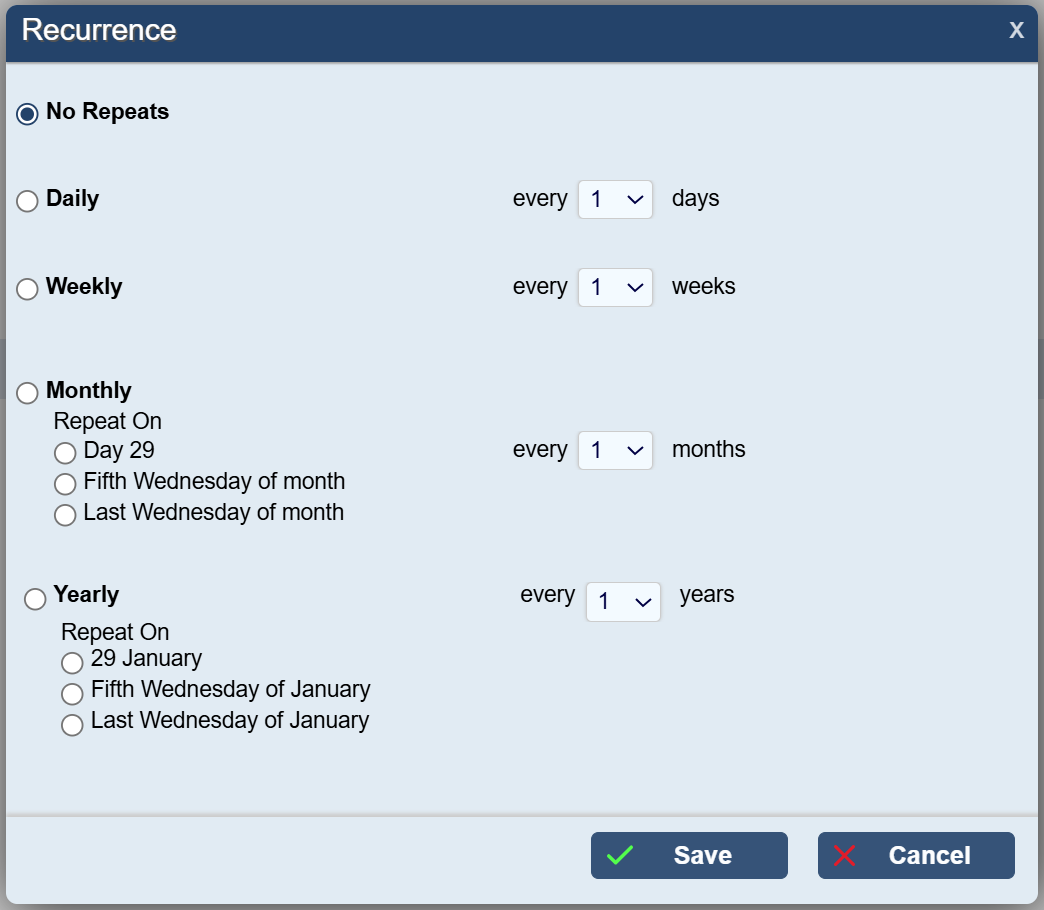
Recurrence
Clicking on the reoccurrence button will give you a multitude of options for how often you wish to event to repeat itself. You can select No Repeats, Daily, Weekly Monthly and Yearly reoccurrences, as well as how often the event is repeated.. (Every day, every week, every 2 days , every 2 weeks, etcetera.)

Once you have filled out the Event Edit, you can click save, but here is a quick overview of the page and the options have been summarised in the table below the screenshot.
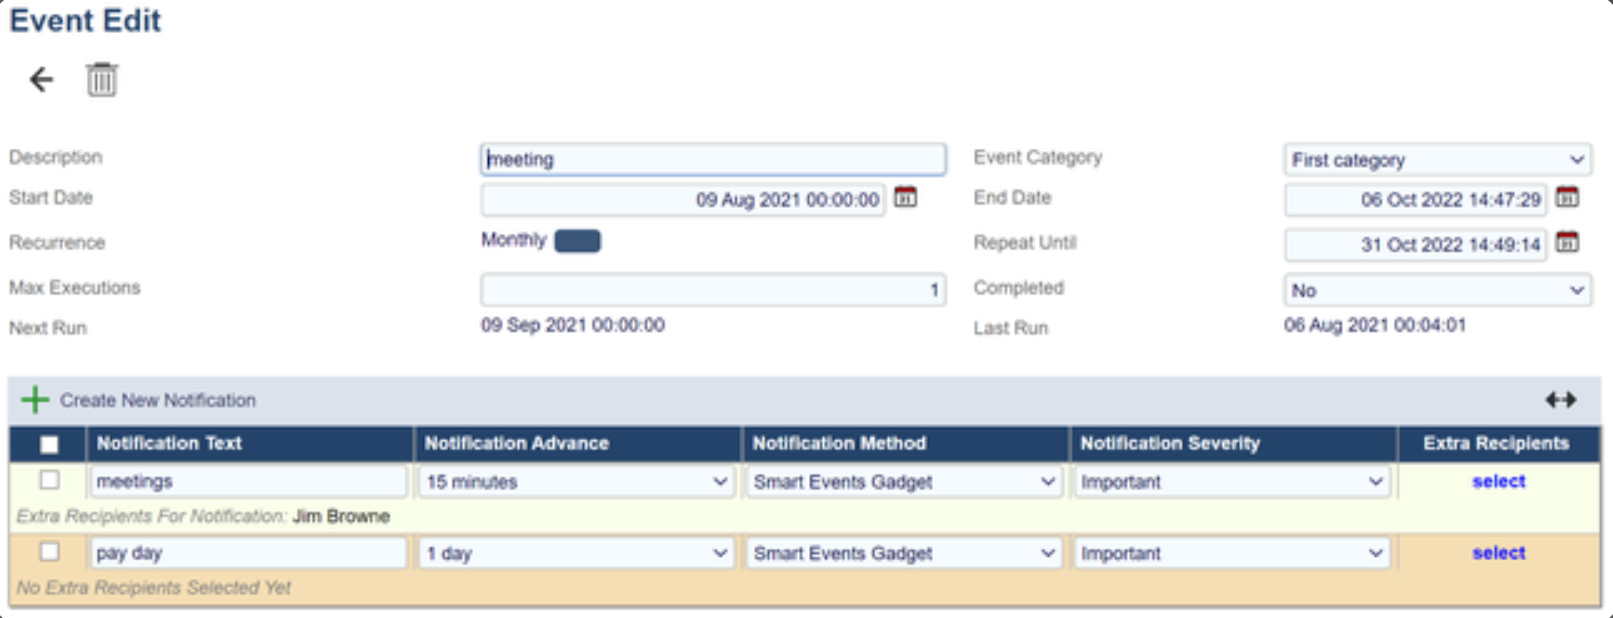
Fill in the parts in the Event Edit Screen.
Description | Name of the Event - Mandatory field |
Start Date | When the event takes place - Mandatory field |
Recurrences | Repeats the event, Daily, Weekly, monthly or yearly |
Max Execution | Number of times the event gets repeated. |
Next Run | Next time the event will occur. |
Event Category | This allows you to colour code your event. |
End date | End date for the event. |
Create New Notifications
When you have completed the Event Edit Header. you can click on Create New Notification at the bottom to add a notification or warning text to let you know when your event happens.
The Notification Text will be displayed in your notification or warning. It is therefore recommended that you choose a warning text that is relevant to your Smart Event.

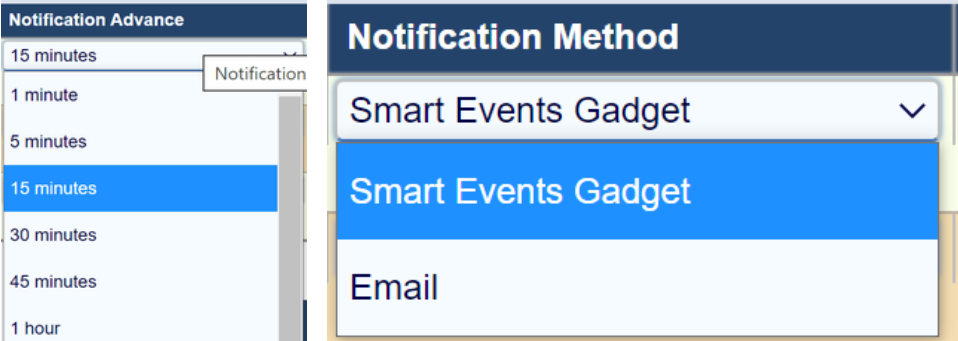
Notification Advance - drop-down menu - you can select when you wish to be notified before the event starts.
Notification Method - drop-down menu - allows you two options to receive the notification, within Aqilla, or via email.
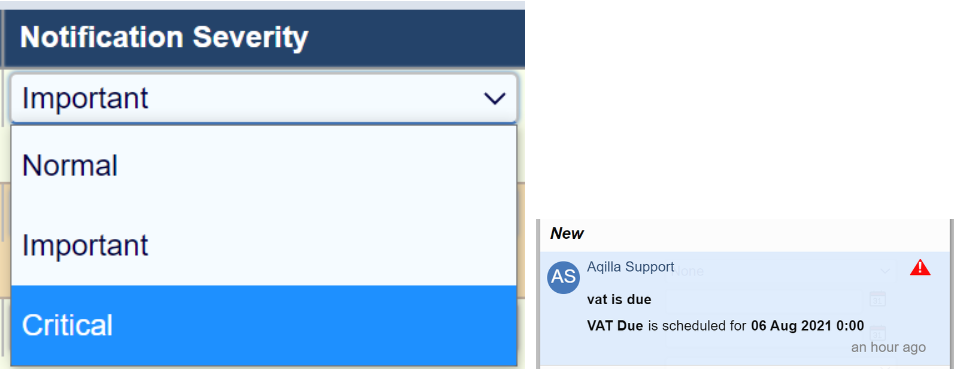
Notification Severity selects how the notification is displayed. For example. Critical shows a red ! icon.
Important shows a yellow icon and normal does not display any special colouring when notifying you.
Add more people
You may want to include more people in your Smart Event notification. Please note that you must have a tick in Browse Other Users on the User Details Page under references. Please make sure you logout and back in after ticking the box.
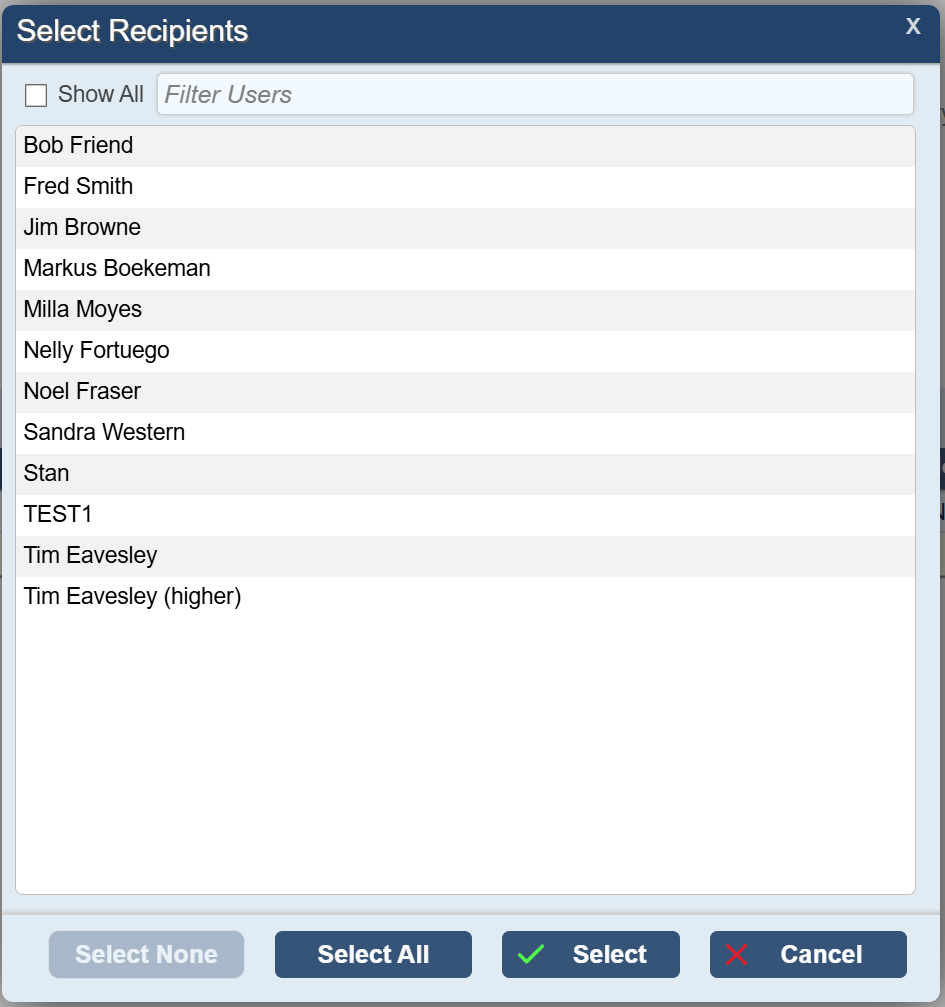
To add more people to your event. Click on Select under Extra Recipients.
You can Select one or more users by clicking on their Name, or use one of the options at the bottom to Select All/None. Close the screen by clicking on Select.
Once you have filled in the Event Edit Screen click on Apply Changes to save it.
Your new event will now be shown in the calendar and on the Smart Events gadget on your Home Page.
Notification Display
In the top right-hand corner, next to your username, a bell icon will show you notifications from Aqilla.
A yellow circle with a number in it will show the amount of notifications waiting to be read.
Clicking on the Bell will show a list of notifications.
You read and dismiss each notification, or use the top menu to Dismiss All, or Mark all as Read.
The list will show the Smart Event creator username, the notification text and the time and date of the event.
When a notification has been read, it is slightly greyed out.