Workflow Groups
Workflow Groups
This function is used to maintain Workflow Groups for Documents and Payment Profiles.
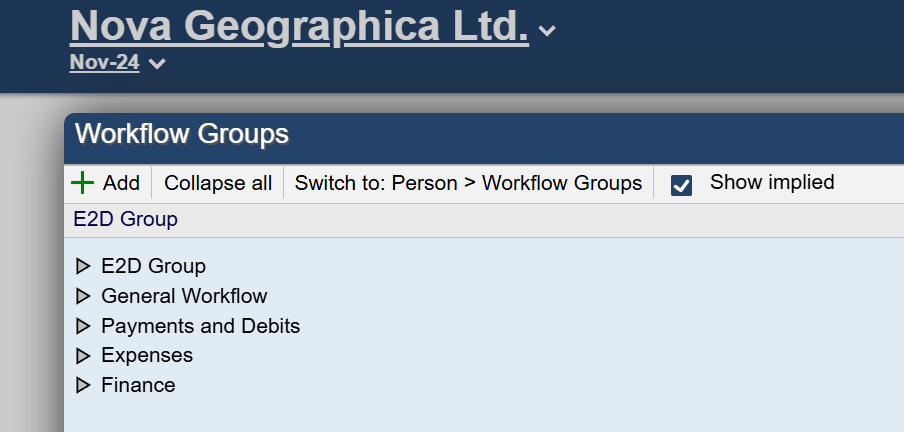
Workflow Groups are used to define who can view, modify, or promote (e.g. approve, post) specific types of documents (and document lines where applicable) within the context of a group of people. Each person in an Aqilla instance can be a member of one or more workflow groups. When you click on Workflow Groups a new window is opened in which you can add, edit and delete workflow groups.
You can also control what documents are available to users by assigning roles to users; see Configuration > Roles.
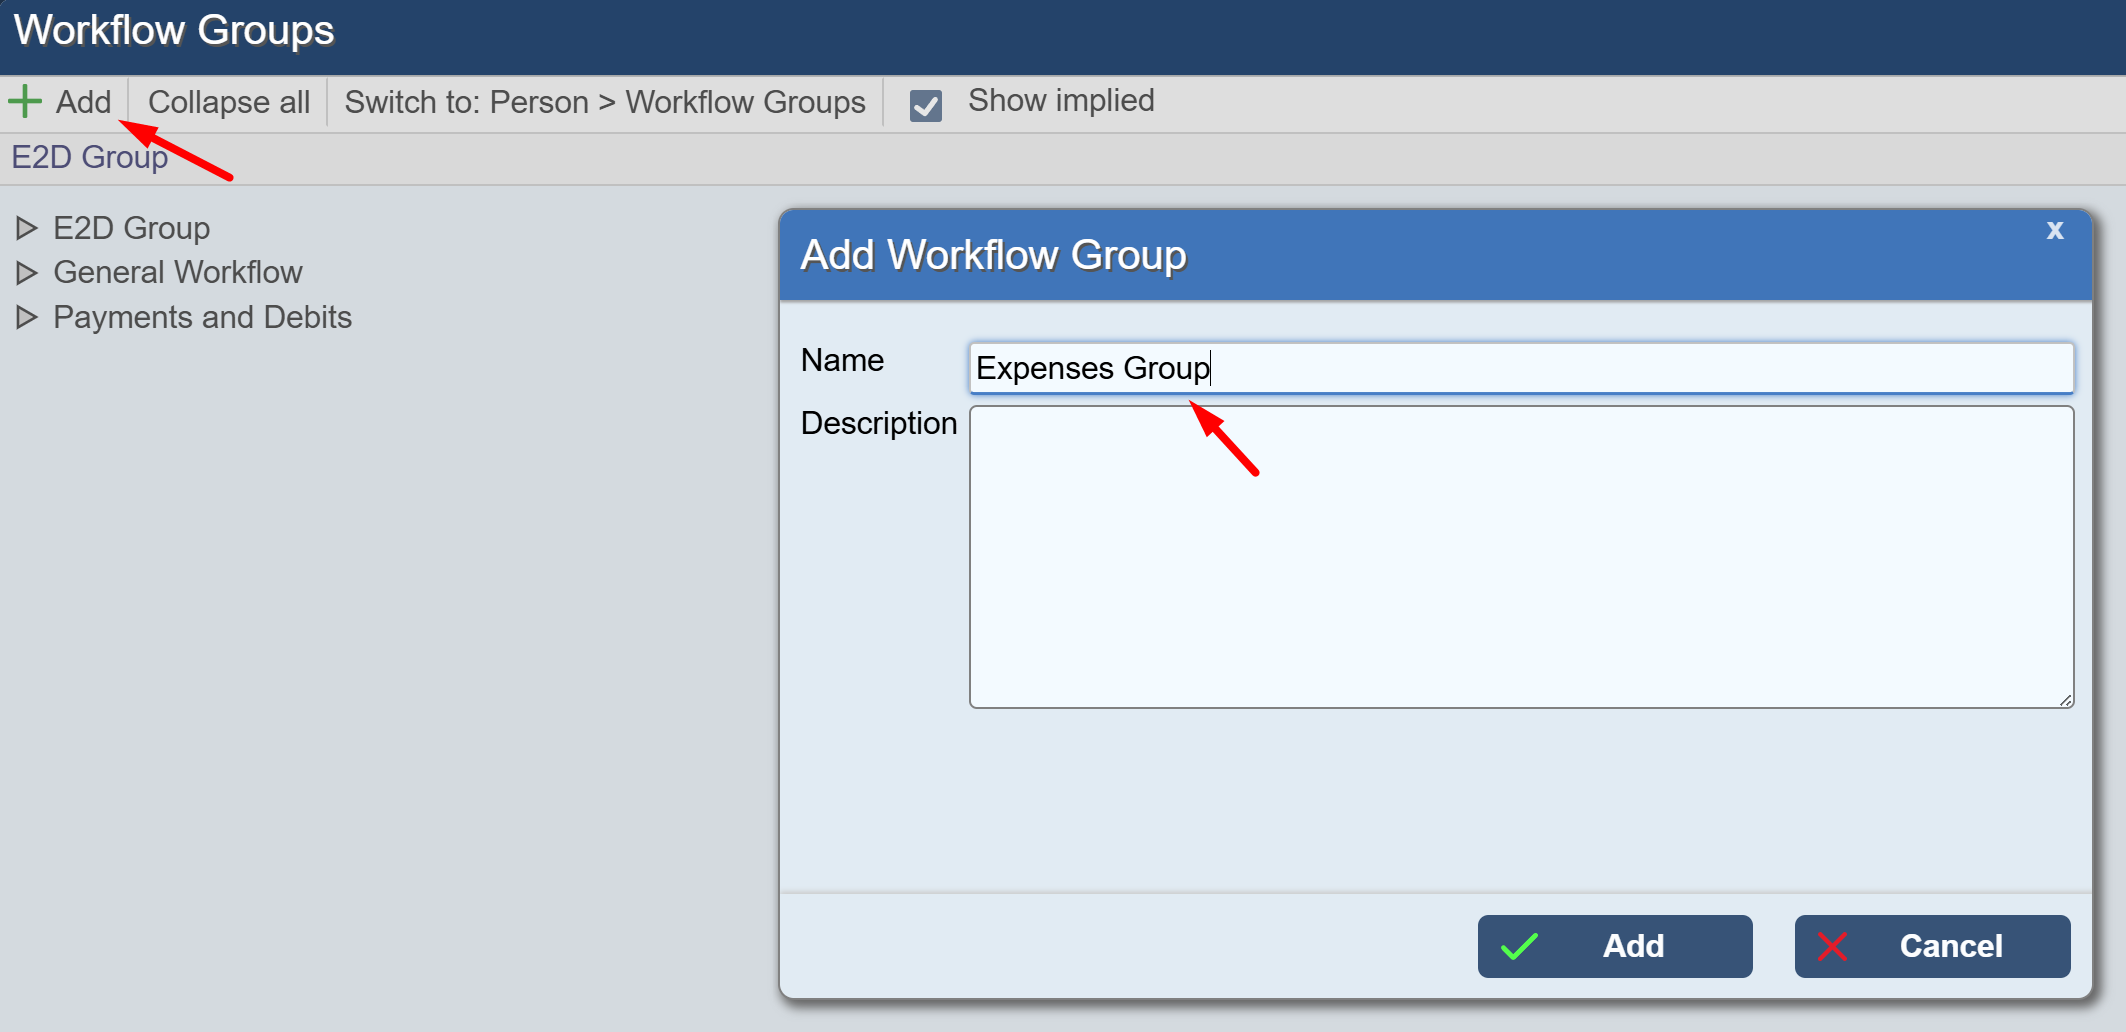
Add | Opens a dialogue into which you can enter a workflow group name and optional description. |
|---|---|
Collapse All | Collapses tree to top level. |
Show Implied | Shows all possible workflows whether permissions have been granted or not. |
Adding a Member to Workflow Groups
Click on New and name your Workflow Group
When you hover your pointer over a workflow group name, the following options are displayed:
Add Member to the Workflow group
Edit Workflow Group
Delete Workflow Group
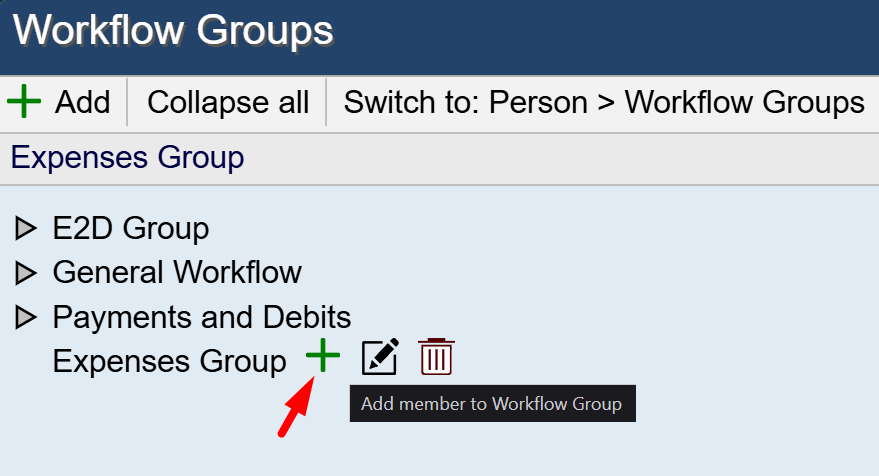
Click on one of the icons to add a member to the workflow group or edit or delete the workflow group.
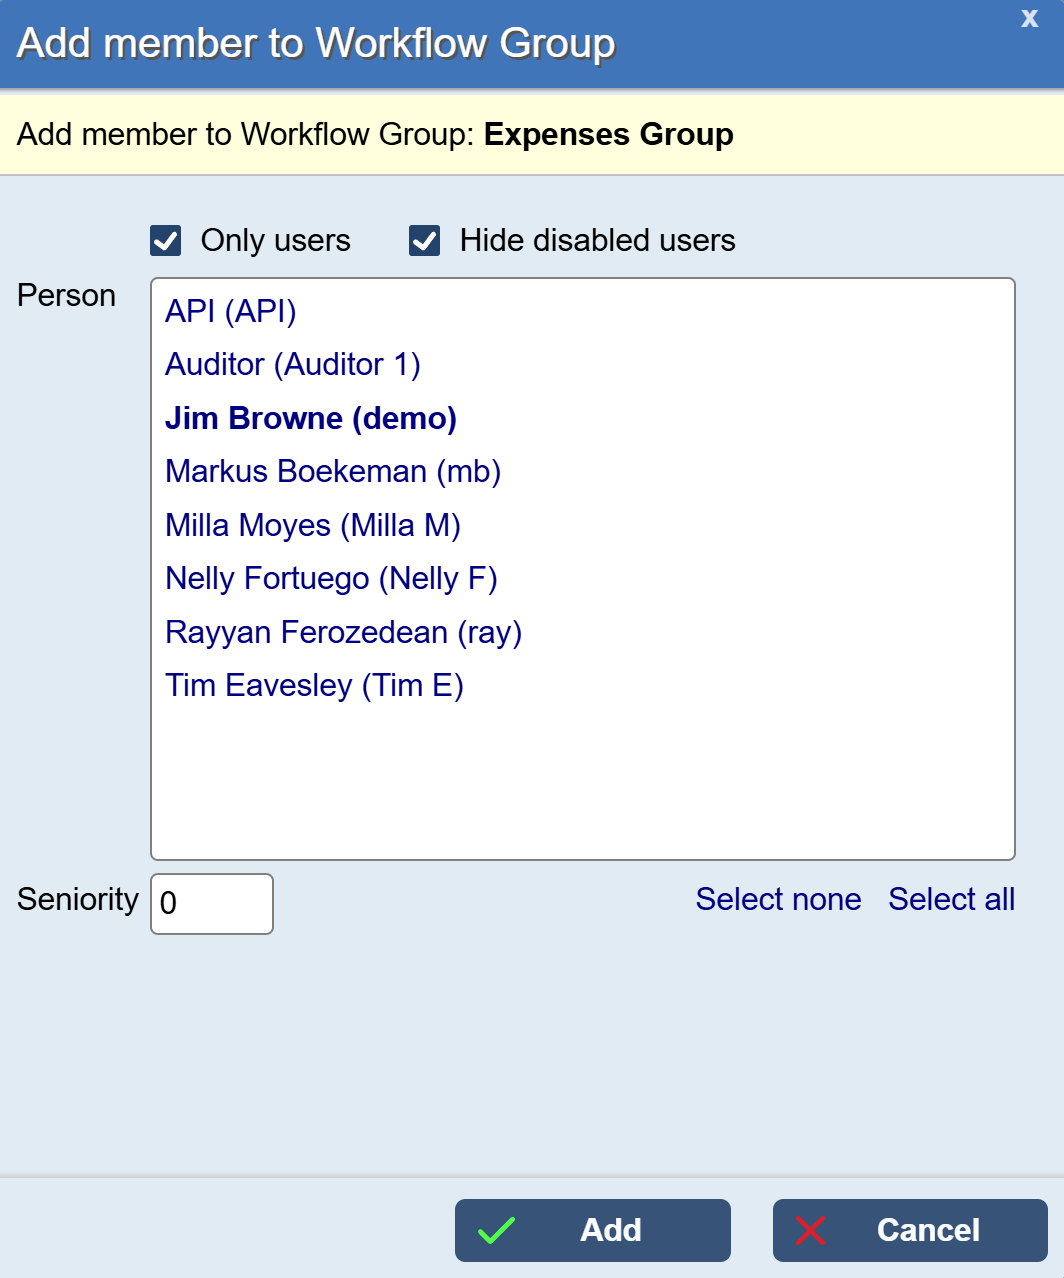
If you click the add member icon the following dialogue is displayed:
You can filter this list by only showing Aqilla users and/or hiding disabled users. You can select all people (or none) and also select one or more people by:
clicking on a person - selects only that person
clicking on people (whilst pressing the Crtl key) - selects all people you have clicked
clicking on people (whilst pressing the Shift key) - selects a range of people
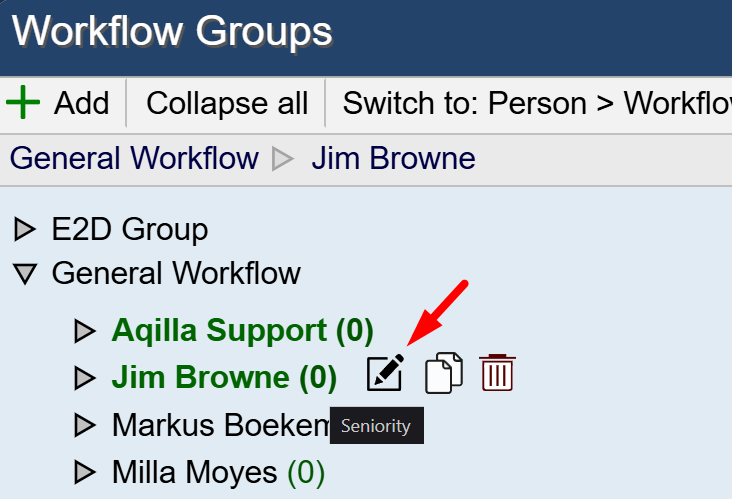
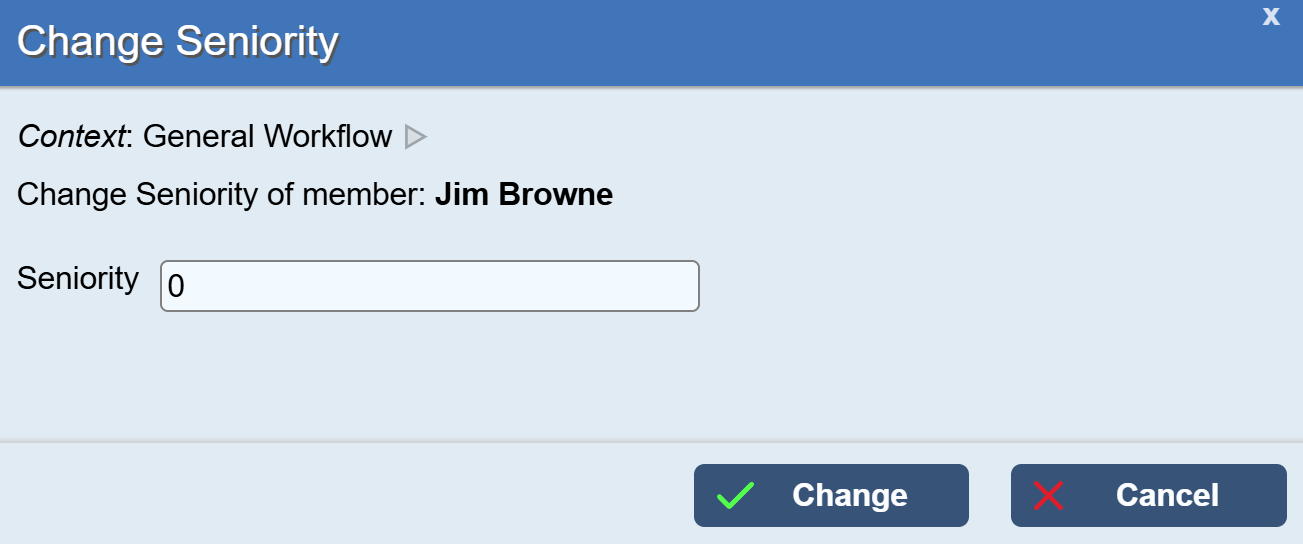
Seniority
You can edit a person's seniority or remove the person from the workflow group by hovering your pointer over the person's name and using these icons:
Using Seniority to Access Documents
A user can only approve documents (e.g. expense claims) pertaining to users with the same or lower seniority in the workflow group in question.
Seniority level 1 is considered low than Seniority level 5 in the workflow group.
A level 5 user can promote a level 1 user's document, but a level 1 user cannot promote level 5 user's document.
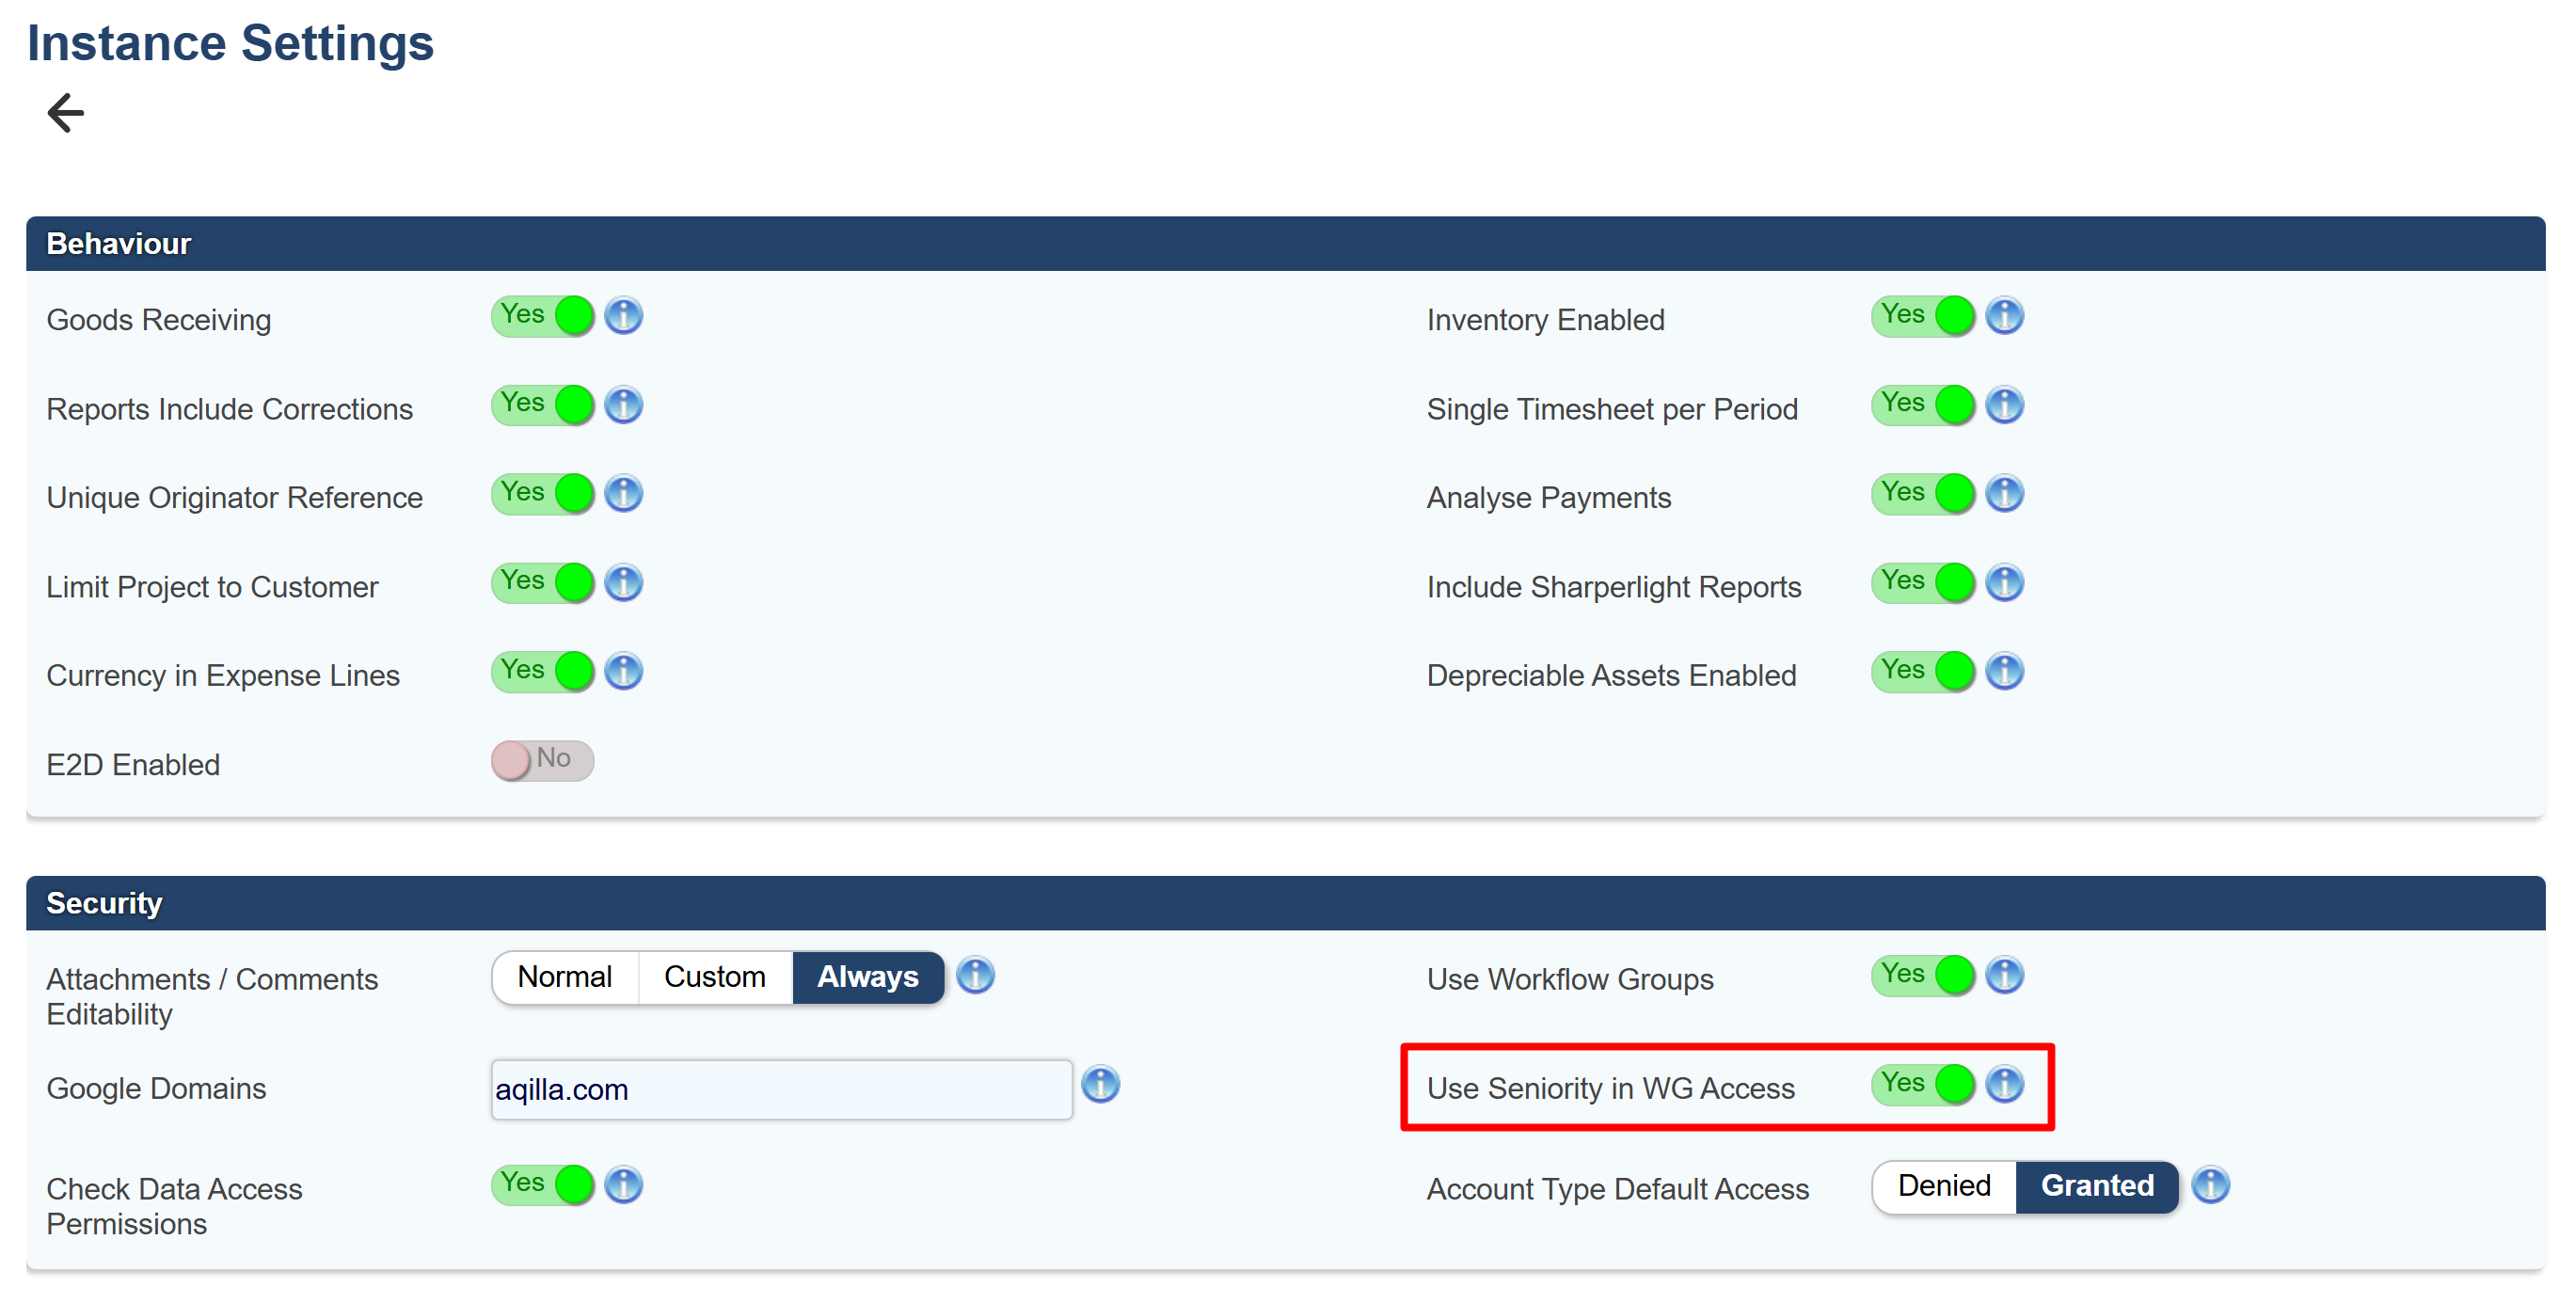
I f you wish to use seniority to limit a person's ability to see documents with higher seniority than the users. You need to enable this setting in Configuration -> Instance Settings. When it is on, the current user can only access documents owned by other users if their Seniority is not higher than the user’s
The setting is off by default.
Once you have created your group(s) and added group members you can then grant permissions with regards to workflows (i.e. documents). You do this by clicking on a person's name and then the workflow in question:
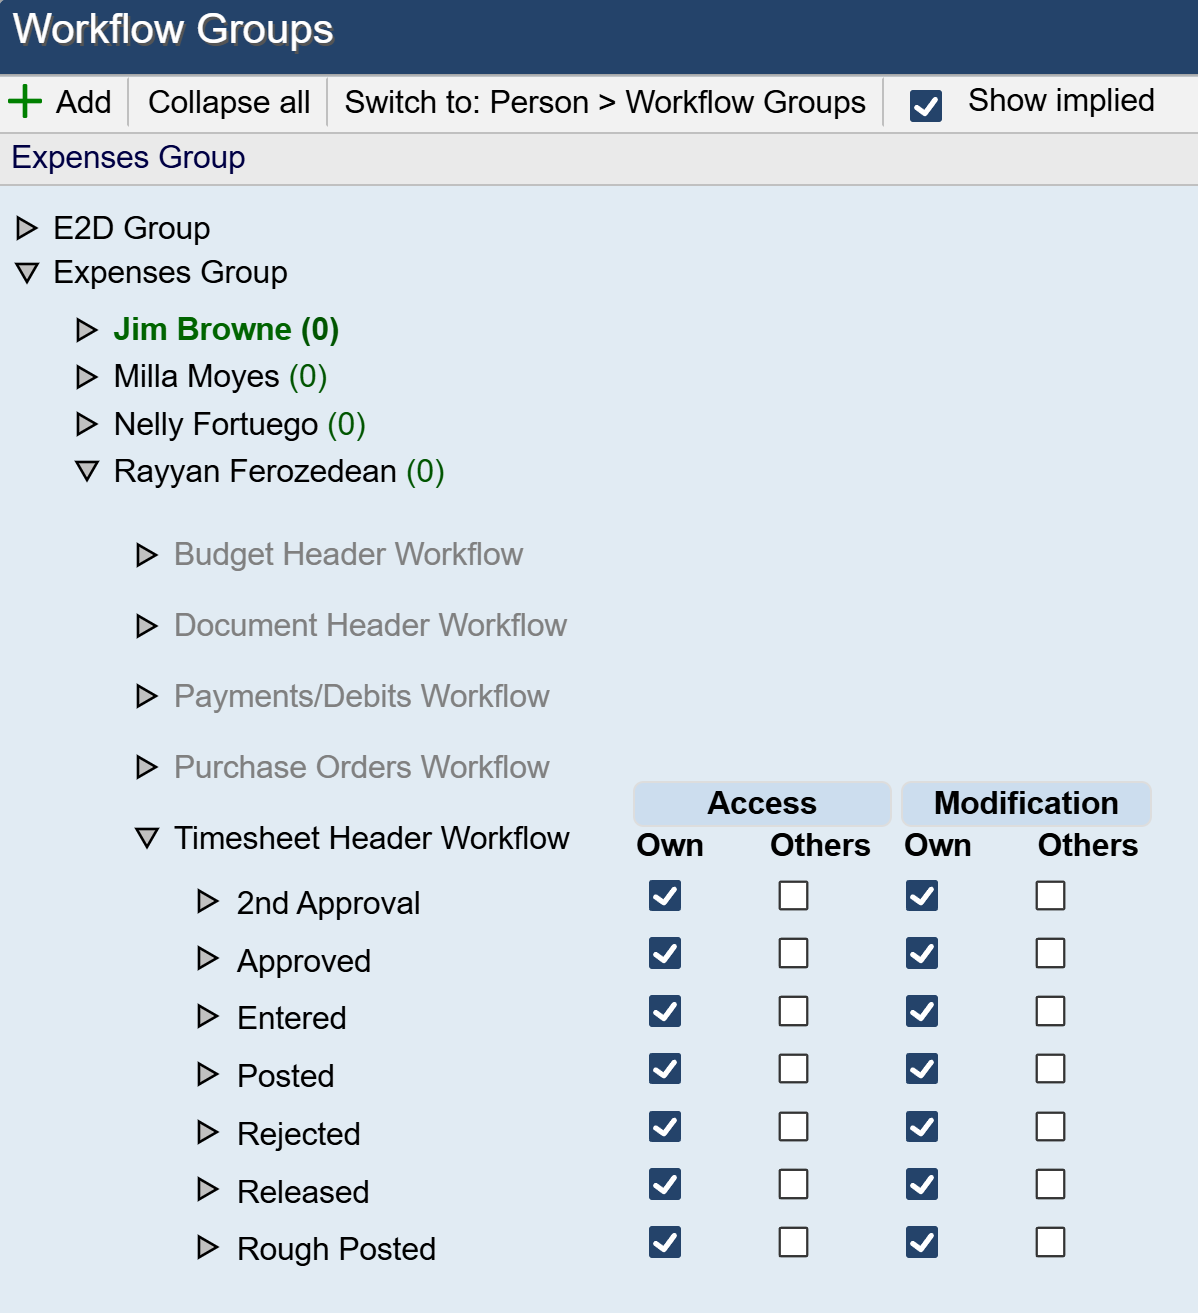
The above example shows the Timesheet Header workflow (note this is also used for expense claims). The ticked checkboxes determine Jim Browne's permissions to access and modify his own timesheets (or expense claims) and access and modify timesheets (or expense claims) pertaining to other members of the same group. You can drill down to transitions at each state that exists in the workflow by clicking on the state name (e.g. Released).
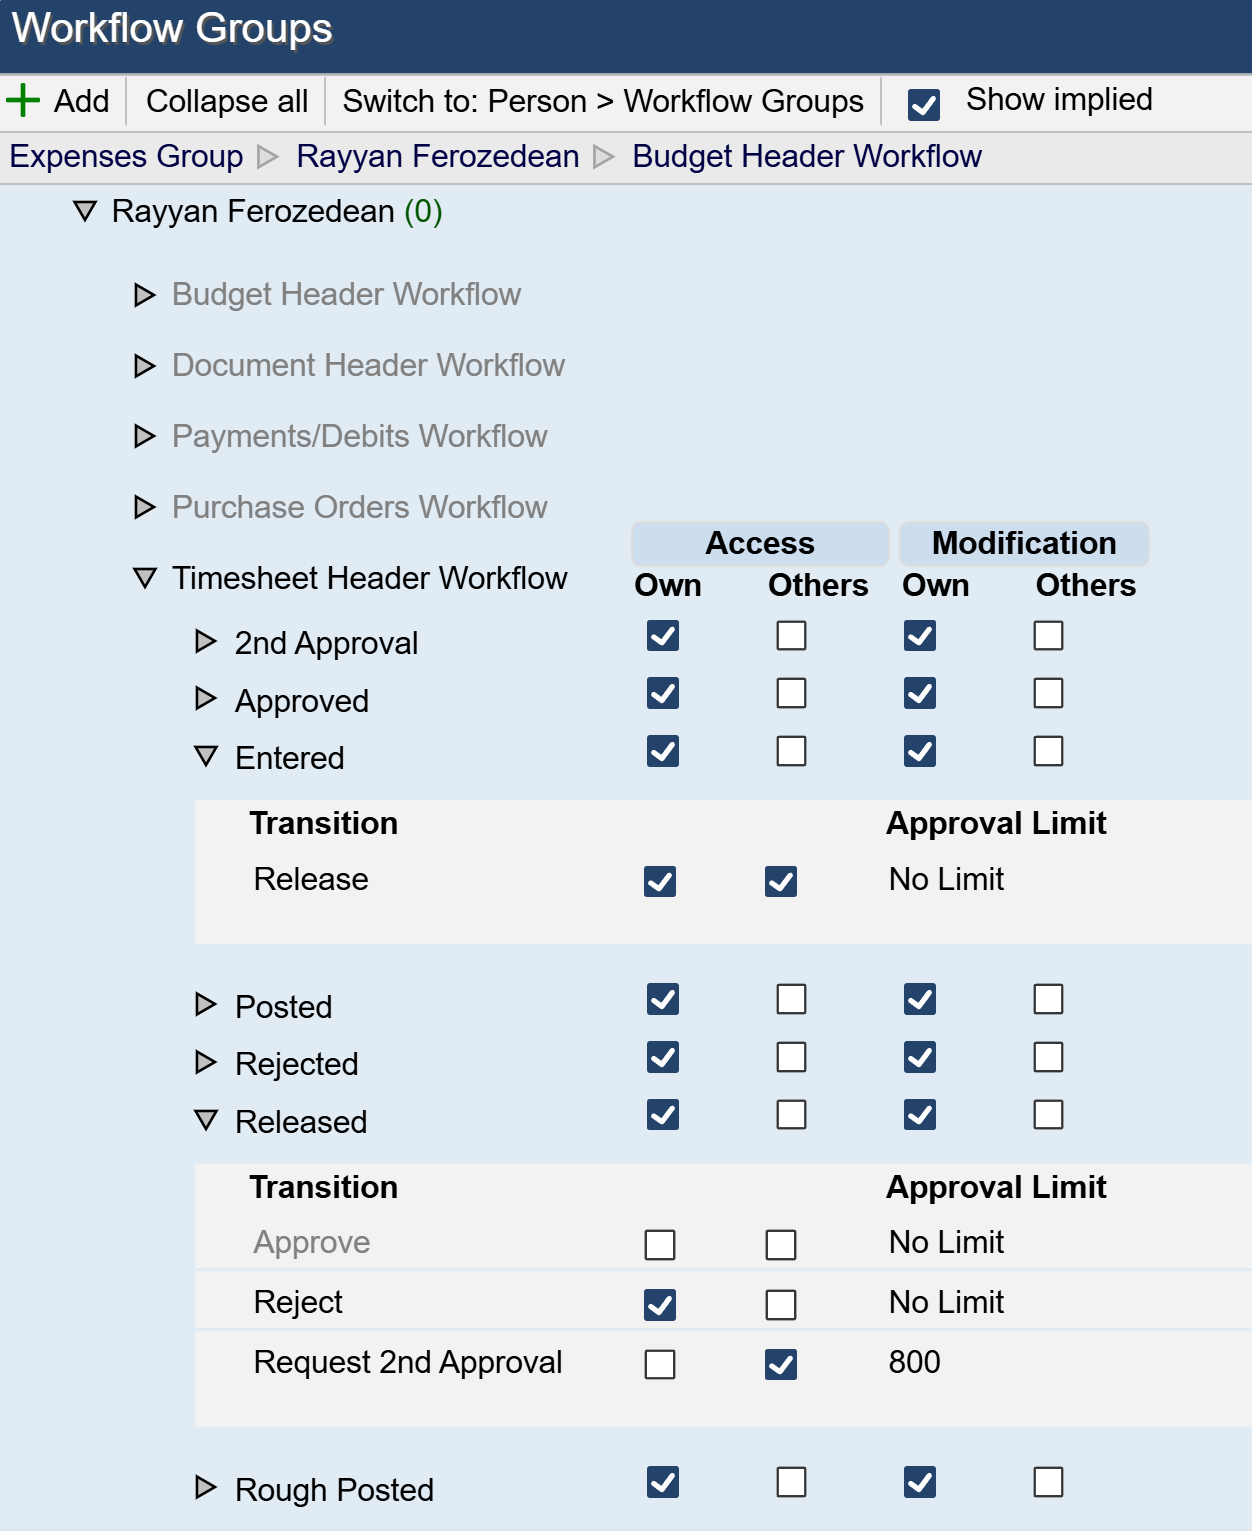
The above example shows that Jim Browne can reject or approve timesheets (or expense claims) for other people in the same group (up to 1,000 in base currency) but he cannot reject or approve his own timesheets (or expense claims).
Error Messages
As stated, people can be members of many workflow groups but they can only "own" a document in one group. In the example shown below, Jim Browne has been added to the Sales group (e.g. to act as an expense claim approver when the sales manager is not available) but he cannot Access Own at Entered state.

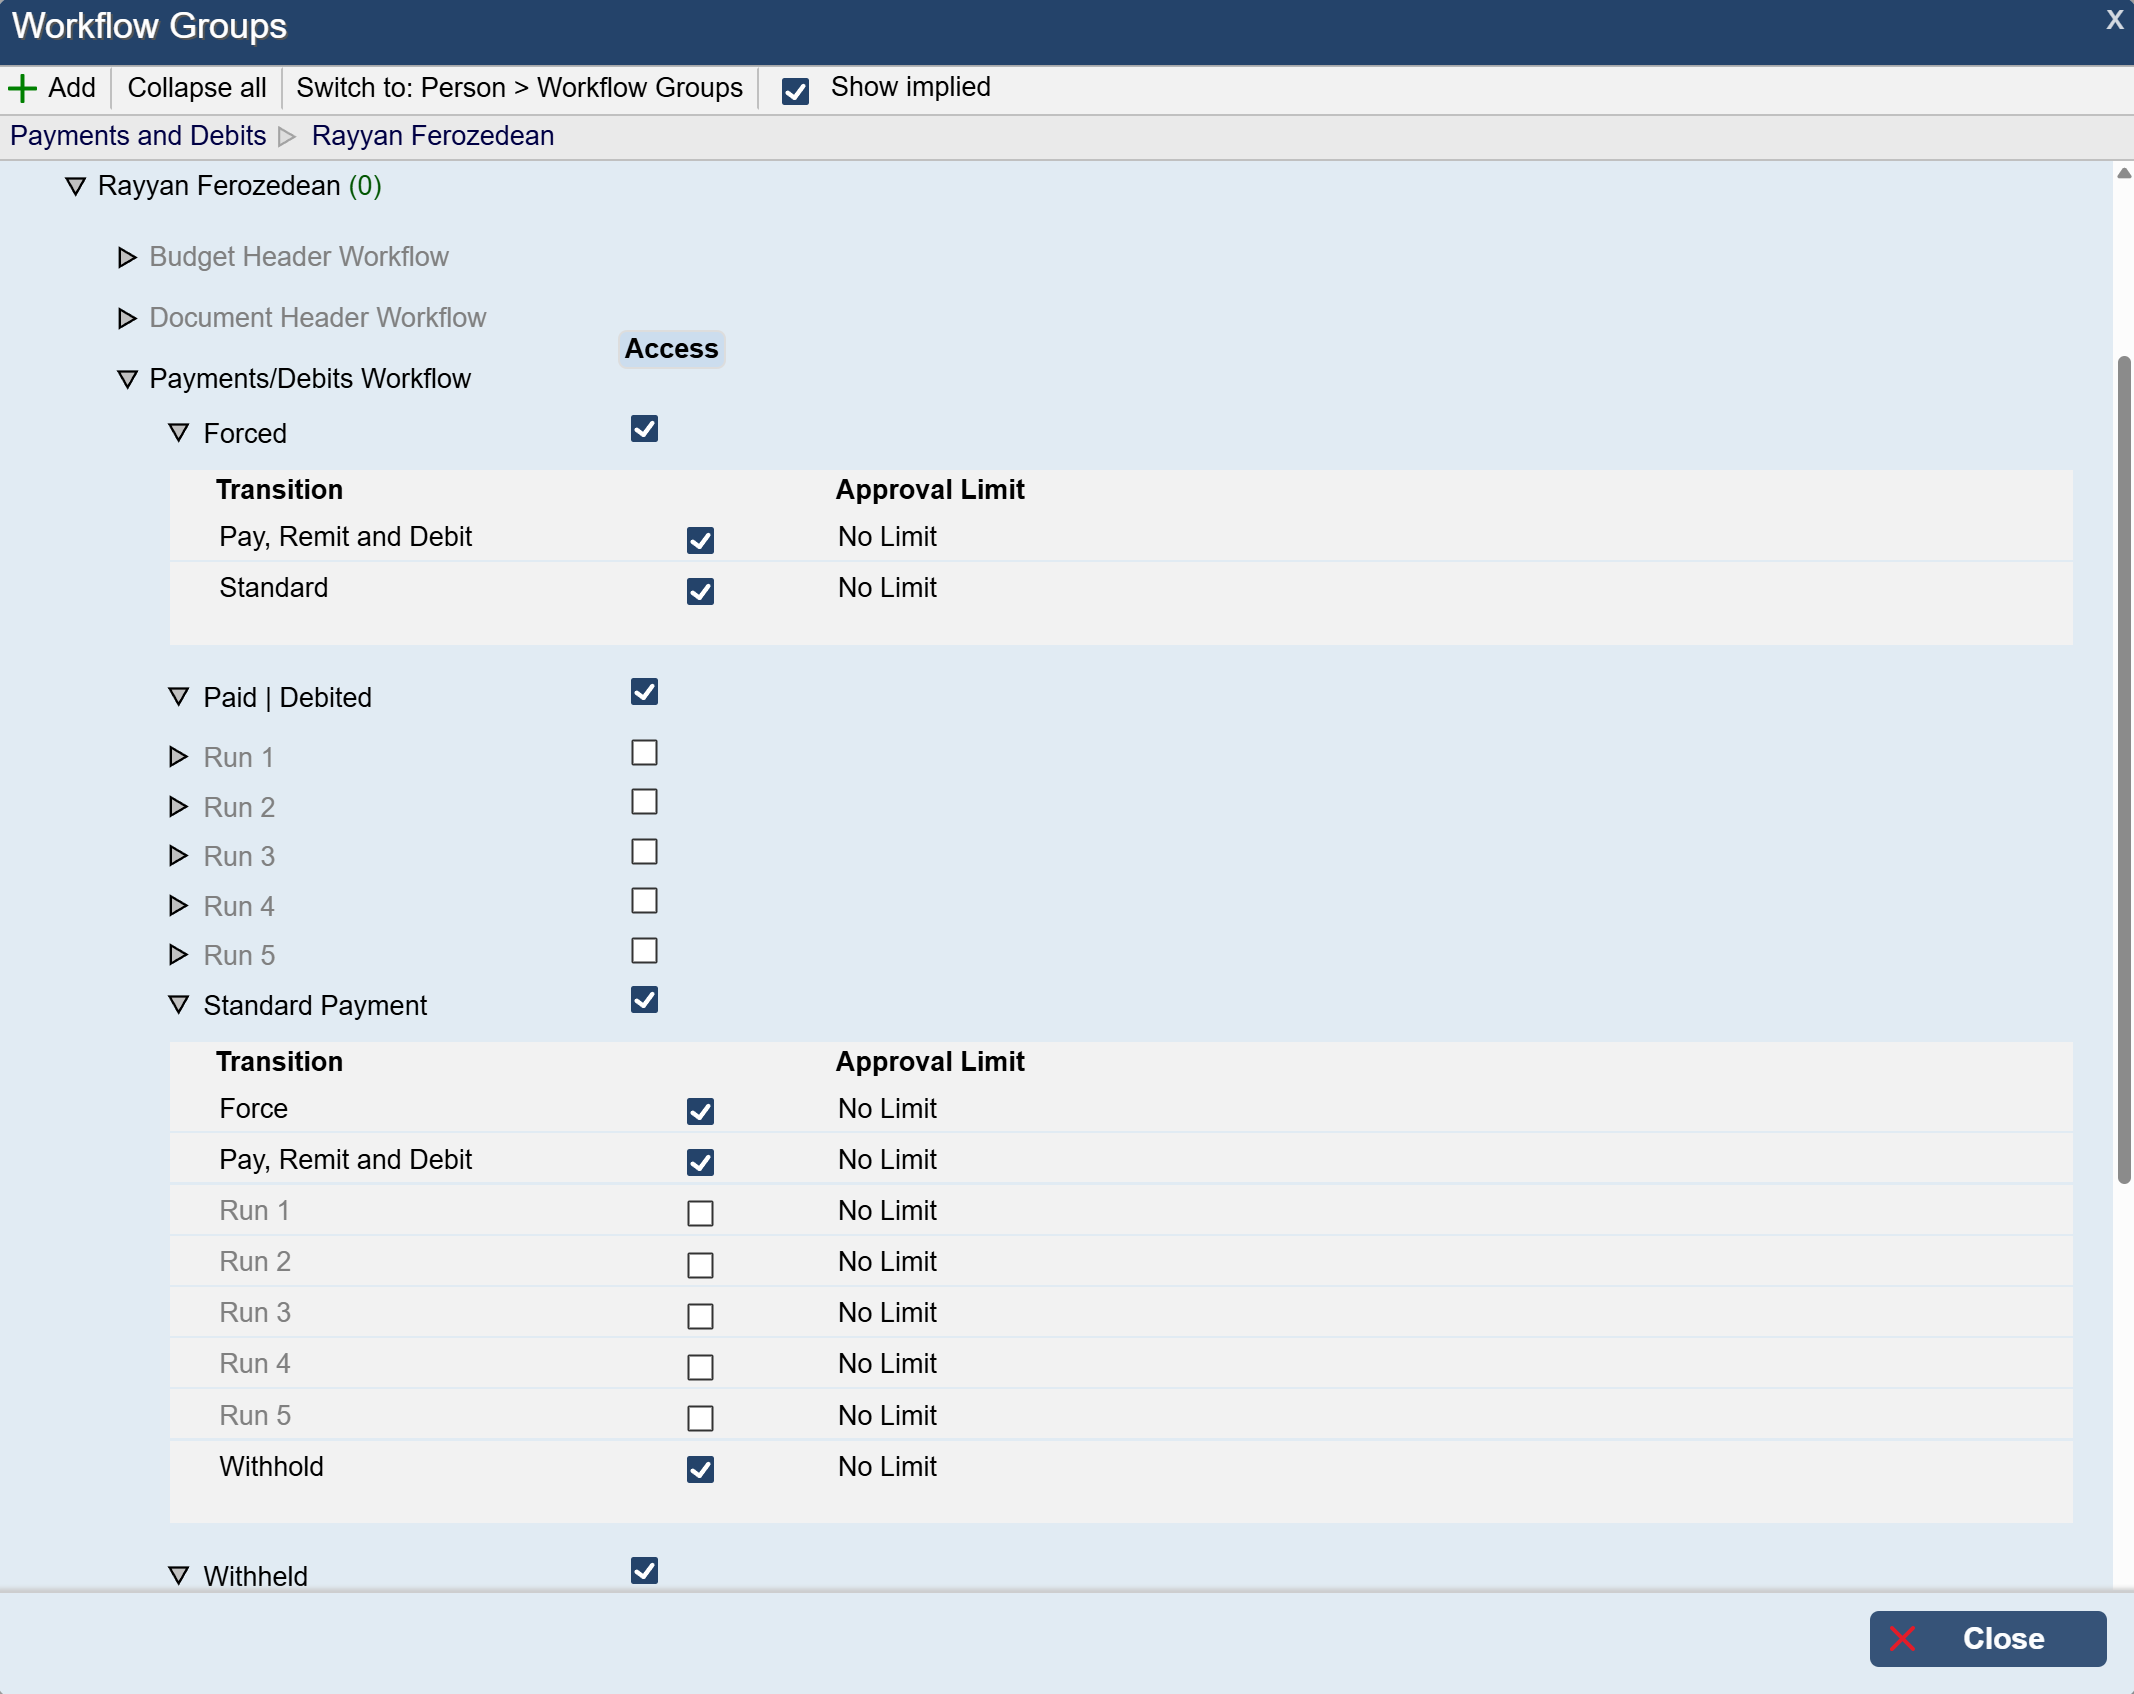
Payments and Debits
A new Workflow Group (Payments and Debits) has been created for the new Payment Profile.
These permissions may be tailored to refine individual’s permissions and utilise the additional payment states as required.
Pay (Pay or Pay & Remit) is only available within the Payments Process. The remaining transitions must be done in Payment Status (formally Transaction Status).
Clicking the box under Access will grant the user access to that Payment Method and Payment State (IE. Standard. Withheld and Forced).