Attribute Wizard
Attribute Wizard

This function is used to add additional attributes to document headers, document lines and reference data. Attributes added to document headers and / or lines can be optionally carried through to the ledger when a document is posted or rough-posted. Attributes created using the Attribute Wizard are available for analysis and selection purposes when running enquiries and reports; attributes can also be included in output documents.
You can use attributes created using the Attribute Wizard in Sharperlight reports but you will need to e-mail support@aqilla.com to request a restart of your Sharperlight service before new attributes become visible in Sharperlight Query.
Your Aqilla consultant can create sophisticated journal mapping rules using attributes created by the Attribute Wizard.
Against each document header, document line or reference data type - a.k.a. entity type - you can add the following:
Quantity | Type | Limits |
|---|---|---|
1 | Long Description | Up to 255 alphanumeric characters |
10 | Text | Up to 30 alphanumeric characters |
4 | Date | Valid date format like 27 Nov 2017 |
4 | Integer | -2147483648 to 2147483647 |
6 | Value | -999,999,999,999,999.999 to +999,999,999,999,999.999 |
Stages of the Attribute Wizard
There are four stages to the Attribute Wizard.
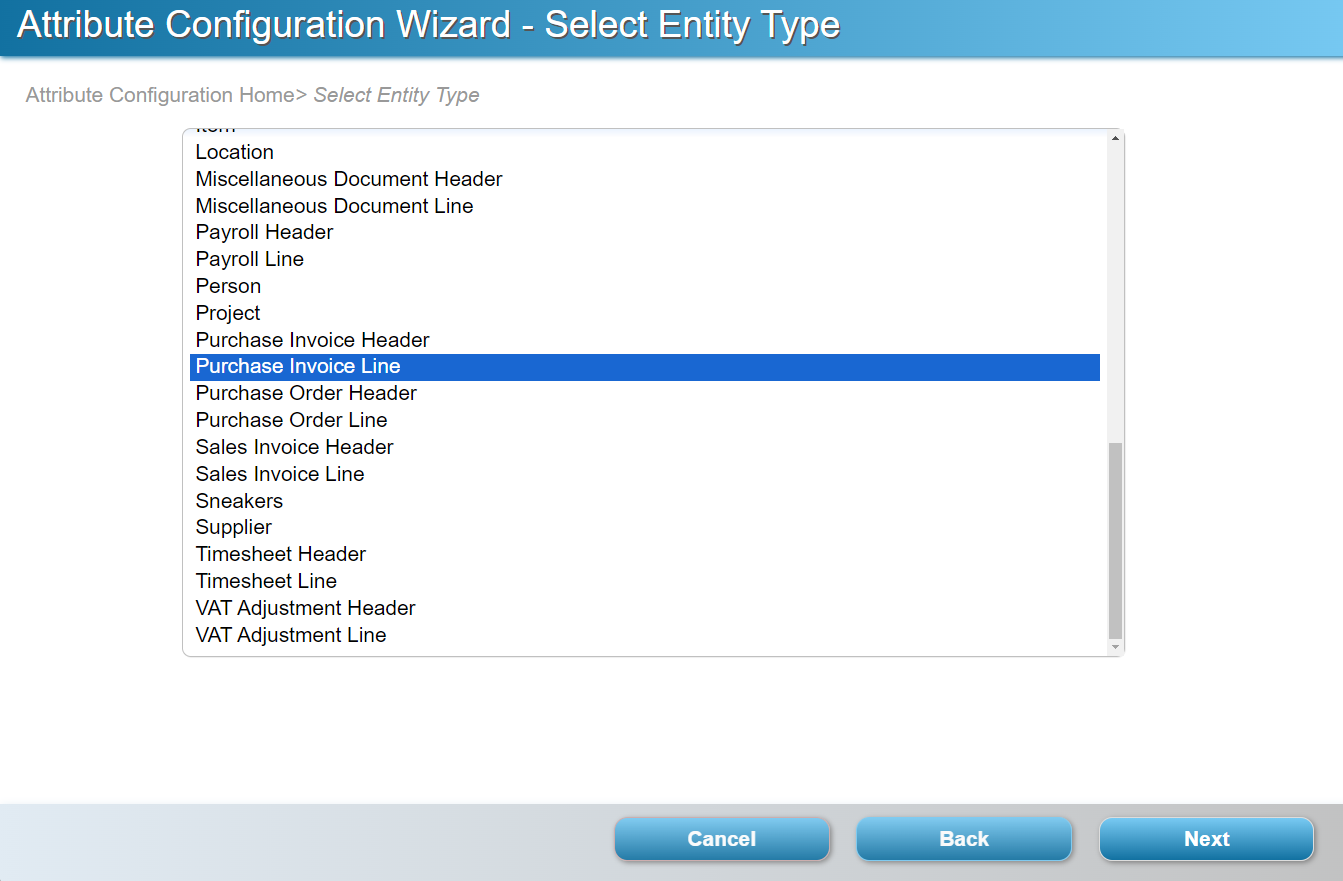
1. Select the entity type you want to work with:
Note that there are no specific entity types for certain documents (at both header and line level) as shown below:
Document Type | Uses Document Type |
|---|---|
Sales Credit Note | Sales Invoice |
Purchase Credit Note | Purchase Invoice |
Prepayment | Accrual |
If you apply a change that is not reflected in the "other" document contact support@aqilla.com, specify the instance you have changed and ask for the instance to be redeployed .
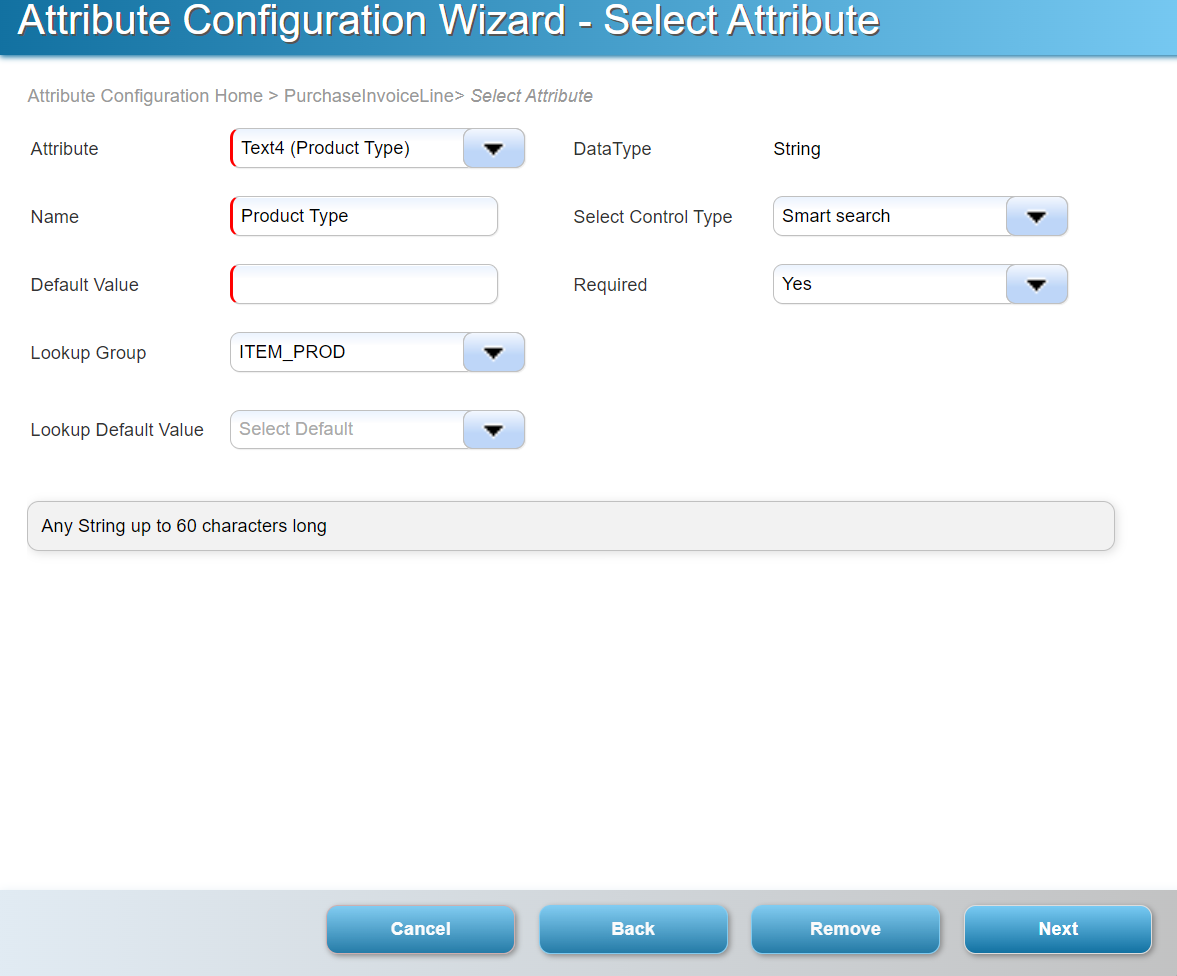
2. Select the attribute and set its properties:
Tip! If you are planning to use a lookup group create it at Reference > Lookup Values before you run the Attribute Wizard.
The fields for a Text or LongDescription attribute are described on the right:
Field | Description |
|---|---|
Attribute | Select an available attribute - attributes in use are highlighted thus . |
Data Type | The data type depends on the type of attribute you have selected. |
Name | An attribute name that is unique within the entity type. |
Select Control Type | Input, Combo, Assisted Input, Smart Search or Text Area - see Navigation > Data Entry. |
Required | Yes or No . |
Lookup Group | The lookup group used to populate a Combo attribute - see Reference > Lookup Values. |
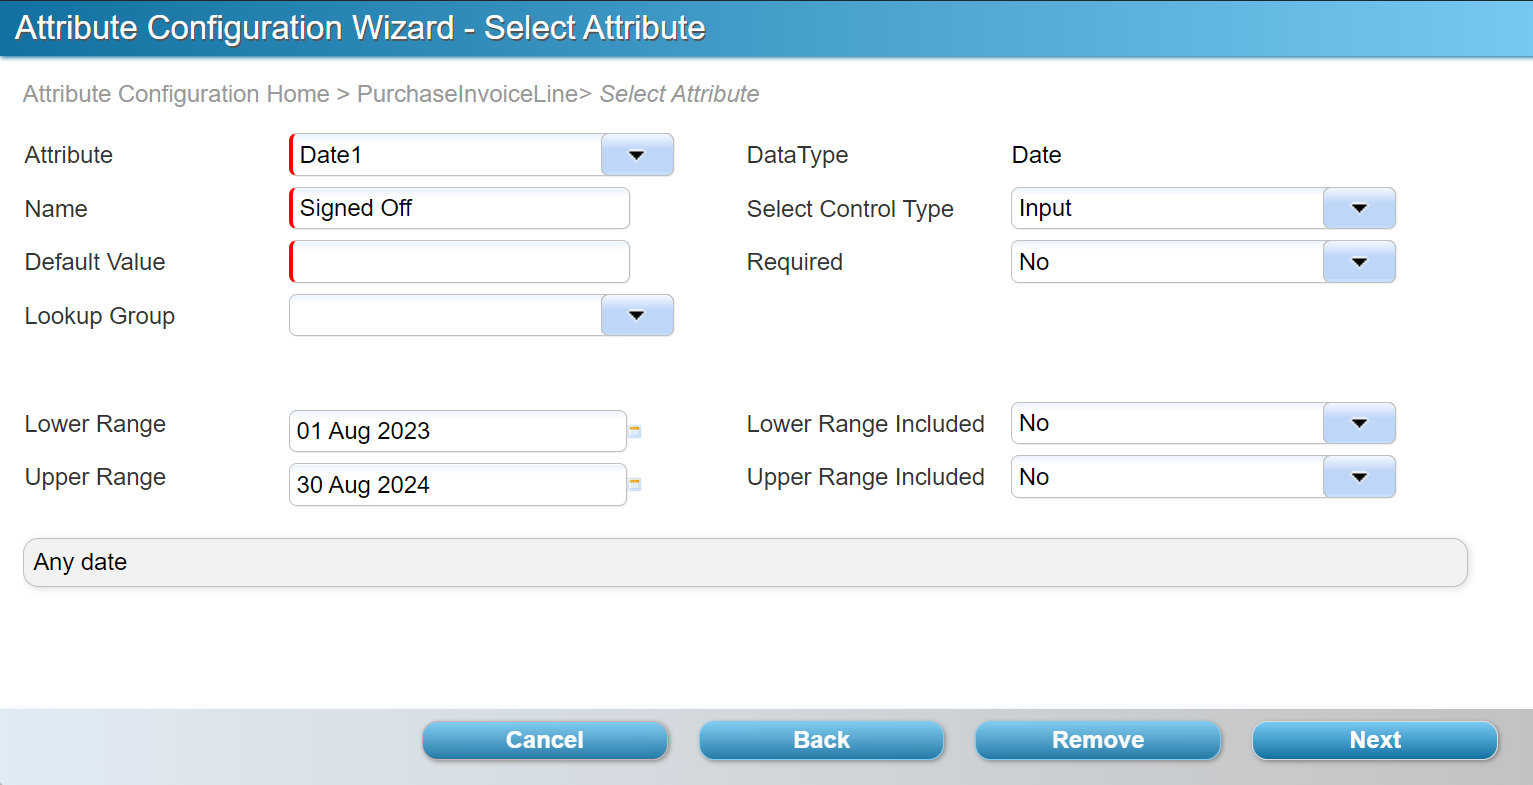
If you select a Date, Integer or Value attribute you will also be asked to specify upper and lower limits as shown on the right:
You will be prevented from using a value (in this case a date in 2017) that is not within the range - but note that in this example you are not required to enter a date.
If you choose a Date attribute you always get a date-picker control.
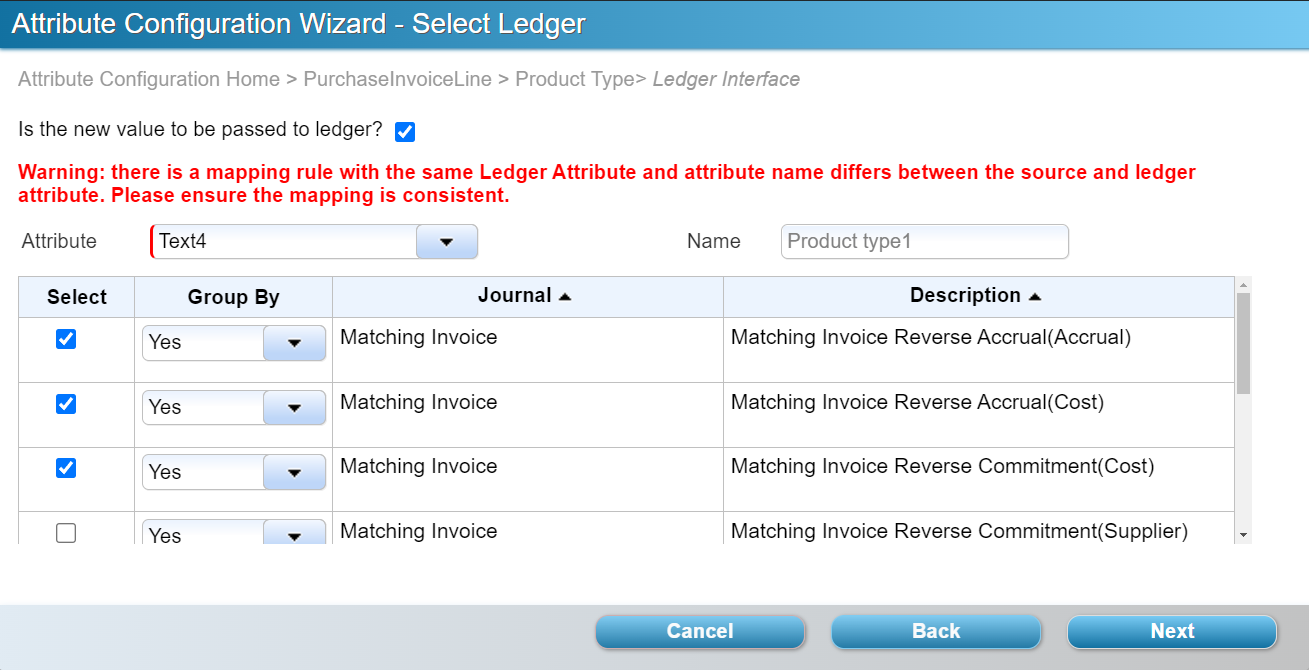
3. Map to the Ledger
This stage is optional and only applies to attributes attached to document header and/or document line. You may wish to carry such an analysis through to your ledger. This is achieved in stage three of the Attribute Wizard thus:
Note that the attribute on the ledger does not need to have the same name as the attribute on the document - and also that document Text1 (say) can map to ledger Text4 (say).
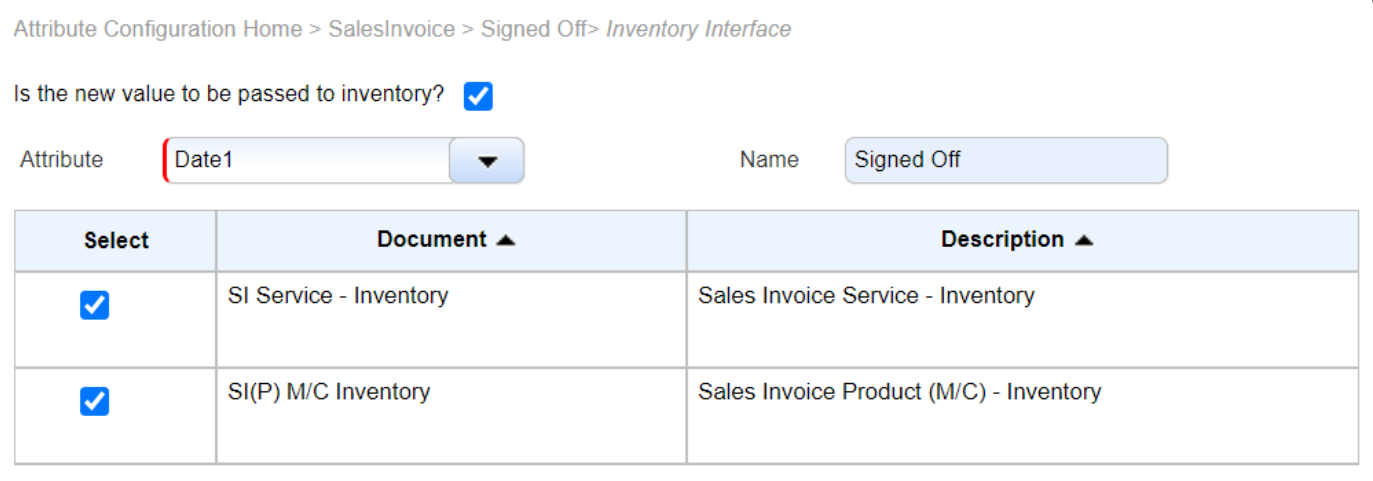
4. Map to Inventory
This stage is optional and only applies to attributes attached to the document header and / or document line. You may wish to carry this analysis through to your inventory. This is achieved in stage four of the Attribute Wizard thus: