
This guide explains how to register your Email Domain with Aqilla via Amazon Web Services (AWS). This is a more advanced setup than a standard "Reply Email" registration and is specifically designed to prevent emails from being rejected by strict security protocols (like SPF, DKIM, and DMARC).
Why is this necessary?
When Aqilla sends an email on your behalf (e.g. invoices@yourcompany.com), the recipient’s mail server checks if Aqilla’s IP address is authorised to send mail for your domain. If it isn't, the email may be flagged as spam or rejected entirely, and you or your recipients will experience failed outbound bounce back emails.
By registering your domain, you officially authorise Aqilla’s servers, ensuring high deliverability and professional "sent from" branding.
Important Information:
-
Initial Setup: Included free of charge.
-
Subsequent Changes: Any future changes to the registered domain or email address are charged at a standard 1-hour consultancy rate.
-
The 72 Hour Verification Window
Once these record are generated by Aqilla Support, your IT team generally has a 72-hour window to apply them before the AWS request expires.We recommend starting this process on a Monday/Tuesday to avoid weekend delays.
Step by Step Process
Step 1: Initial Email Verification
Before we can verify the whole domain, the specific "Reply To" email must be active in Aqilla.
-
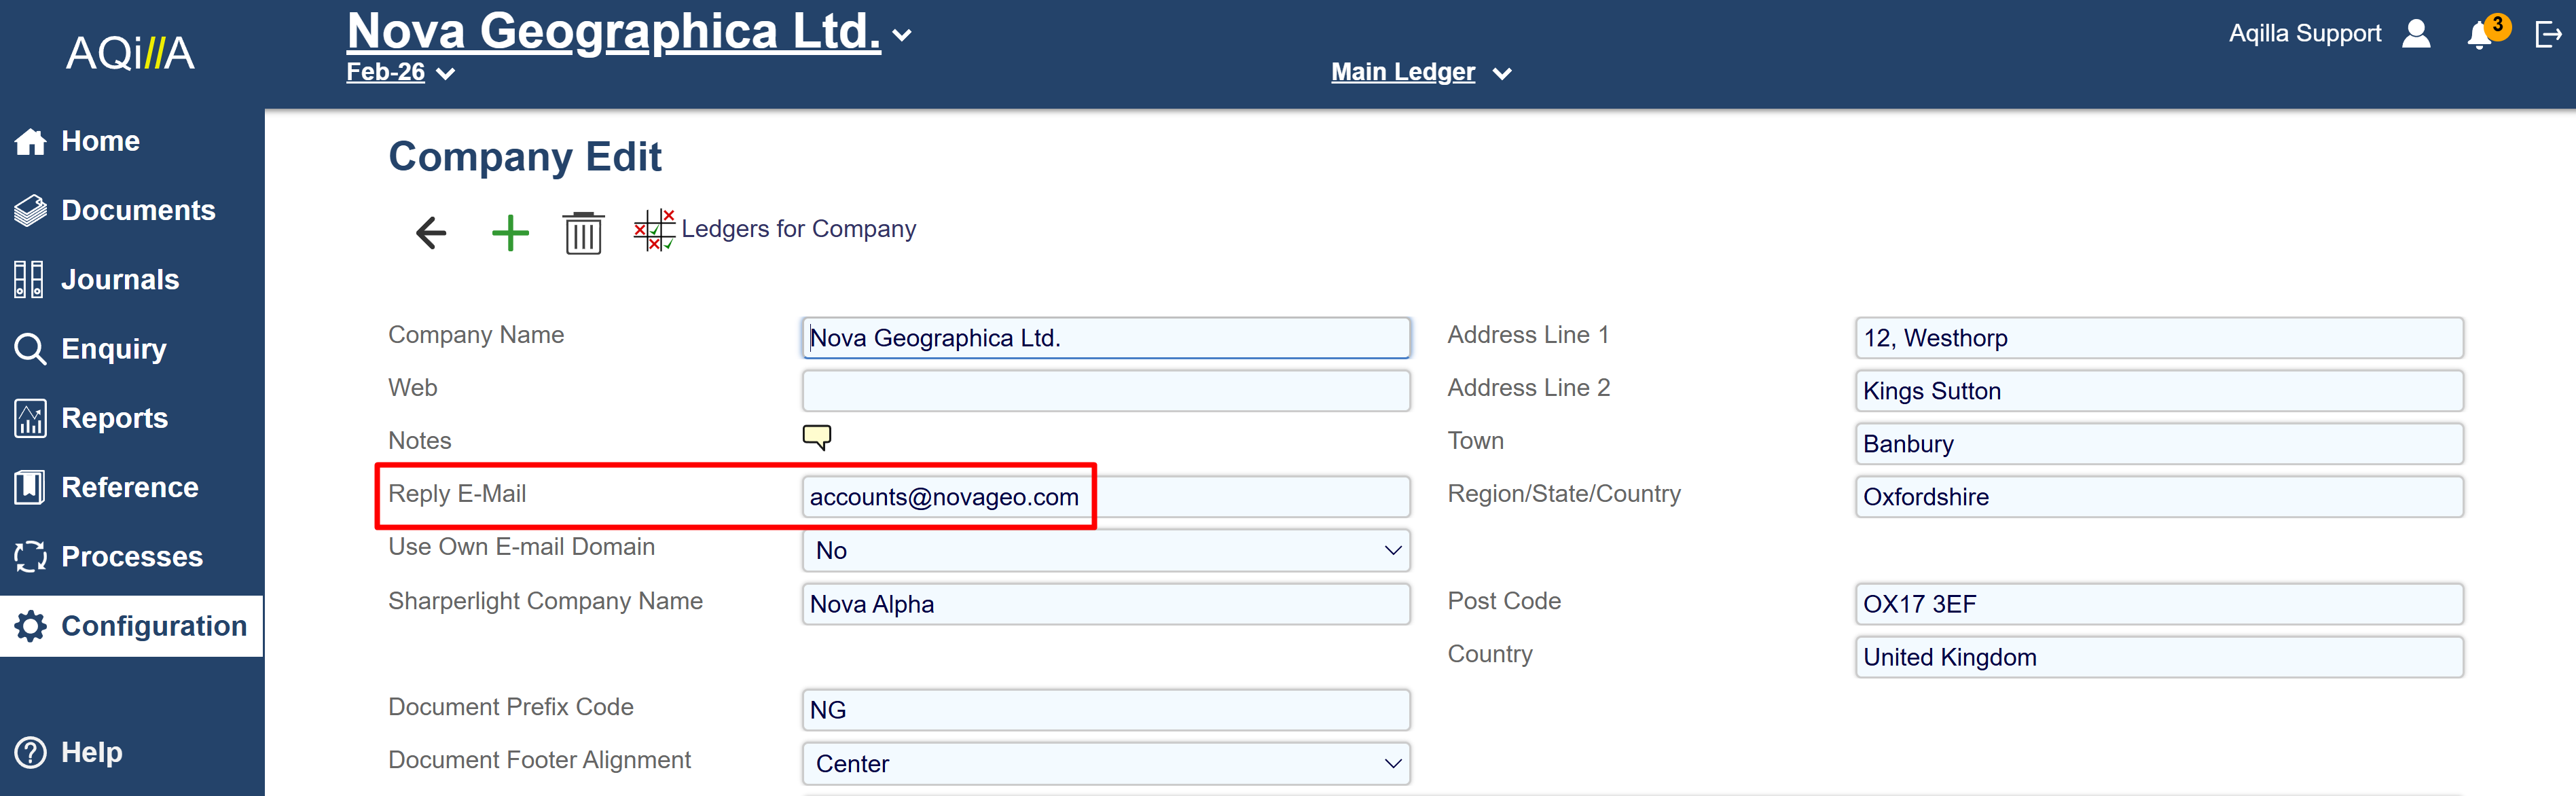
Go to Configuration > Companies > Company Edit.
-
Ensure your chosen business email is in the Reply E-Mail field.
-
Notify support@aqilla.com to trigger the initial AWS verification email.
-
Action: Click the verification link sent to that inbox by Amazon Web Services.
If you haven’t registered your Reply Email, visit https://aqillakb.atlassian.net/wiki/x/AoCMGgE to set it up before configuring the domain.
Step 2: Choose a Subdomain
To maintain a clean reputation for your main domain, we use a "Mail From" subdomain (e.g., mailer.yourcompany.com).
-
Action: Confirm with your IT team what subdomain prefix you would like to use (default is usually
mailer). -
Result: Your emails will technically be sent via
invoices@mailer.yourcompany.combut will appear to users as your standard address.
Step 3: DNS Record Implementation (Critical)
Once Aqilla Support creates the "Domain Identity" in AWS, we will provide you with a set of DNS records. Your IT/Infrastructure team must add these to your Domain Provider (e.g., GoDaddy, Cloudflare, Route53).
You will receive three types of records:
-
CNAME (DKIM): Three records that "sign" your emails to prove they haven't been tampered with.
-
MX & TXT (SPF): Records that authorize AWS/Aqilla to send mail on your behalf.
-
DMARC: A TXT record that tells receiving servers how to handle emails that claim to be from you.
IMPORTANT: The 72 Hour Window
Once these record are generated by Aqilla Support, your IT team generally has a 72-hour window to apply them before the AWS request expires.
We recommend starting this process on a Monday/Tuesday to avoid weekend delays.
Step 4: Final Activation
-
Once your IT team has updated the DNS records, notify Aqilla Support.
-
We will verify the status in the AWS Console.
-
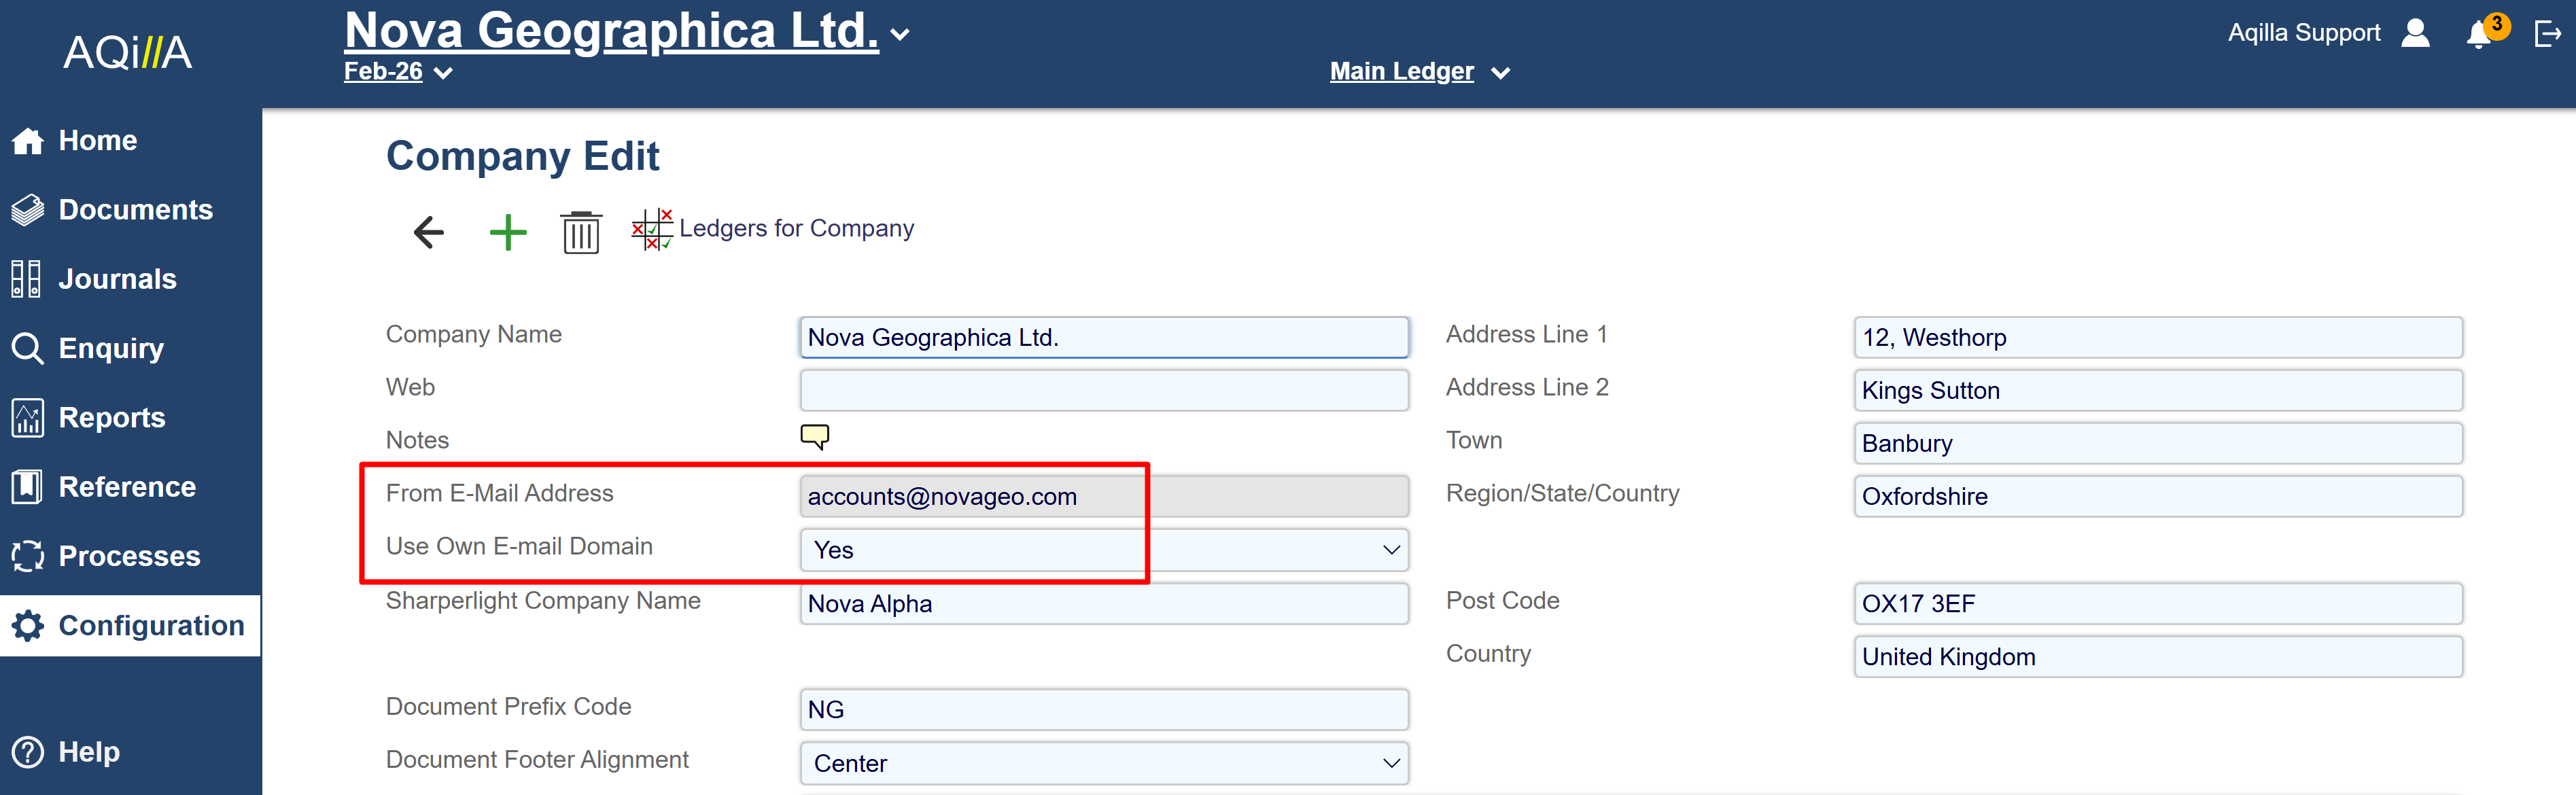
Support will then set Use Own E-mail Domain to Yes in your instance.
-
The email address is now "Locked," and your custom domain setup is live.
Information for your IT Team
If your IT team requires our specific sending IP addresses for whitelisting, contact Aqilla Support and they can provide the details.
Standard SPF Include:
If you already have an SPF record, simply add include:amazonses.com to your existing record rather than creating a new one.