Upload New Documents
When you first connect to Aqilla through the add-in, a number of default settings are established. These are:
Instance
Company
Ledger
Posting Period
These are displayed in the status line at the bottom of the workbook and will be the default choice, unless otherwise specified in the document.

Creating a document in Excel
Uploading a new document starts with the document coloumn labels
Add the headers of the document. e.g. Sales Invoices (Services)
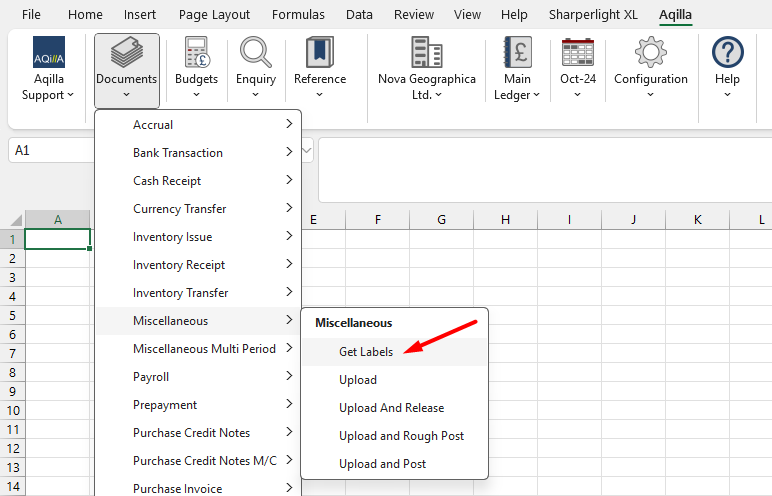
Select a cell in the worksheet (usually A:1) then select the Add-in menu option Documents > Sales Invoice (Services) > Get Labels to add the column labels of Sales Invoice Service.
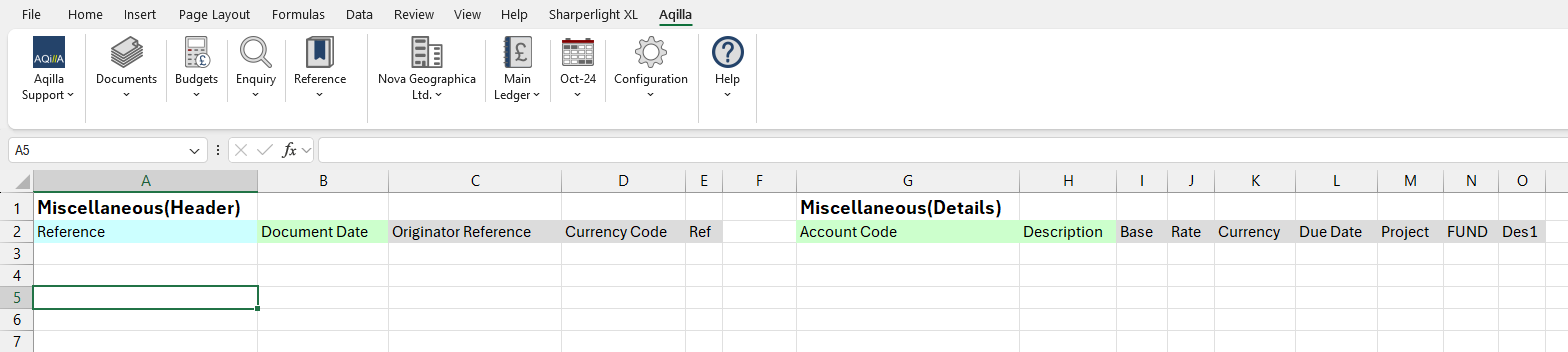
After selecting Get Labels the add-in will populate the worksheet with the document headers and details.
The document labels are divided into two sections. The Header section and the Details section.
The fields relating to the sales invoice header are displayed on the left of the worksheet and the fields relating to the sales invoice detail lines on the right.
Columns with a green background are mandatory, columns with a grey background are optional and columns with a blue background are updated by the server when the document has been added to Aqilla.
The exact columns displayed will depend on the configuration of your instance.
One line in the Header section will create one document, and similarly, one row in the Details section will create one document line.

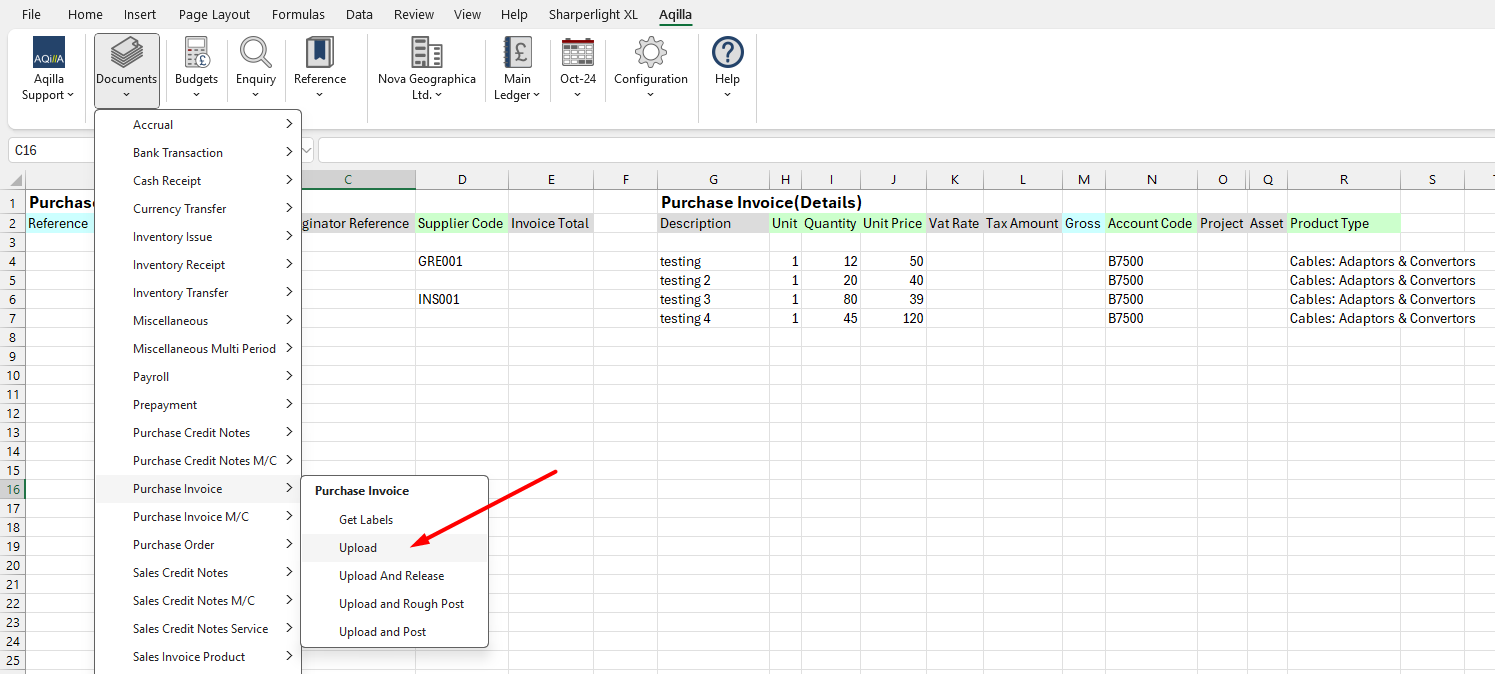
The screenshot to the right shows how to create two Purchase Invoices with two Document Header lines each.

Uploading a document
To upload a document, select ALL rows and columns that you wish to upload and go to the Aqilla Ribbon > Document > Upload
You can choose the following three options
Upload
Adds a document as Entered
Upload and Rough-post
Adds a document and rough-posts it
Upload and Post
Adds a document and Posts it
Uploading Documents to Multiple Companies and Ledgers and Specifying Posting Period
If you have multiple companies in a single instance (see Multi-Company Accounting) you may wish to upload documents to more than one company at once (e.g. an intercompany journal). You may also wish to post to more than one ledger at once. If you use the Add & Post option you may also want to post into different periods from the same upload. Aqilla allows optional parameters to be specified in the blank column between header and details sections, thus:
Multiple Instance / Inter-Company Transactions

In the example above, the worksheet contains four Miscellaneous documents that are to be added to four separate companies and posted to period Feb-19. These four documents may be selected as a single upload and posted in one go.
Note that the parameter names and associated values are case sensitive. The parameter values may be surrounded by double quotes; this is essential if the values contain separators such as “,” or “:”. The posting period is specified by the name of the period, which must be open for posting. The following examples illustrate the syntax:
company:Nova Geographica, ledger:Budget Ledger,postingPeriod:Mar-19
Example of selecting a specific instance and two different companies
Specifying the instance is similar to companies and ledgers.

Multi Instance, Company, Ledger, Posted Period Syntax:
Instance:InstanceName,company:CompanyName,ledger:LedgerName,postingPeriod:Jan23
If a parameter is specified it will overwrite selections made when configuring the connection.
The postingPeriod parameter will only be used if you use Add & Post Document It will be ignored if you simply use Add Document.
Enhanced handling of uploading documents.
Previous versions of the Aqilla add-in uploaded all the selected documents as a single batch. If the batch contained a large number of documents, the processing time could be extensive and could potentially lock out other processes.
This enhanced version of the add-in fully processes each document in the selected batch one-by-one.
One consequence of processing each document individually is that errors might not be as obvious as the previous method of processing. In order to overcome this, some additional User Settings have been included to control how errors are handled.
User Settings
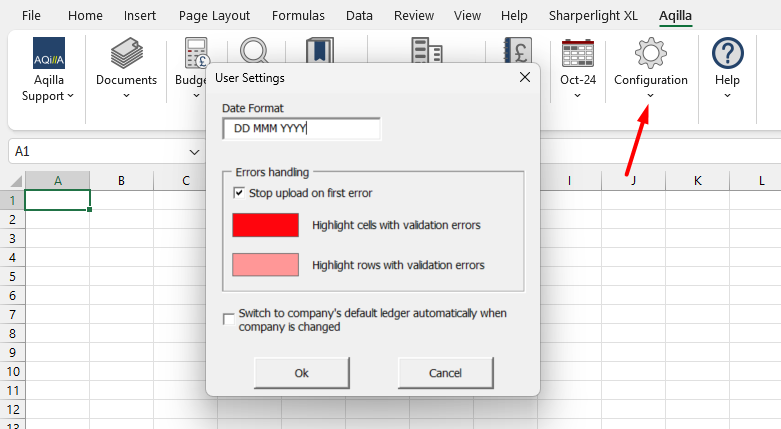
Stop upload on first error.
If this option is checked the upload process will stop when the first error is encountered. All documents prior to this error will have been fully processed and the line in error will be highlighted. The user may then correct the error and restart the upload process from the point where error occurred by selecting the rows and columns from the point it stopped.
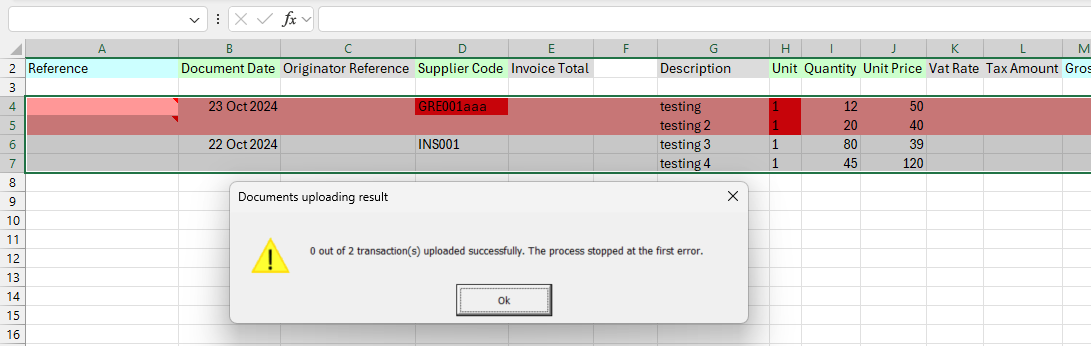
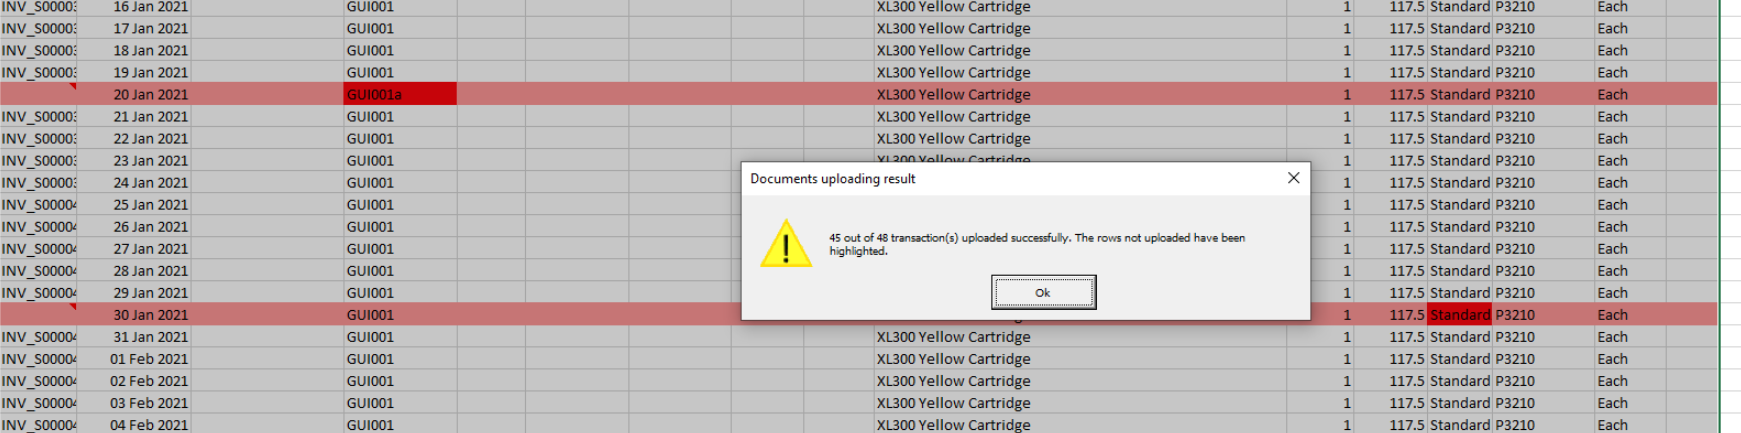
If the option is not checked, the upload process will continue through all the selected documents, highlighting any documents in error. Once the upload process has completed, all the documents that had no errors will have been fully processed and the user should correct any documents in error. In this case, it may be simplest to correct each line in error and upload each corrected document one-by-one.
When an error is identified, the row and cell are highlighted and as normal a comment in the first column identifies the cause of the error. The default colours are red, but these may be changed in the User Settings.
Download the latest version of the Aqilla add-in to take advantage of this new functionality. Details of how to install the Aqilla add-in can be found in the Aqilla Help at the following link: Install Aqilla MS Excel Add-in