Personnel
Personnel
The Person Edit view is used to maintain details about a person in your organisation. Some people may also be Aqilla users. Please consider that distinction when reading this topic.
Please note that Aqilla policy is that we will not maintain users on your behalf in order to protect your organisation's security.
User Creation Guide
https://youtu.be/v1PMX5WrgWIPerson Edit Fields
A sample Person Edit view - excluding Contacts - is shown below:
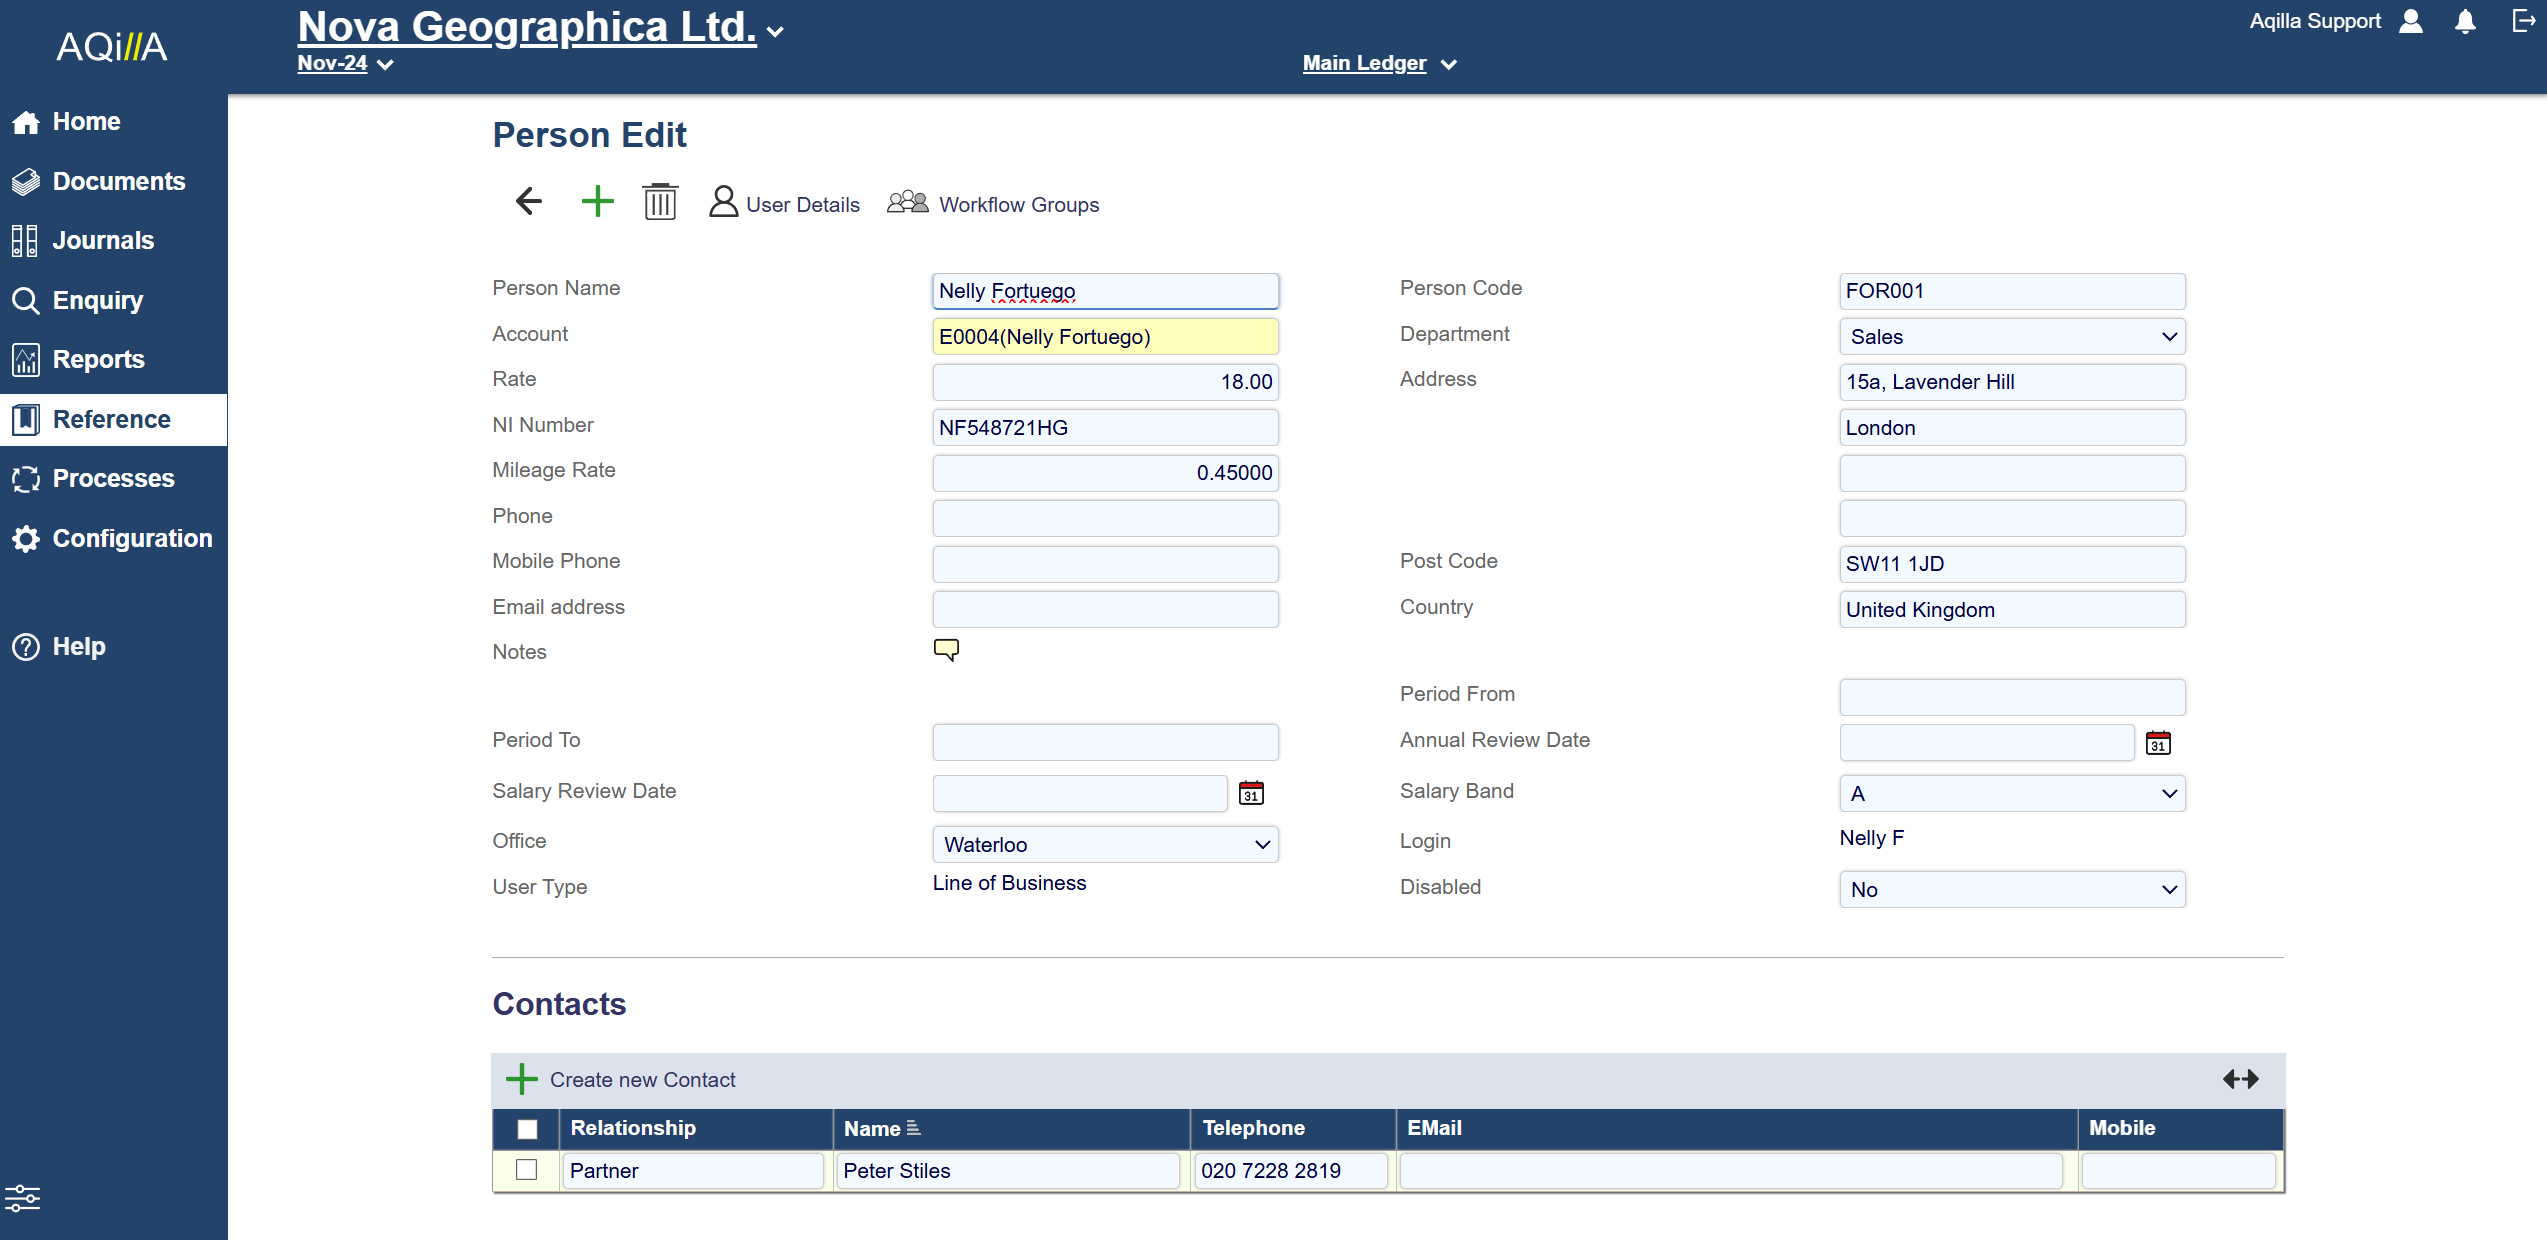
Each field on this record is described below. Mandatory fields are highlighted thus.
Field Name | Description |
|---|---|
Person Name | The person name is alphanumeric (60 characters max) and must be unique within the instance. |
Person Code | The person code is alphanumeric (30 characters max) and must be unique within the instance. |
Account | The creditor account at Reference > Creditor Accounts that is used to pay the person's expenses. |
Rate | The default hourly rate used to calculate timesheet charges; see Documents > Timesheets. |
Address (1) | The person's address; line 1. |
NI Number | The person's national insurance number. |
Address (2) | The person's address; line 2. |
Mileage Rate | The person's mileage rate used in calculating travel expenses - format is 99.99999 |
Address (3) | The person's address; line 3. |
Phone | The person's phone number (e.g. landline). |
Address (4) | The person's address; line 4. |
Mobile Phone | The person's mobile phone number. |
Post Code | The person's post code. |
E-mail Address | The person's e-mail address. Mandatory when creating or updating a record. |
Country | The person's country. |
Notes | Notes about the person - see Navigation > Notes. |
Period From | Determines the periods into which the person (if a user) can post relative to System Current Period - e.g. -1 (blank = no limit) |
Period To | Determines the periods into which the person (if a user) can post relative to System Current Period - e.g. +3 (blank = no limit) |
Contacts

You can store any number of contacts against a person. Contacts are often used to record the next of kin information. A sample list of contacts is shown below and the fields are all self-explanatory.
User Details
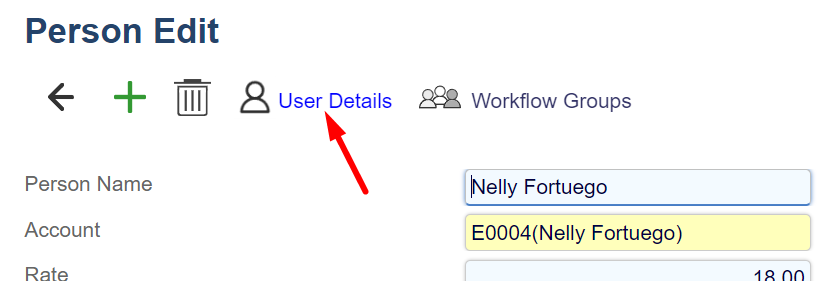
To convert a person into a user click on the User Details icon:
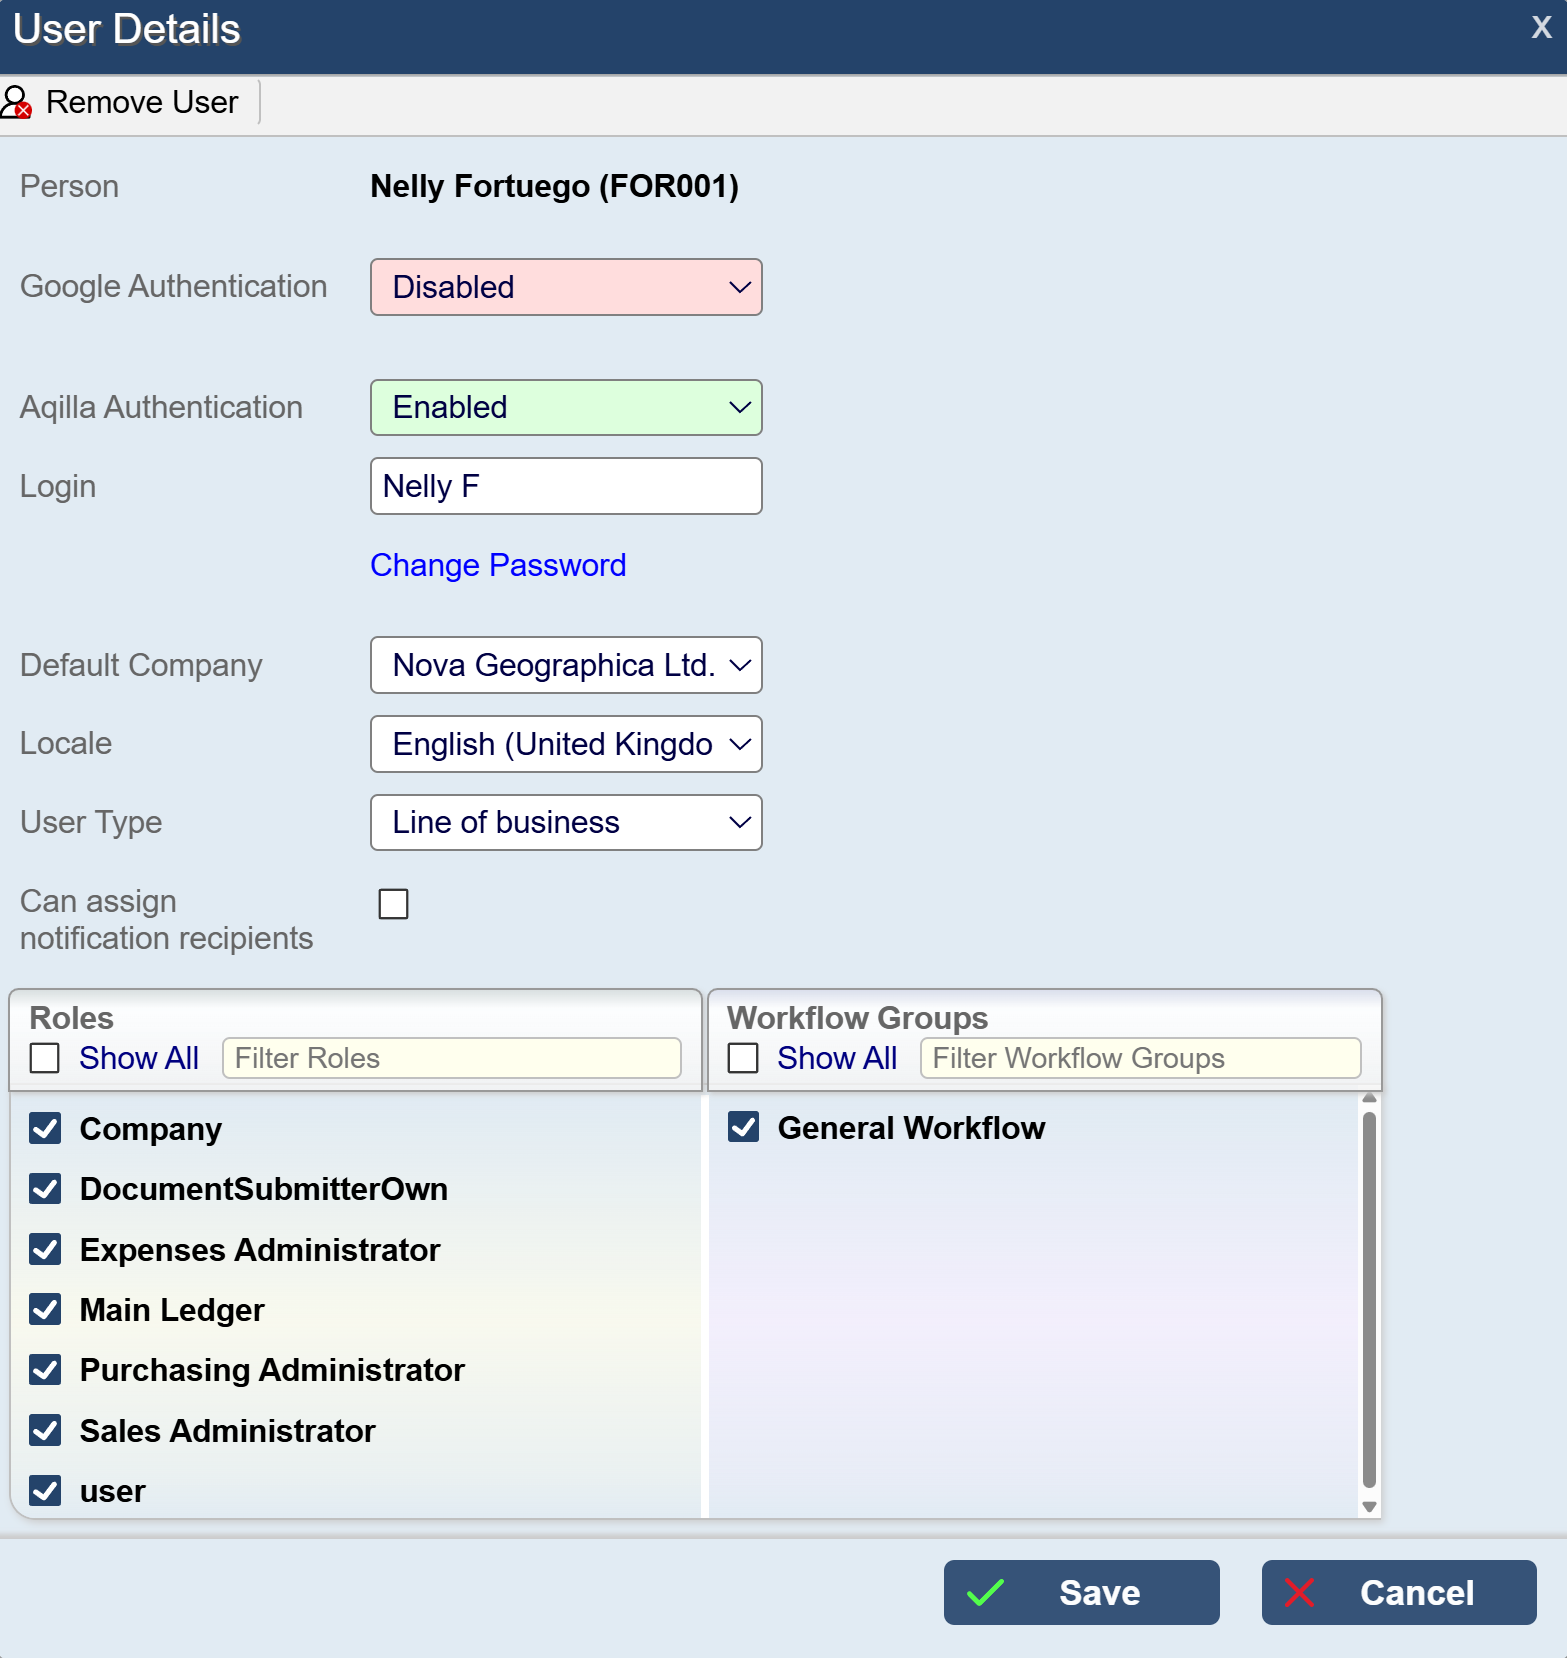
This will open a new dialogue as shown below:
The User Details dialogue is intuitive with helpful error messages and it will not be described in detail here, but note the following:
The first time you convert a person to a user you have the option to copy from an existing user.
Copy From will copy the roles and workflow groups to the new user.
You can set the Default company and Locale for the user.
The user must still have a role that grants access to their default company.
Locale will change the language on the users Aqilla.
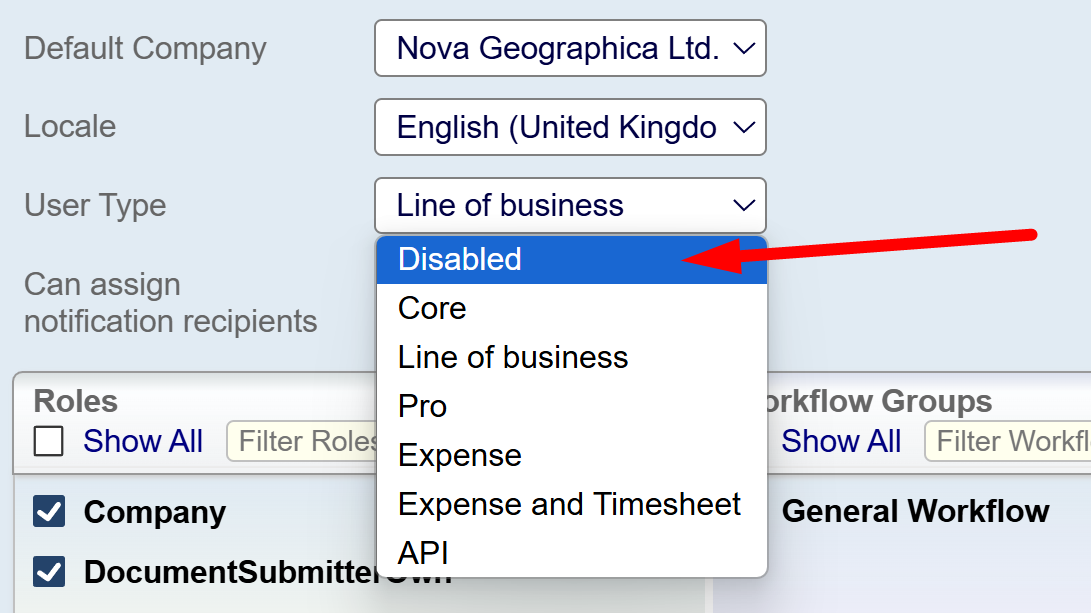
User Types are very important in Aqilla and determines the users level of access, more than the Roles do. You can see a chart here and on our pricing page.
Changing the User Type will affect your billing
Can assign notification recipients.
Ticking this box allows the user to send Smart Event notifications to other users.
Disabling a User
There are 2 settings
Aqilla Authentication:
Disabling Aqilla Authentication will disable the users login, preventing them logging into Aqilla, otherwise the User is still active.
Setting Google or Aqilla Authentication to Disabled will only disable the users login, not the billing.
User Type:
Disabling User Type will completely disable the user from Aqilla.
This setting will reflect on the billing.
Please note: User Type must be set to Disabled, or you will continue to being billed for the user.
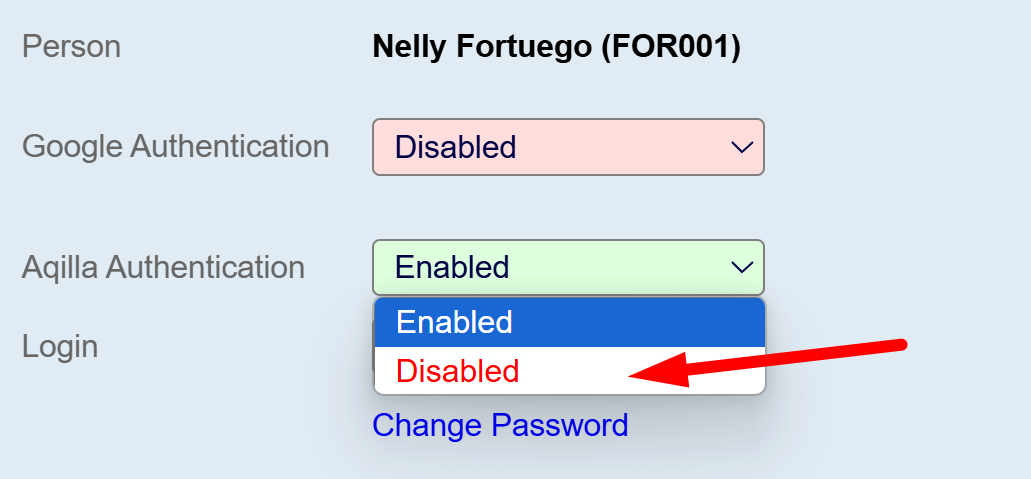
Disabling Aqilla Authentication will only prevent the user logging into Aqilla
Disabling User Type will completely disable the user in Aqilla and will reflect on billing.
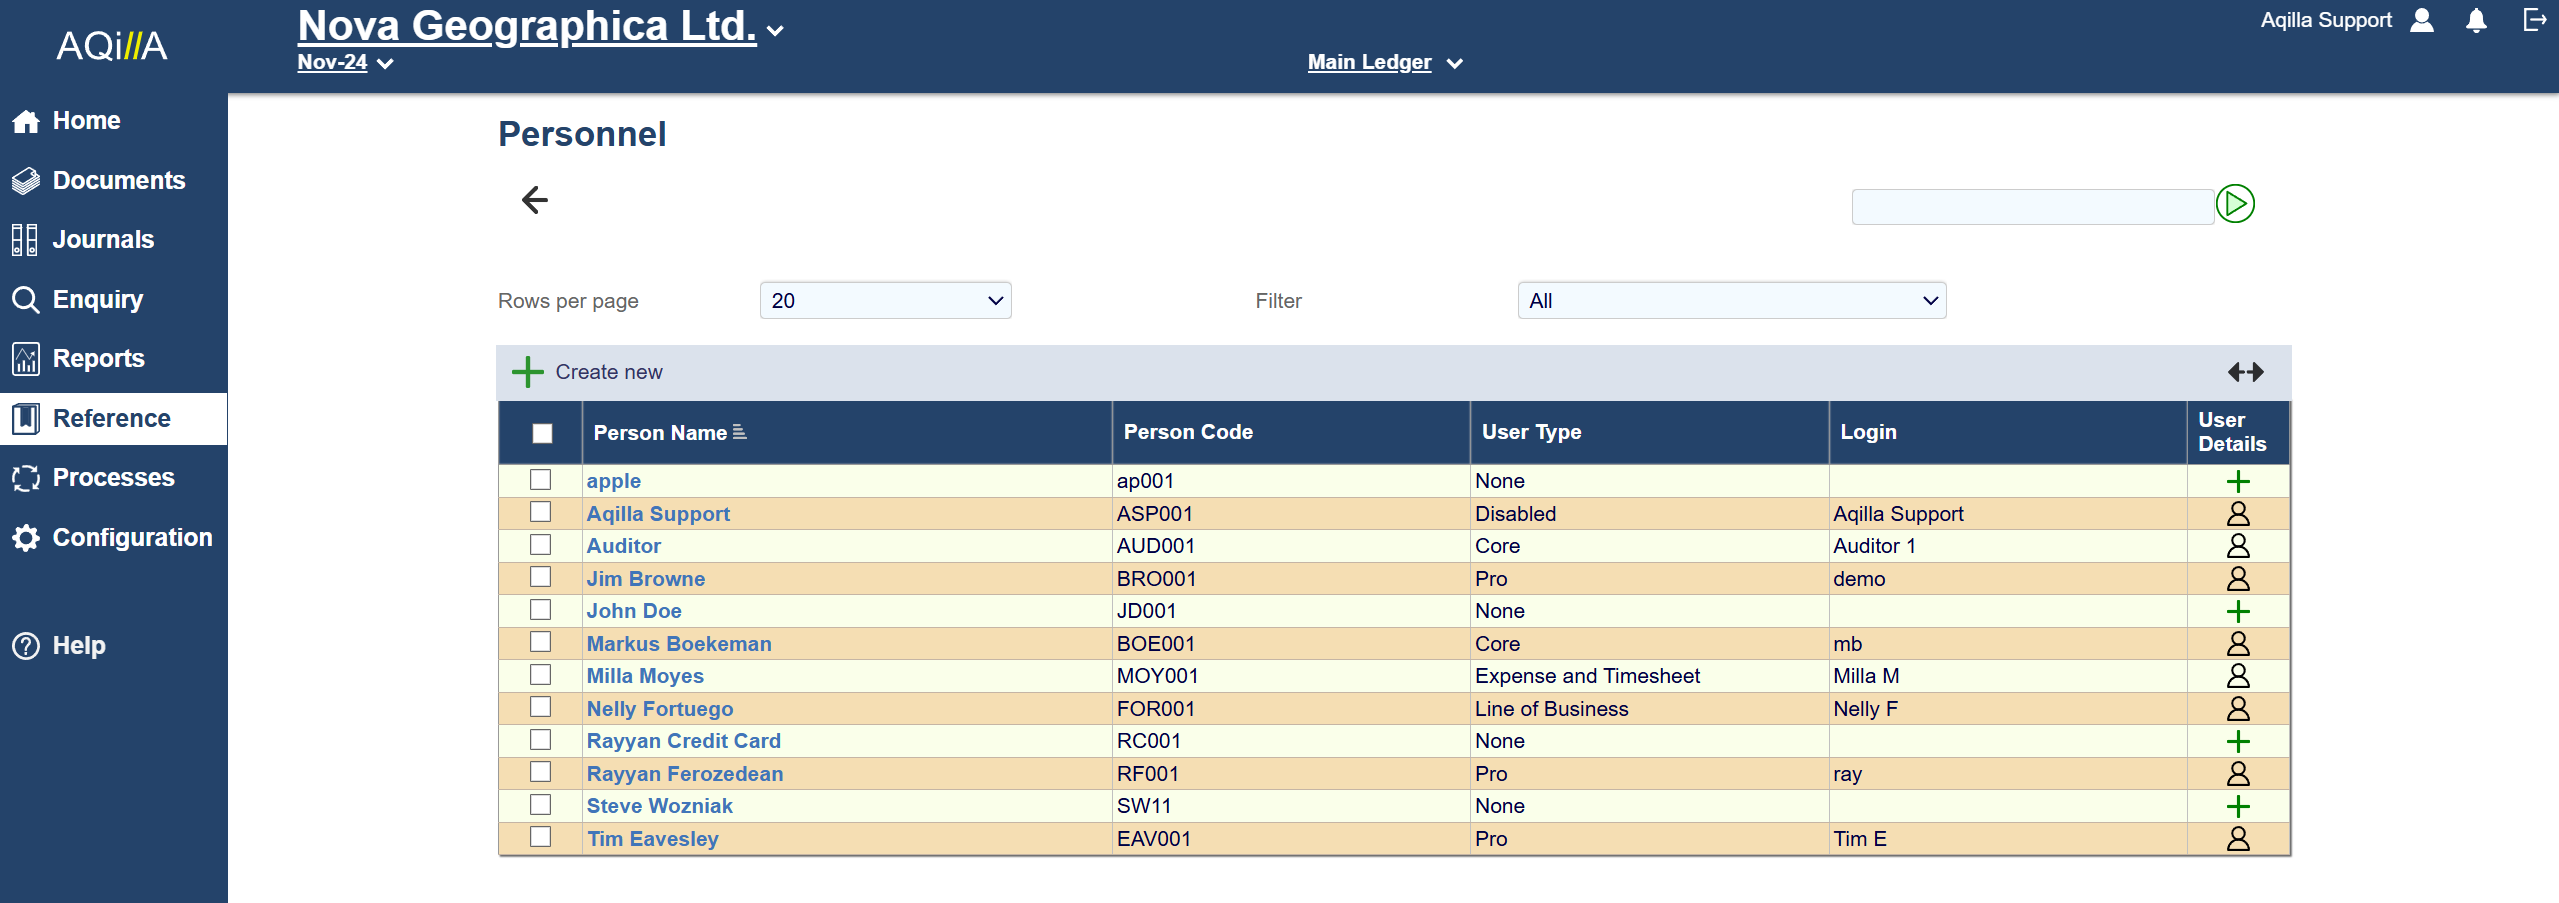
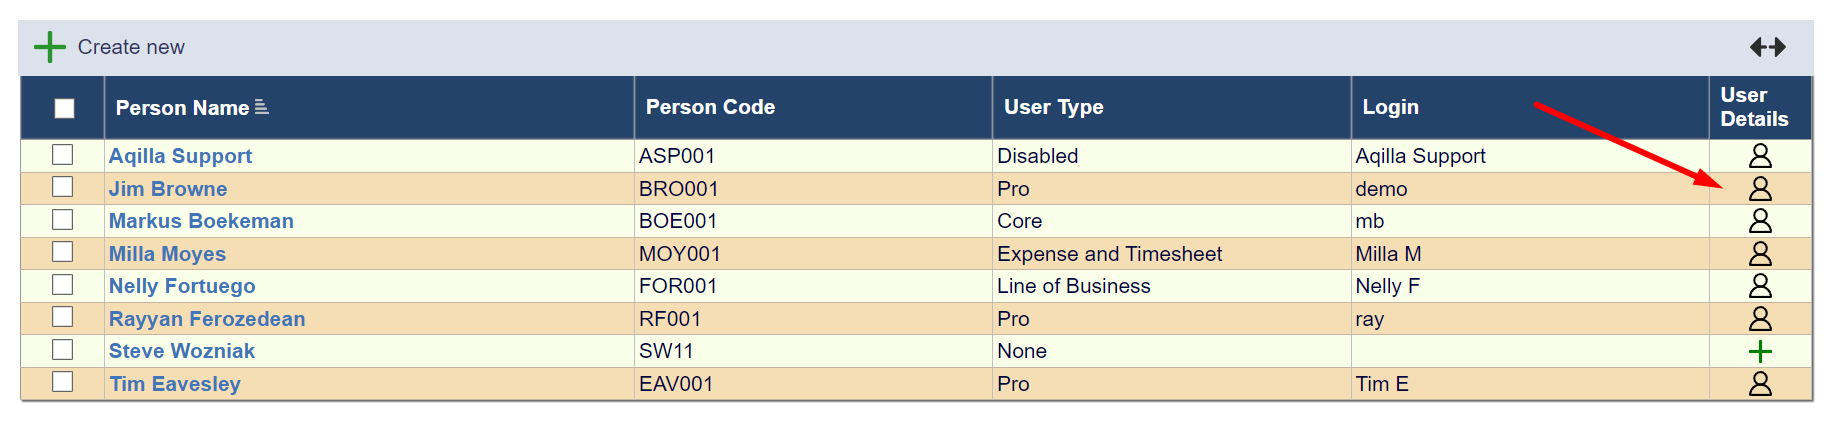
You can also launch the User Details dialogue using the icon in the list of people:
Please see Articles > Google Authentication if you are using this authentication method.
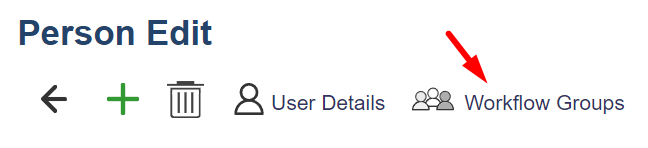
Workflow Groups
The Workflow Groups icon opens the Workflow Groups dialogue.