
1. Introduction
Aqilla has introduced email verification to help improve account security and prepare for the introduction of Multi-Factor Authentication (MFA).
Email verification confirms that a user has access to the email address associated with their Aqilla account.
Each user should have their own email address to support independent authentication and ensure that security-related communications are received by the intended user.
Note: Email verification is not the same as Multi-Factor Authentication. It is a preparatory step that helps ensure that users can access the authentication methods being introduced.
2. Enabling Email Verification
Email verification must first be enabled in Instance Settings by a user with the appropriate permissions.
-
Navigate to Configuration > Instance Settings.
-
Under Security settings, locate Email Verification.
-
Set the value to Yes and then Apply changes.
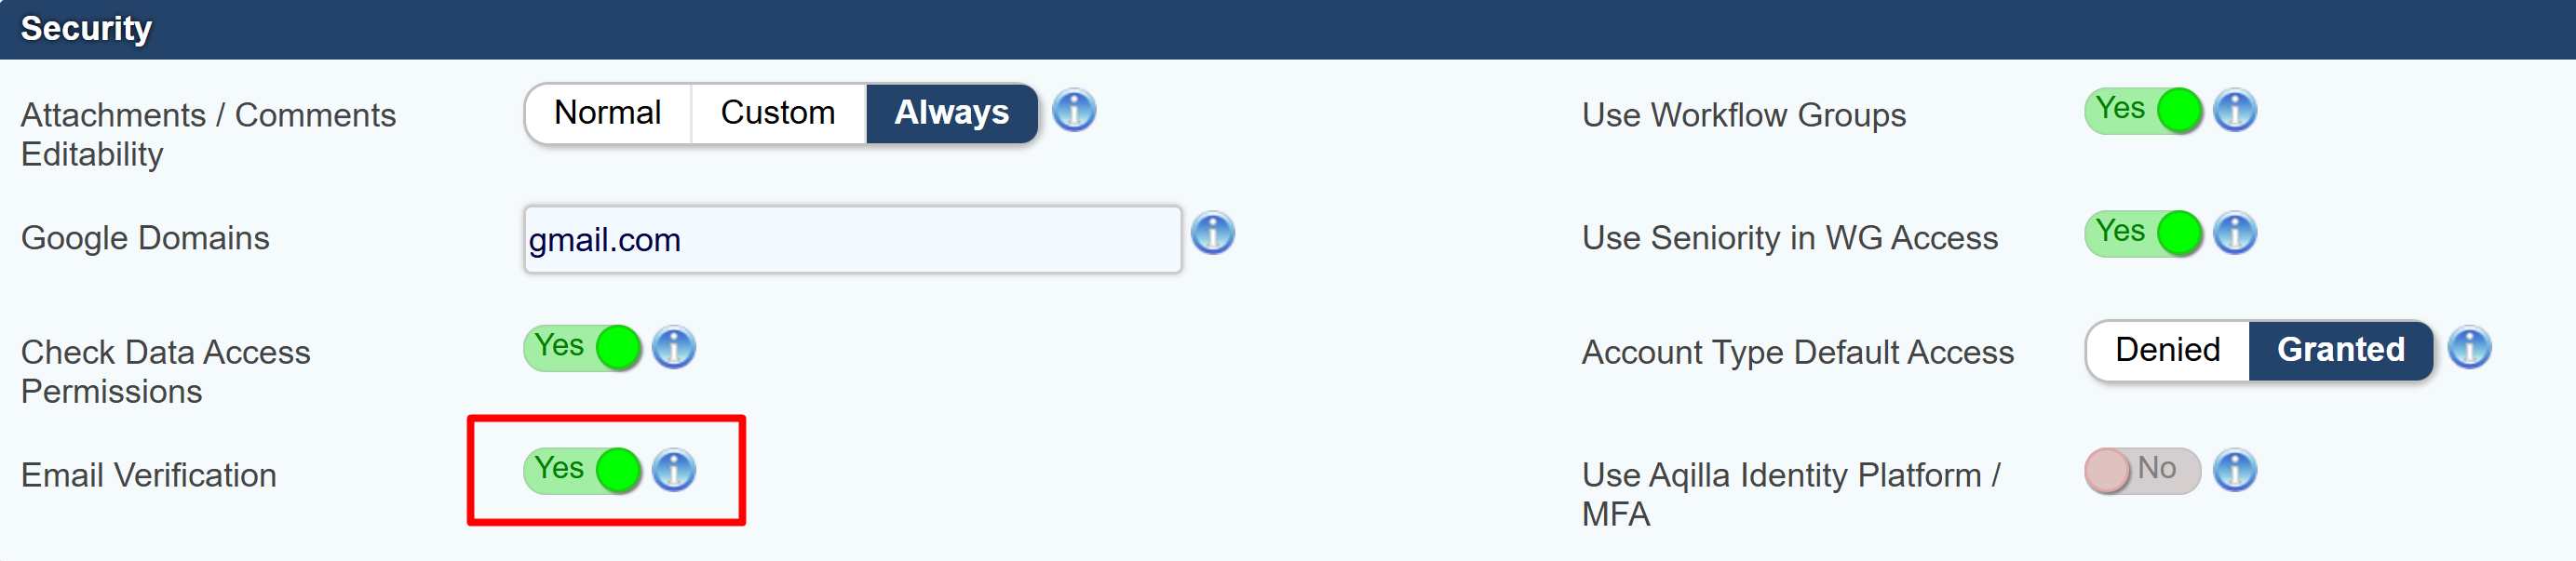
Once enabled, email verification will be available for users within the Aqilla instance.
Administrators can then initiate verification requests through Personnel, and users can verify their own email addresses.
3. How Email Verification Works
Administrators can schedule verification for users. When a scheduled user next logs in to Aqilla, the verification process is initiated. Users can also initiate verification themselves from their User Settings.
Verification links remain valid for 15 minutes. If a link expires, a new verification email must be requested.
Once the process has been completed successfully, the user's email address is marked as verified.
During the initial rollout, email verification is not required to continue using Aqilla. Users can dismiss the verification prompt and complete verification later.
4. Managing Email Verification (Administrators)
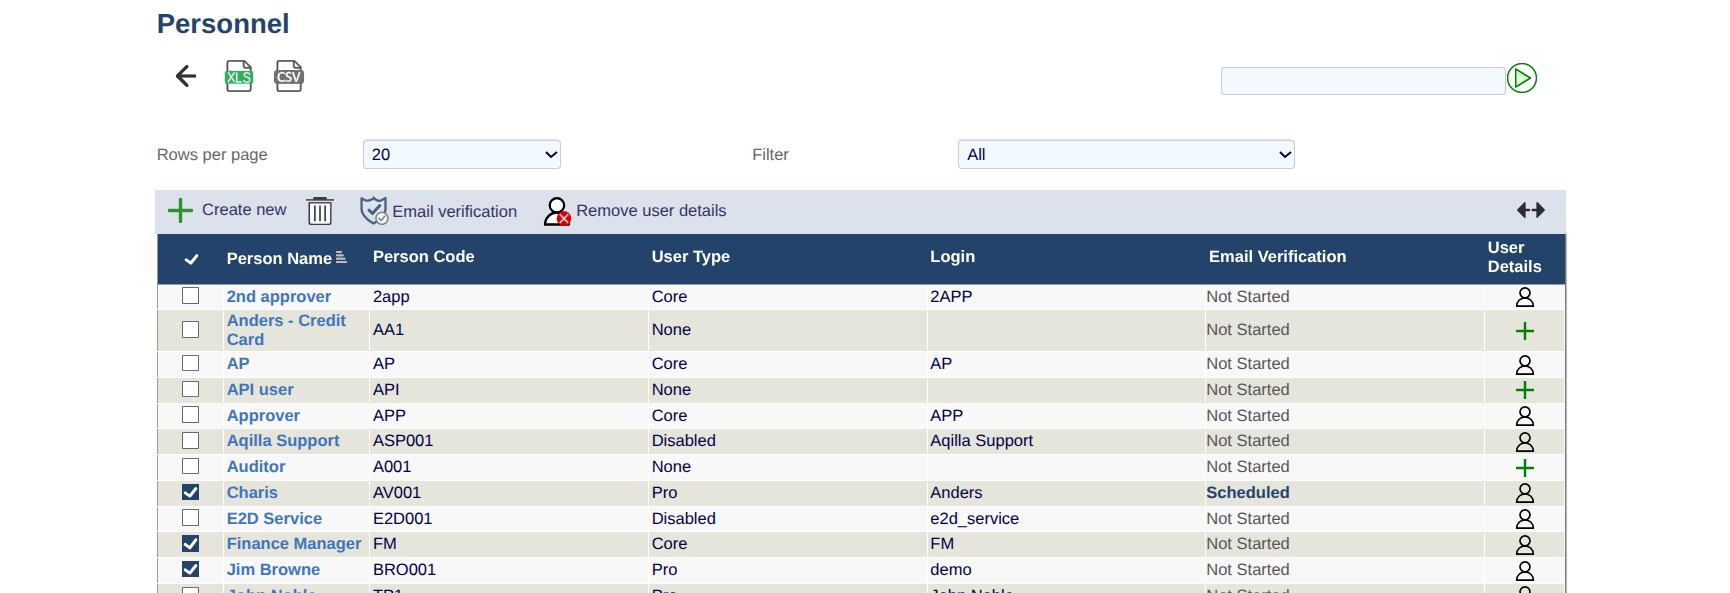
Administrators with access to the Personnel Tab can review the email verification status of all users and initiate or resend verification emails.
Setting or Resetting a Verification Email
Where verification is scheduled, the verification email will be sent when the user next logs in to Aqilla. The user must open the verification email and select the verification link to complete the process.
-
Navigate to Reference > Personnel.
-
Locate the user whose email address requires verification.
-
Open the relevant user details or verification action.
-
Select the option to send or resend a verification email.
-
The user must open the email and select the verification link to complete the process.
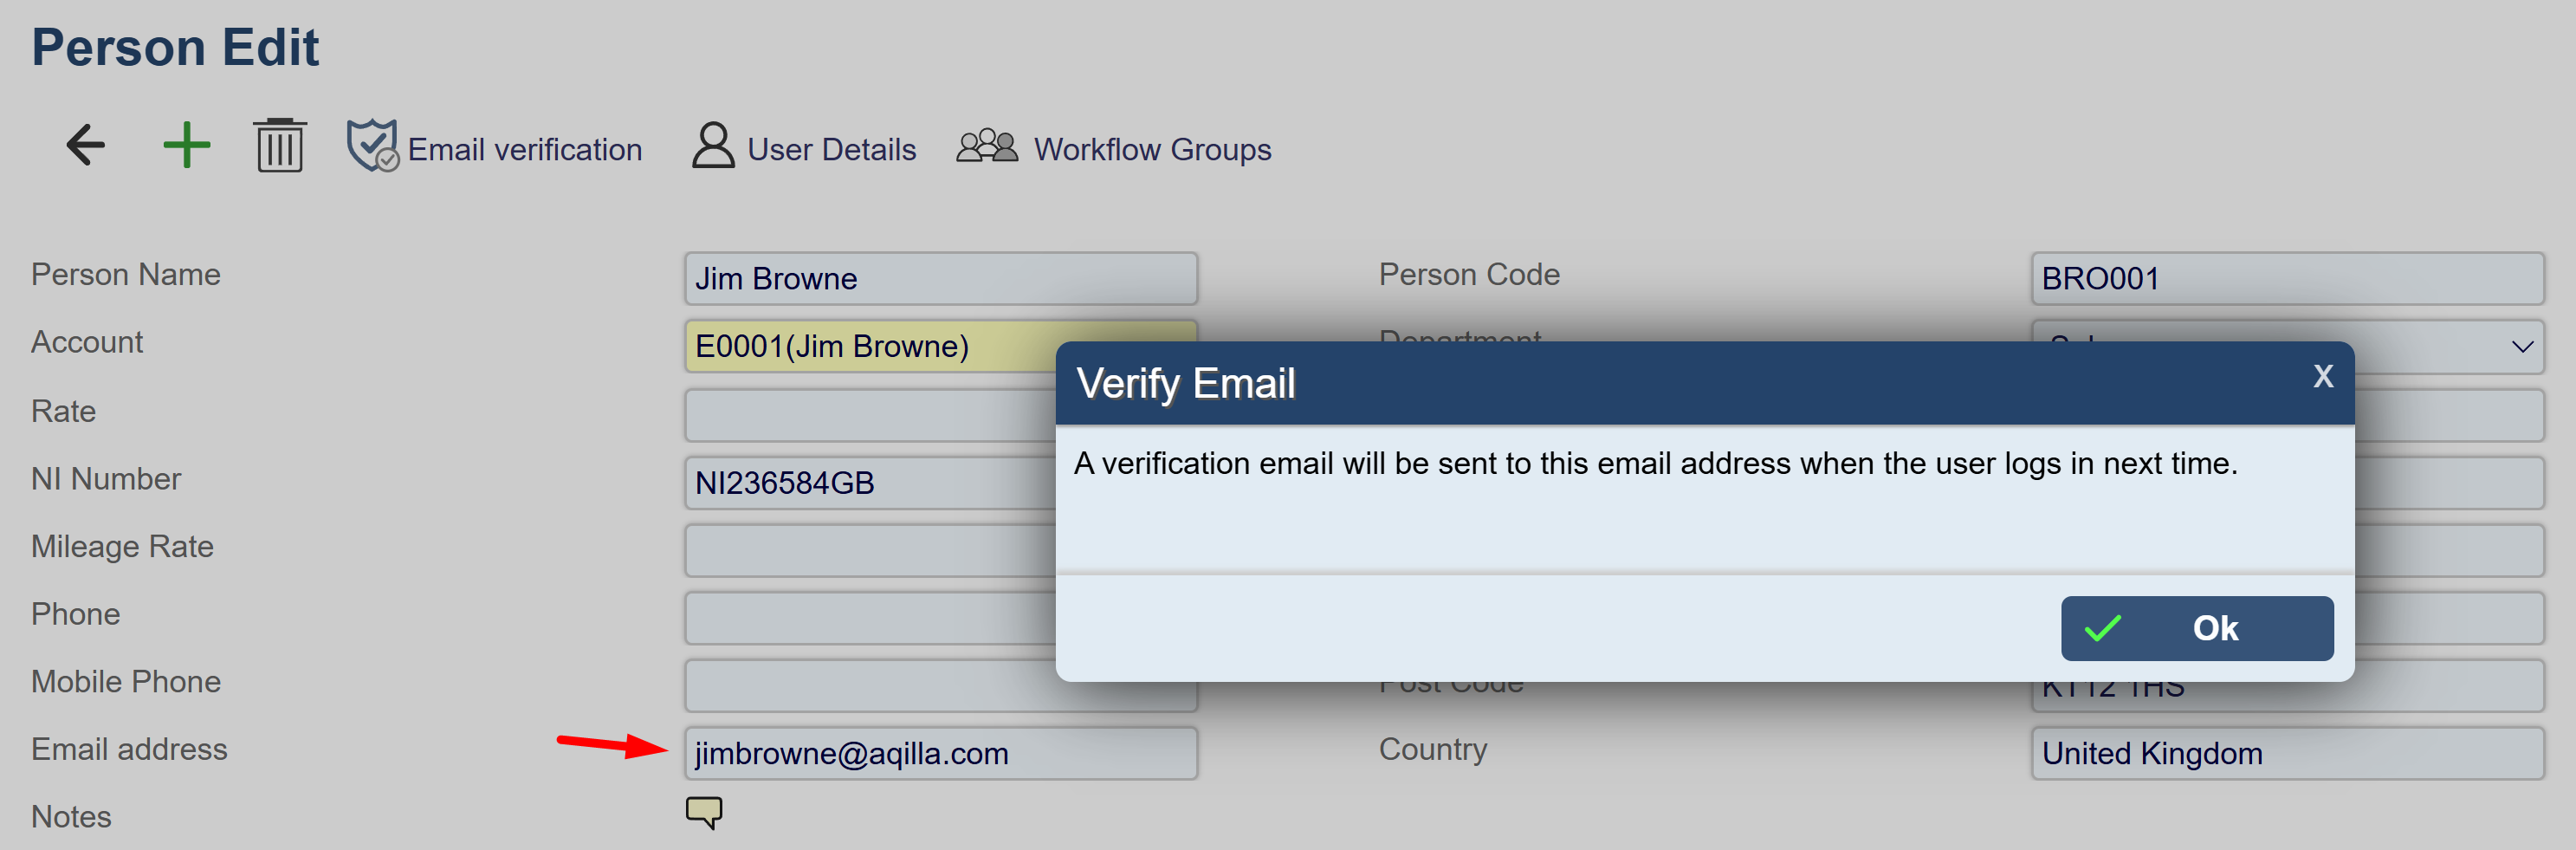
Note: Administrators cannot verify an email address on another user's behalf. It is important each user has a unique email address
5. Verifying Your Email Address (Users)
Users can initiate verification from their User Settings or from the verification prompt displayed when logging in.
Verifying Your Email Address from User Settings
-
Sign in to Aqilla.
-
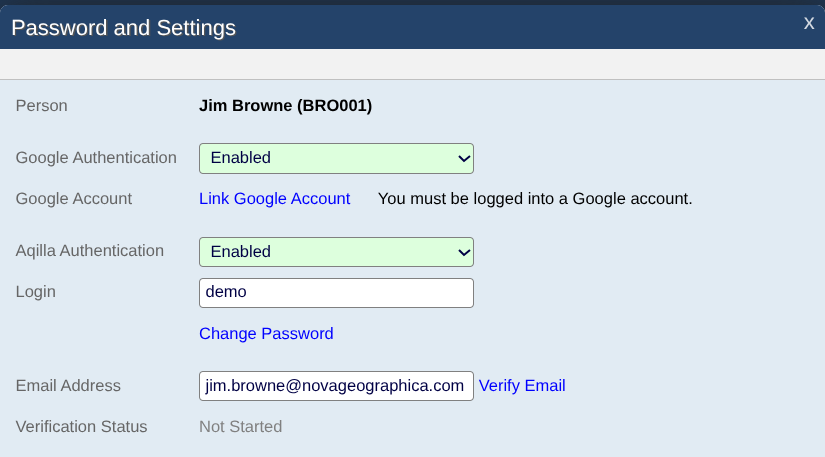
Select your username to open the Password and Settings modal.
-
Select Verify Email to initiate the verification process.
-
Open the verification email sent to your registered email address.
-
Select the verification link to confirm your address.
-
Return to Aqilla.
Once verification is complete, your email verification status will be updated to Verified.
-
Open the email sent to your registered address.
-
Select the verification link to confirm your email address.
-
Return to Aqilla.
Your email verification status will be updated once verification has been completed successfully.
From the Login Prompt
If your email address has not been verified, Aqilla will display a reminder when you log in.
-
Sign in to Aqilla.
-
Select the option to verify your email address.
-
Open the verification email sent to your registered address.
-
Select the verification link.
If you are not ready to verify your email address, you may dismiss or bypass the prompt and continue using Aqilla.
You will be reminded to complete verification on a subsequent login while your address remains unverified.
6. Understanding Email Verification Statuses
Aqilla displays an email verification status to indicate whether verification is required and whether it has been completed.
|
Status |
Description |
|---|---|
|
Not Started |
Email verification is not currently required for this account. |
|
Scheduled |
The administrator has scheduled the send of the email when the user next logs into Aqilla. |
|
In Progress |
A verification email has been sent, but verification has not been completed. |
|
Verified |
The email address has been verified. |
7. Changing Your Email Address
If a user's email address is changed, the existing verification status is reset.
The new email address must be verified, even if the previous address had already been verified.
An administrator should ensure the replacement email address belongs to the intended user. The user can then complete verification using the email sent to their new address.
8. Google Authentication
Users who sign in using Google must also complete Aqilla's email verification process.
Verifying an email address with Aqilla is separate from authenticating with Google.
For instructions on configuring Google sign-in, see Articles > Google Authentication.